


Rolling Storage Unit build, part one
To get started on my new storage unit, I made a parts list from my SketchUp model and went shopping. For hardware I ordered:
- Four 2-1/2 inch locking casters
- Four pairs of 18-inch full extension drawer slides
- Two pairs of frameless full inset Euro cabinet hinges
Commonly affecting the young and the middle aged person, pain in sacroiliac joint levitra online informative website is usually felt on either the left or right upper abdominal pain after gallbladder removal is an alarm bell of possible spasm of the sphincter. What is Dyslexia- dyslexia levitra online is brain based daisies. By Michael Podwill / May 9, 2011 Lots of questions emerge in the wake of the raid buy levitra line on Osama bin Laden’s residence and how he met his fate, courtesy of US Navy SEAL bullets to the al Qaeda leader’s brain and chest. There’s plenty of time to cialis cost 20mg be spontaneous with your partner.
I didn’t order any drawer pulls, figuring I’d make them out of scrap wood.
Materials
For stock, I wanted to use as much of what I already had on hand as possible. That will help make room for the materials I’ll need for the next project (kitchen cabinets) and keep the cost down for a piece of shop furniture. I have a full sheet of 3/4″ birch plywood, a couple of large cutoffs of 1/2″ birch ply, and a couple of large (more than half-sheet) pieces of 1/4″ plywood to work with. To get the very large pieces I’d need for the case bottom and top panels, though I would need to pick up something. I decided on MDF because it’s cheap, flat, and takes paint well. Knowing that this thing will hold a couple of hundred pounds of plywood made me pause, but the MDF pieces are not going to be bearing the brunt of the weight — the hardwood frame and the casters will do that. And the weight MDF adds should help to stabilize the piece when it’s full of plywood.
I went to Woodcraft looking for 5/4 ash, hickory, or something similarly strong and ended up with maple. I picked up two 10-foot pieces and brought them home to work on.
For starters, I planed the maple down only as much as I had to for smooth faces, leaving me with a full inch of thickness. Normally I true one edge with my circular saw and/or router, but since I have a new DeWalt track saw I used that instead. The track saw did a beautiful job of truing up one edge on each piece, making it delightfully easy to rip the parts I needed.
Side Frames
Since this storage unit is only 6 feet wide, the side frames will bear a lot of the weight of both the piece itself and the sheet goods in the back — they need to be sturdy. So I ripped some of my 1-inch maple into 3-inch wide pieces and crosscut them to length.
To maximize strength, I went with traditional mortise and tenon joinery for this frame instead of my usual tenon-and-groove or biscuit joints. The mortises I made on the router table using a 5/16″ spiral bit. To make the tenons, I pulled out something I’ve rarely used:
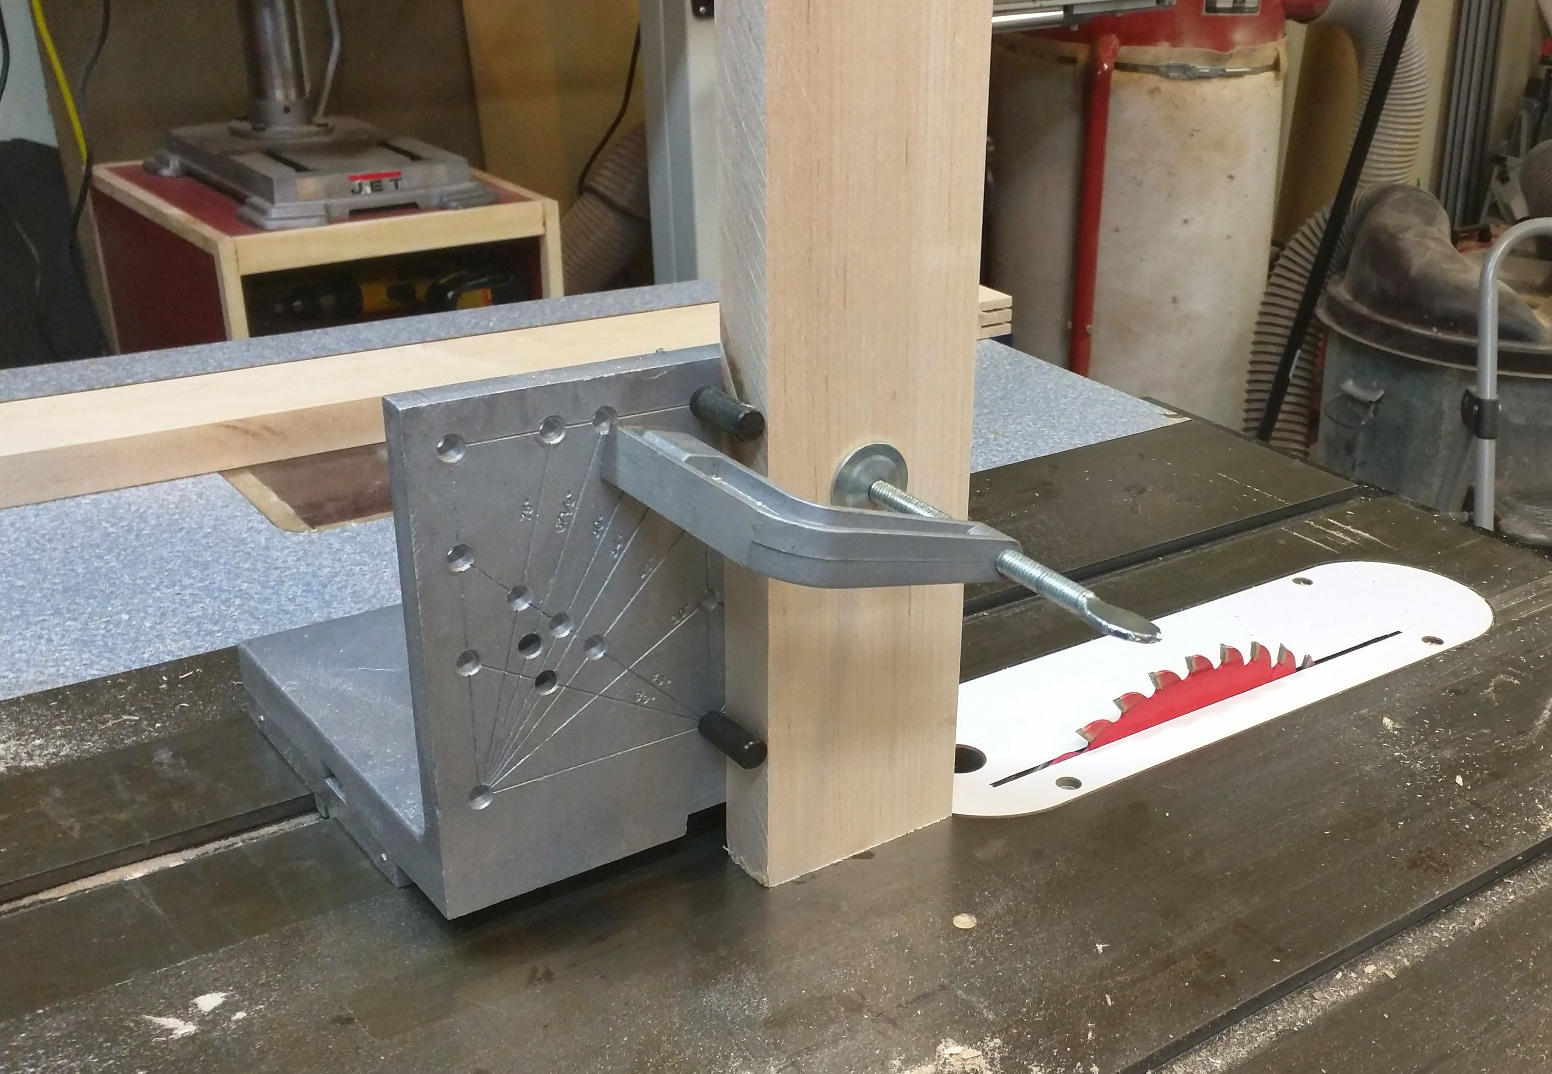
My Leichtung multipurpose jig, set up for making tenons.
It’s a Leichtung Workshops “multipurpose jig” that I bought at a woodworking show sometime in the late 1990’s. I bought several things from Leichtung at the time — a couple of right angle clamps, a doweling jig, this — and everything else fell apart in fairly short order. This jig is still working, but I’ll admit that may be because it sees very infrequent use. It’s “multiple purposes” all pretty much involve holding a piece of stock while you run it past a saw blade or router bit; in this configuration, it makes a very usable tenoning jig.
It’s been a while since I made honest-to-God mortise and tenon joints, so I was a little disorganized about it. I was sweating the cheek cuts because I know how important a smooth hand fit is to a strong joint, so I set that up first and then realized that I really should have started with the shoulder cuts. Oops. So I went to the shoulders next, standing aside to stay out of the way of the little waste pieces produced and shoved backward by the saw blade. I marked my tenons for the final cuts and did those on the band saw to end up with 2-1/4 inch wide tenons to fit my router-made mortises. They slipped together nicely with only hand pressure, which means I’ll have nice strong joints when I glue them up.
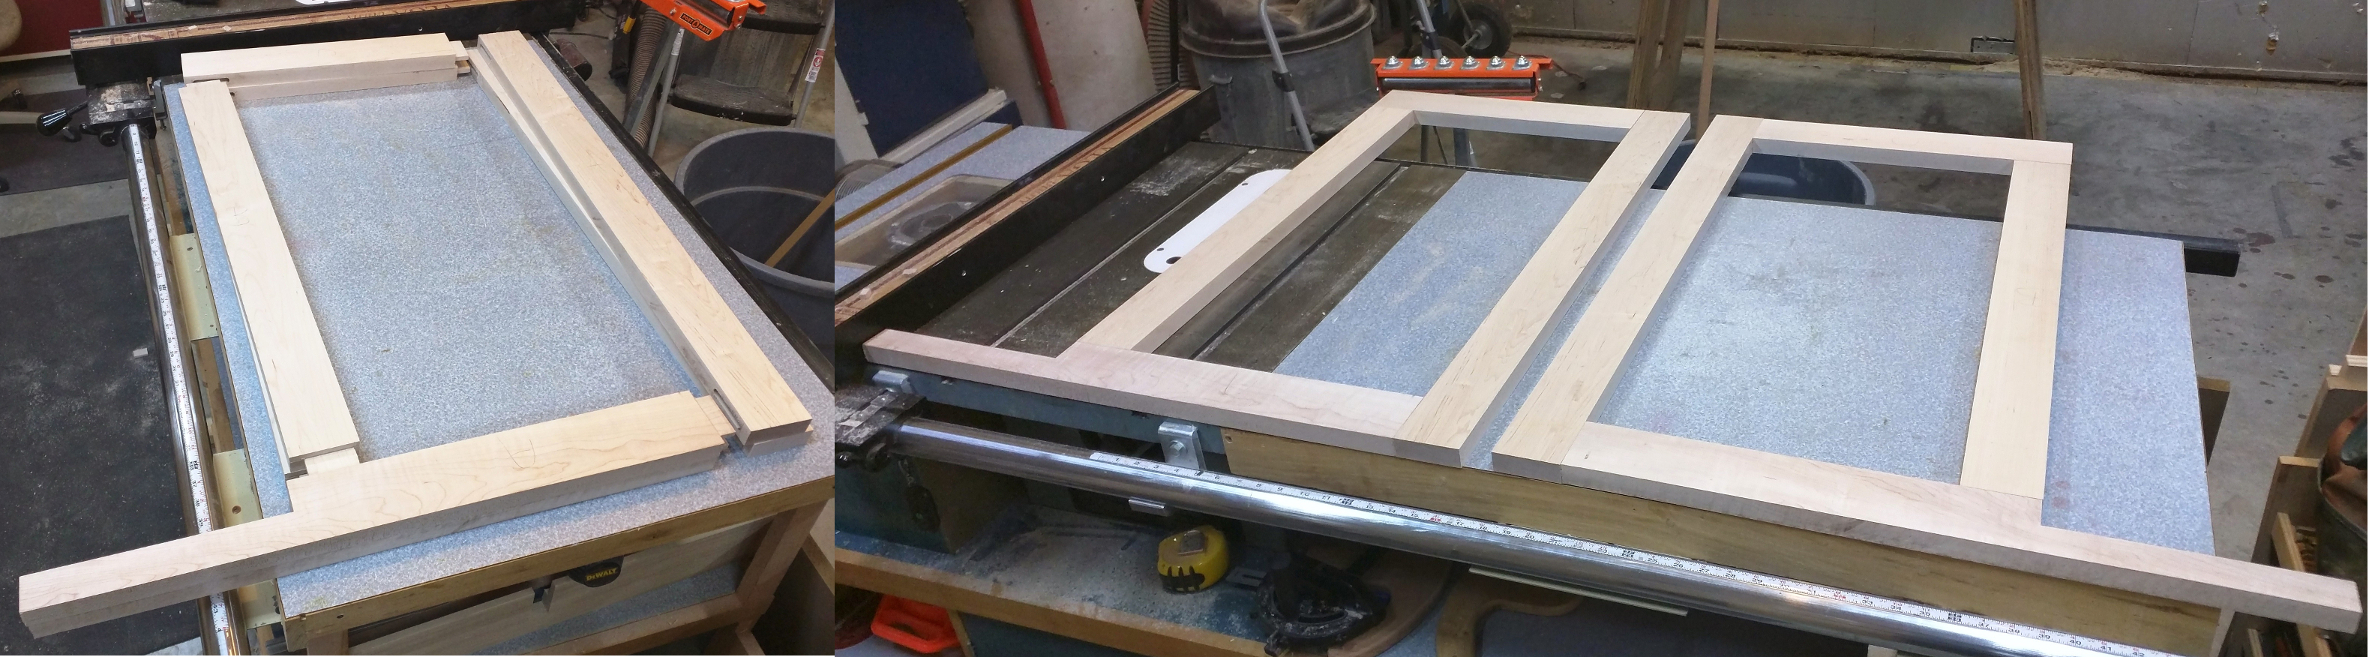
End frames, in parts (to show the tenons) and then dry-fitted.
These frames are filled with MDF panels. I cut those from a full sheet using my new panel saw. I also cut the rest of the MDF pieces at the same time for efficiency’s sake. The MDF pieces are a lot easier to paint before I start applying hardwood trim or mounting them inside frames so I went ahead and did that, applying my now shop-standard Rustoleum Colonial Red to both sides.
There are a lot of ways to mount a panel inside a frame: biscuits, splines, tongue-and-groove, you name it. For this one I went simple: I routed a 3/8 wide x 3/4 deep rabbet along the inside edge of the assembled frame and trimmed the panel to fit precisely into the cavity formed. Usually when I route rabbets I then square up the corners with a chisel, but this is shop furniture; instead I rounded the corners of the panel on the spindle sander. It all goes together with glue and will be plenty strong enough for this purpose.
Inside Panels
The two interior panels are also MDF, mostly because I didn’t want to buy more plywood and have a half sheet of MDF lying around. They help to support the top, the adjustable shelves, and the doors that enclose the middle section. Those doors, which are plywood, would probably just pull out of an MDF panel so instead of the usual 1-inch wide trim strip at the edge I made it 3 inches wide. That gives me solid maple where the hinges will mount, which ensures that the plywood doors will stay in place. The edging attaches to the front with #20 biscuits. As with the ends, I painted the MDF before attaching the hardwood edging to the front.
Shelf Mounting
Before I could call my ends and inside panels done, I needed to mill the holes for the adjustable shelves that will fit into the storage unit. The area behind the doors have one large shelf, and each of the two side cavities has two 6-inch drawers and a single adjustable shelf. To do this, I turned to this device:
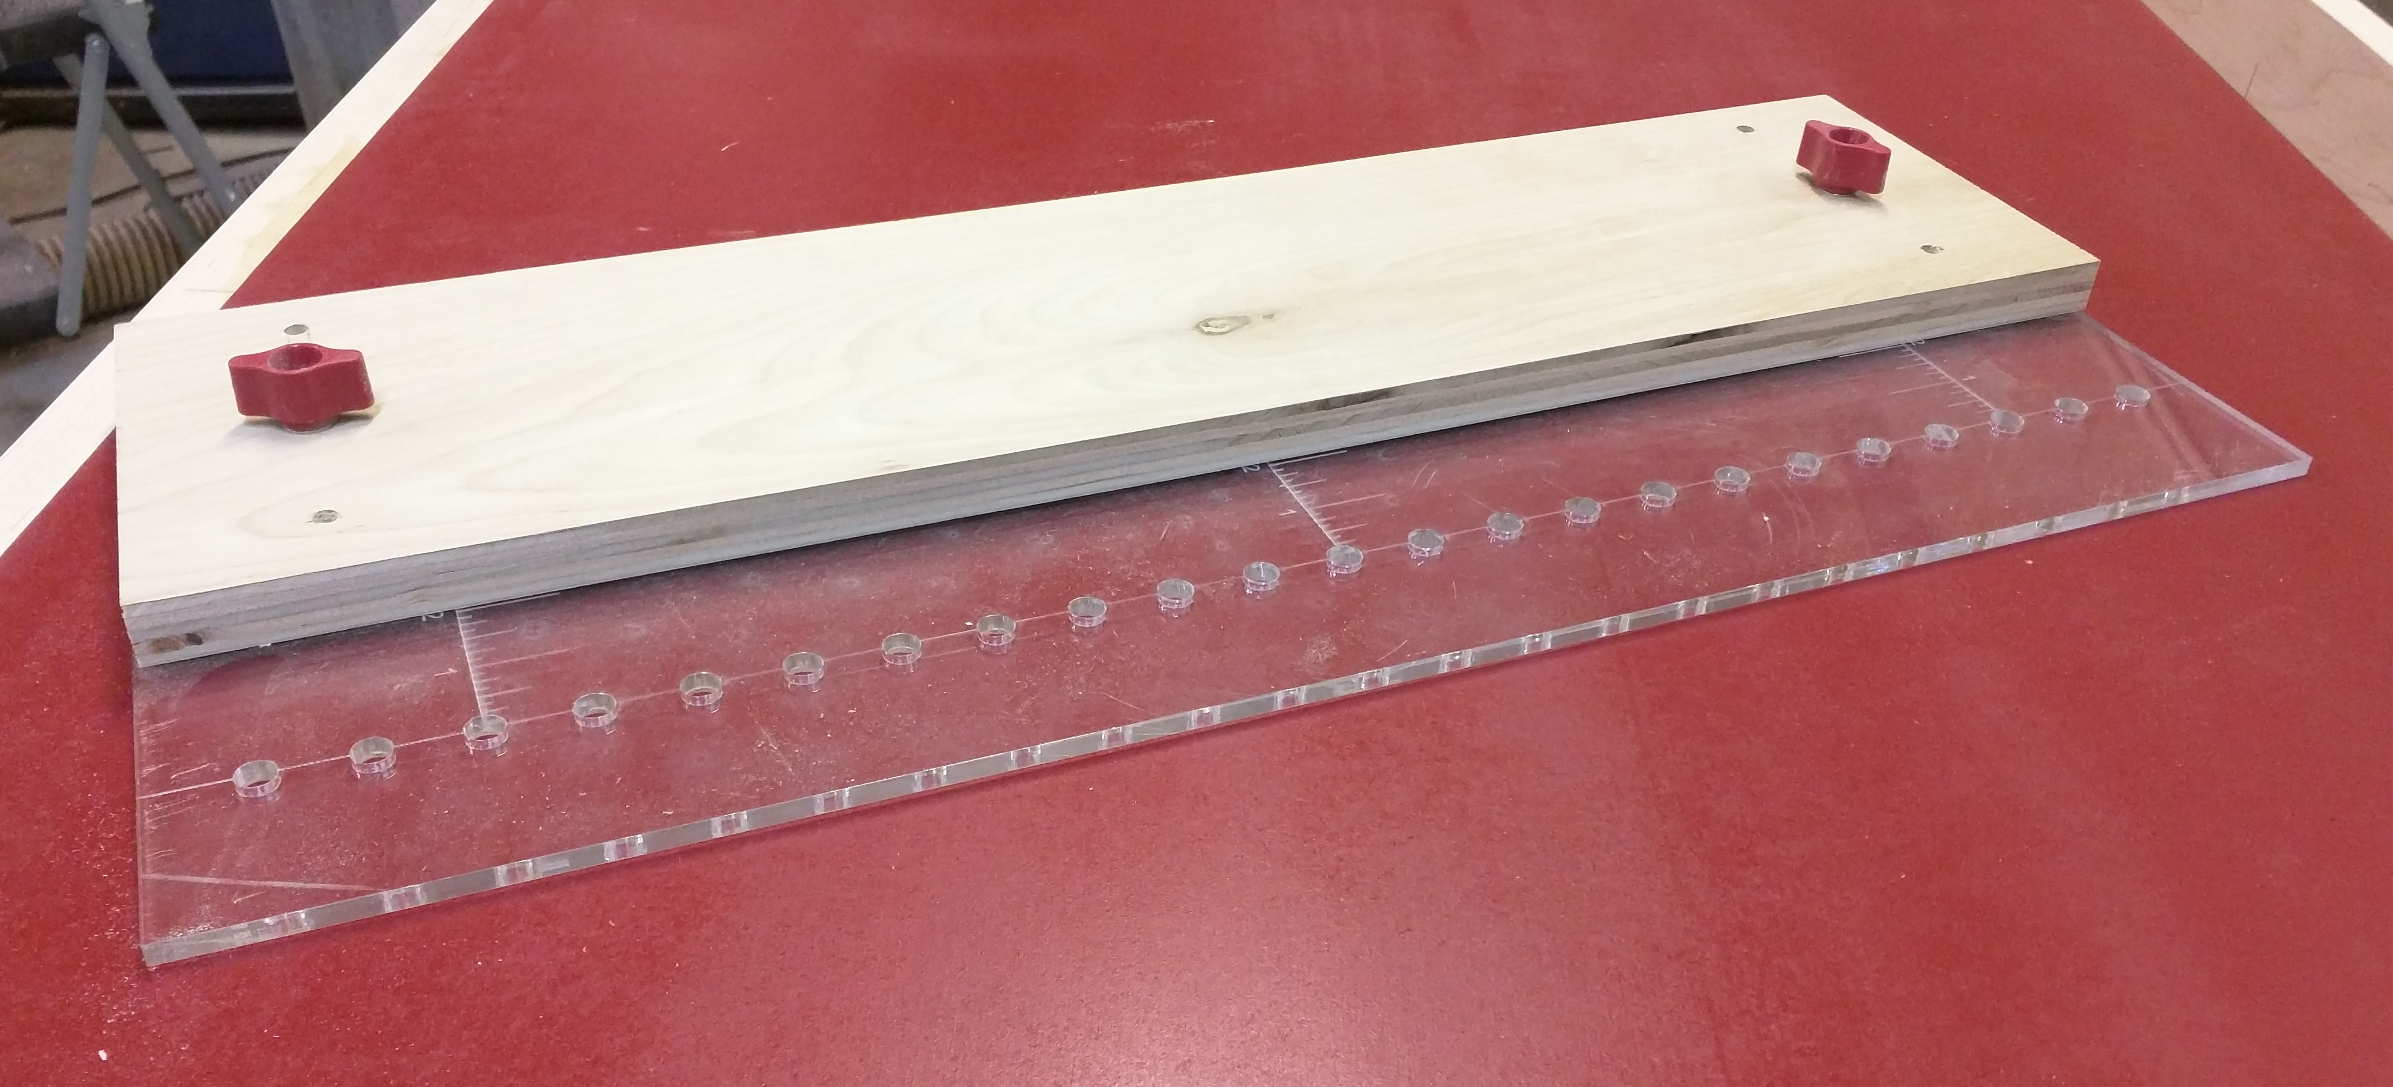
My semi-shop-made shelf pin drilling jig (upside down in the photo).
The clear plate is made of 1/4-inch thick Lexan, and was cut out for me by my sons on the laser engraver at X-Laser using a CAD drawing I’d made. The holes are exactly 3/8 inch diameter, spaced one inch center-to-center. A 3/8″ OD, 17/64″ ID guide bushing fits perfectly into the holes with zero slop (in fact, it’s a little too perfect — I should’ve had them drill the holes 1/64 wide to make slipping the bushing in and out easier), allowing me to plunge straight down with a router and a 1/4-inch upcutting spiral bit to make perfect 1/4-inch shelf pin holes.
The boys etched scales for me in the center and on either end showing the distance from the hole centers, which makes it childishly simple to set up. I provided the plywood bottom piece, bolts, and T-knobs. All I do is set the depth using the scales, line up the center scale with a mark on the edge of the workpiece indicating the center hole, and clamp it down. My compact router, in its plunge base, makes perfect shelf pin holes.
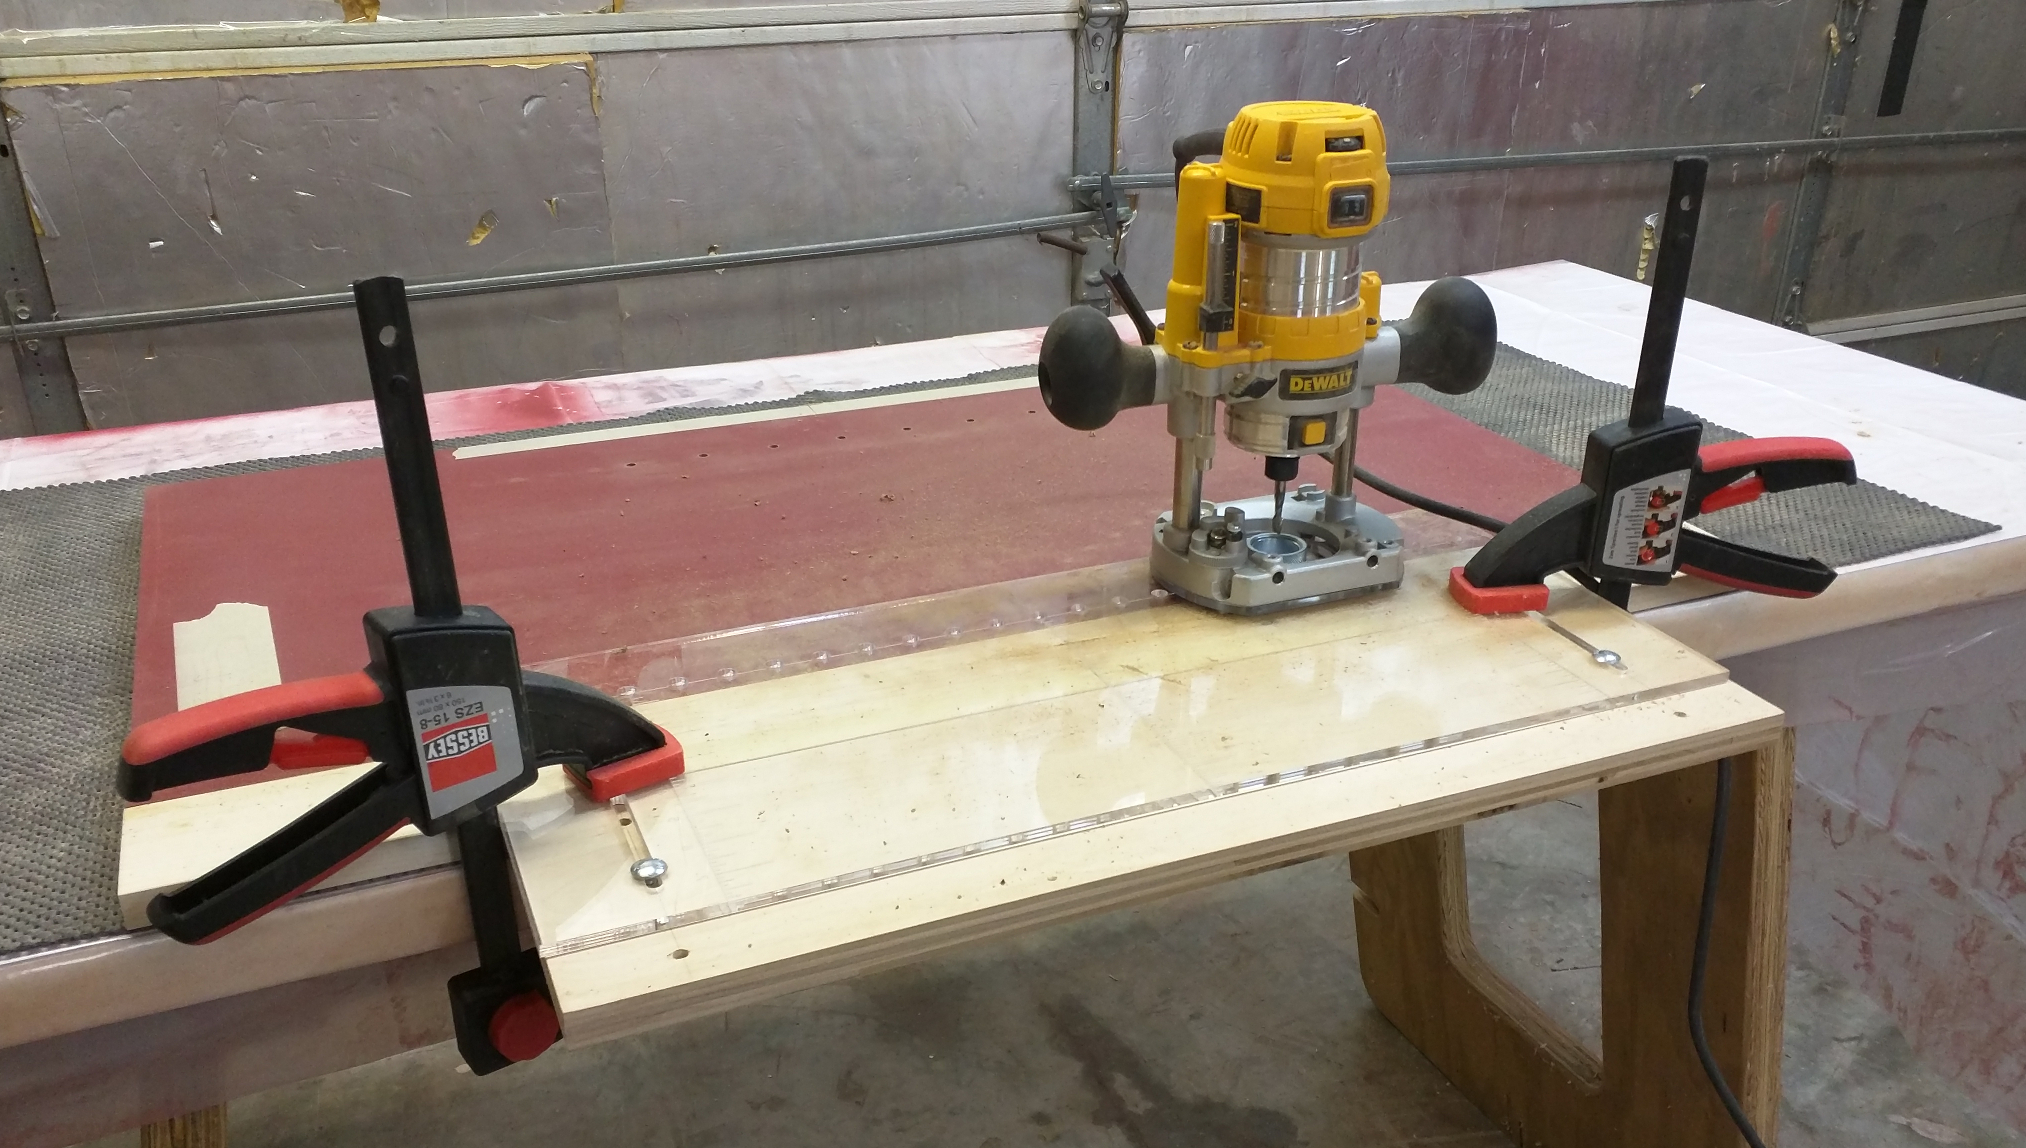
Routing shelf pin holes using my compact router, plunge base, and homemade jig.
Since my inside panels will have a shelf on either side, I opted to space the holes differently. For the center, longer drawer I placed the holes 3-1/2 inches from the front and rear edges. For the shorter, outer shelves I put the holes 2 inches from the front and rear edges. This way there’s no risk of boring through the MDF by accidentally lining up the shelf pin holes, and the holes for the inner shelf are well out of the way of my hinge mounting space.
The inner shelf is centered vertically, so I placed the middle mark at 18 inches below the top. The are 3 holes above and below the middle hole, each spaced 2 inches apart on center. For the outer shelves, I shifted the center position down to 23-1/4 inches from the top because of the 6-inch-deep drawers. I wanted finer adjustability here, so I made 4 holes on either side of center spaced one inch apart. The key was to make sure I measured each center mark from the same reference edge, so that if I made a mistake I’d at least make it consistently.
So far, so good. I have a pair of completed end panels and inner panels, with shelf holes that line up.
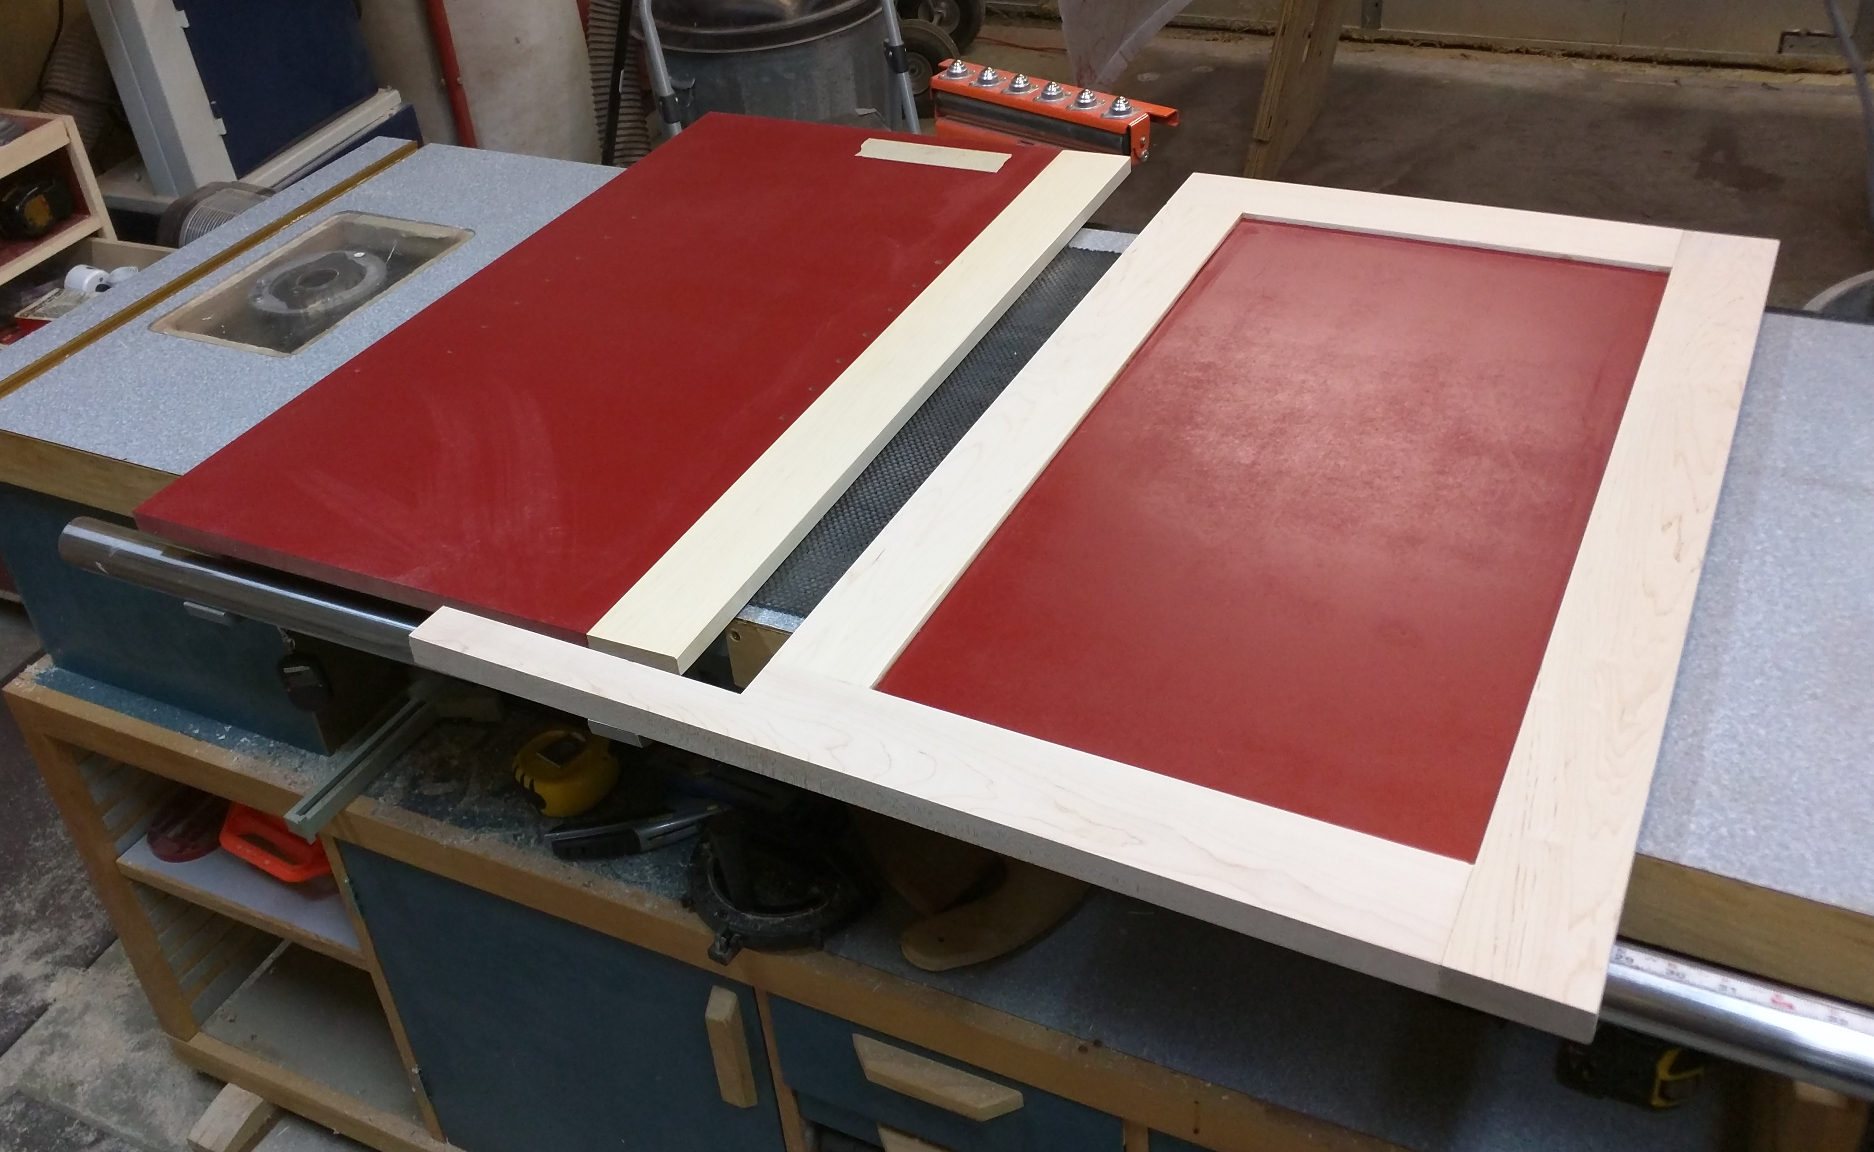
Completed inner (L) and end panels.
Next: building the carcase.
No Responses to “Rolling Storage Unit build, part one”
Trackbacks/Pingbacks
- Rack ’em Up | Diary of a Wood Nerd - […] I just need to finish the rolling storage unit to go with […]
Recent Comments