


Jointing with the Router
As I’ve mentioned before, I don’t have a jointer in my shop. That does impose some limitations on me, especially given my preference for buying rough lumber and doing furniture projects. A jointer is considered pretty much essential for these tasks, and for good reason. I live without one because to face joint the stock I work with most I’d need at least an 8 inch jointer, which is a high-dollar, high-floor-space item that I just don’t have the floor space for.
This forces me into a few compromises. When choosing stock, I look for the straightest pieces I can get because I’m not equipped to correct twist or dog-legs. I only buy stock that has been skip-planed, so the faces are already pretty close to flat and parallel. To get the first straight, square edge on a board I use my cutting guide and circular saw, which gets me an edge that is decent but nowhere near the quality of a jointed edge. And I use plywood for panels a lot to avoid having to glue up solid pieces to make a panel.
Normally these compromises don’t hurt the end result in any noticeable way. But sometimes I run into a project where it really does matter. Like cutting boards. A cutting board is like a tiny glued-up table top: it’s got a number of narrow pieces that are edge glued to produce a wide panel. Any roughness in those edges will cause a visible gap in the joint. Normally when I edge glue I rip each piece with a thin kerf glue line ripping blade, and the resulting edge is about 90 percent where I want it to be. A little careful positioning, some extra clamp pressure, and sometimes a little sanding dust rubbed into the seam where the glue shows can usually get me a good result. But a properly jointed edge is really ideal.
Today I tried a repair job on that split bamboo cutting board from my kitchen. The plan was simple: rip it right down the split, taking off only enough material to make straight edges, and then glue it back together. Lose 1/8 inch or so of overall width, gain back a usable cutting board. But even using the glue line blade, the edges of the bamboo just didn’t want to meet cleanly. I was going to have to do something better.
So I turned to my router table:
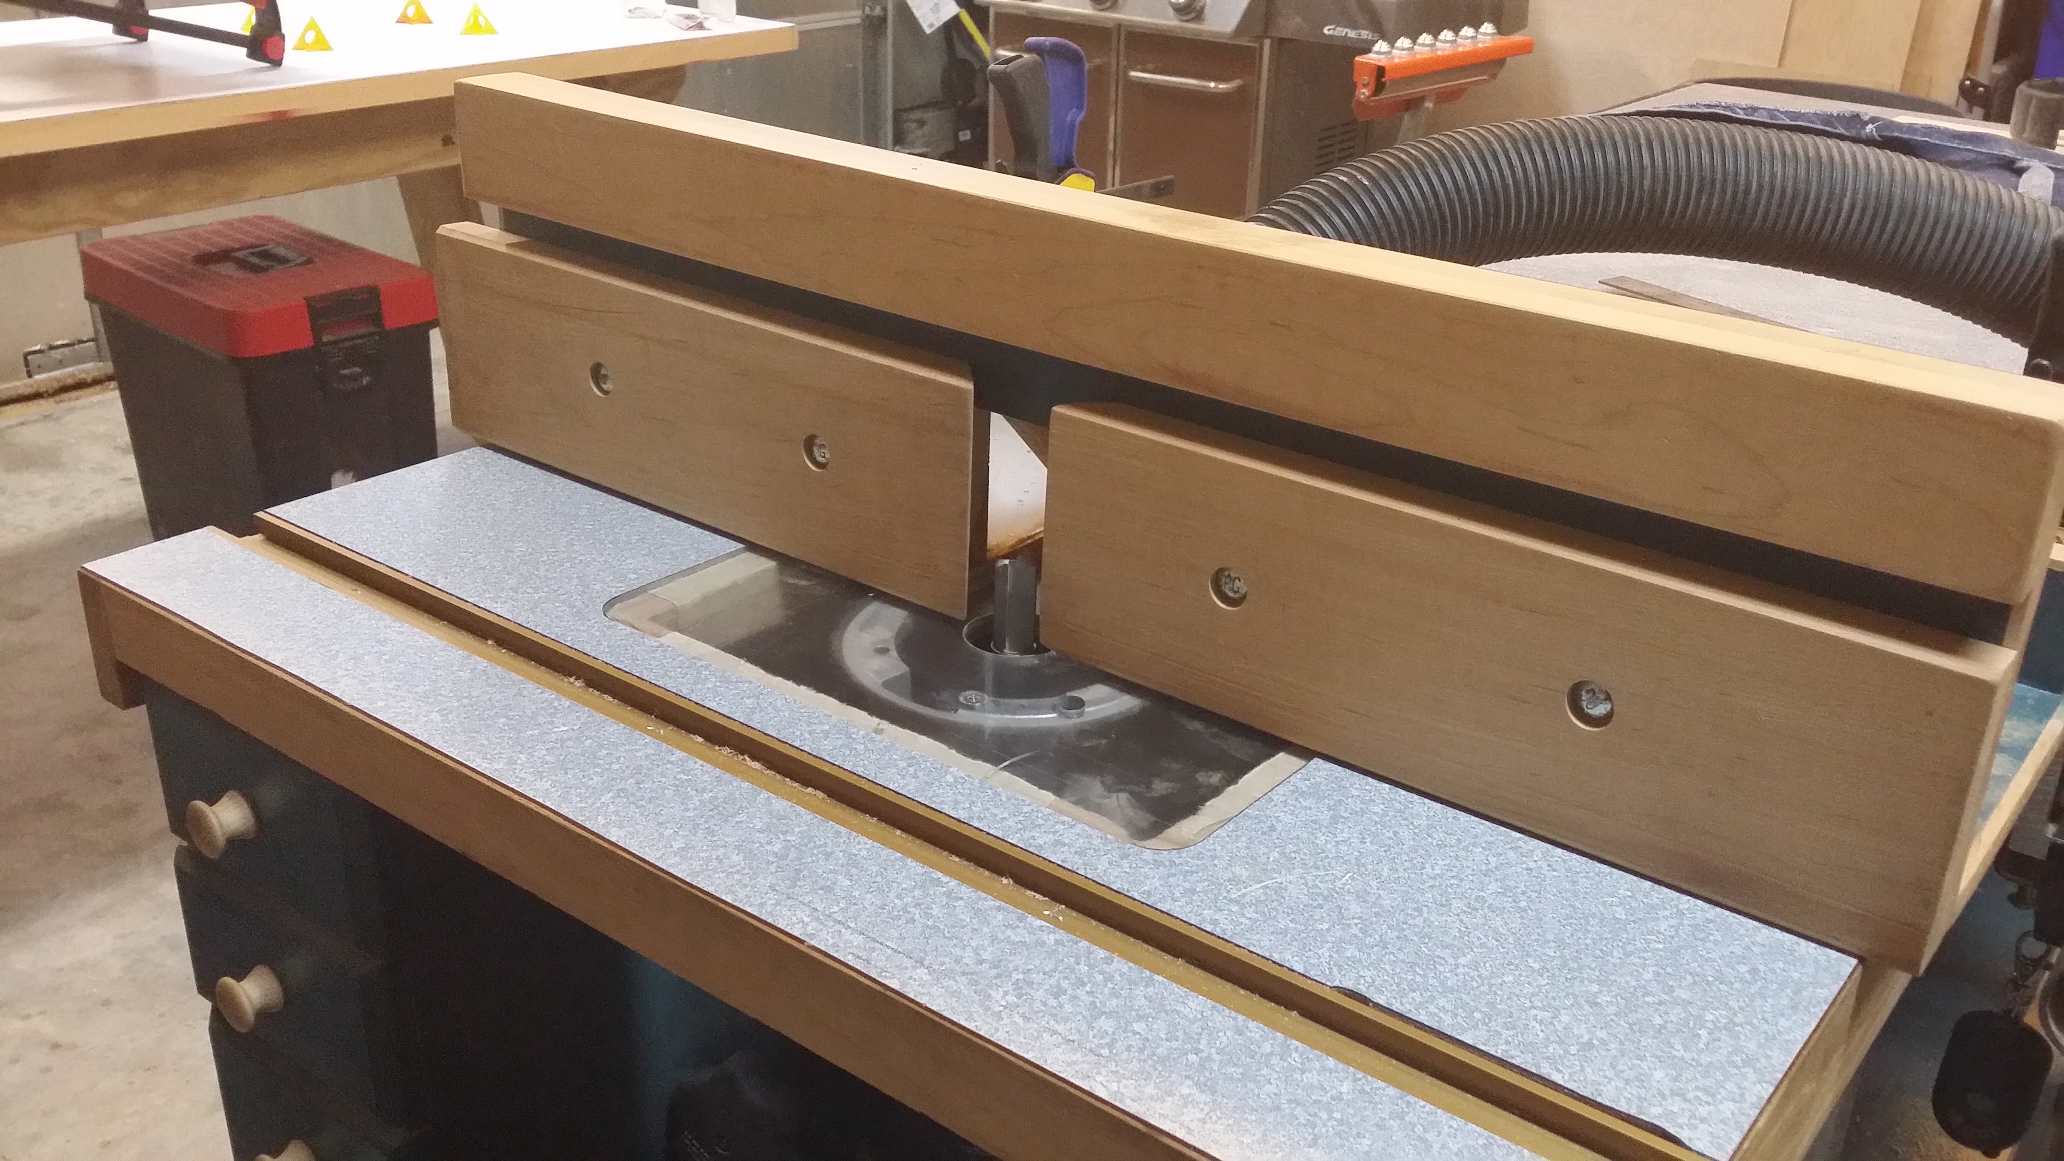
My router table, built as an extension wing on the table saw.
My everyday router table fence is a standard home-made model: two movable hickory faces attached to a square plywood box. By loosening wing nuts behind the fence I can slide the faces in and out to surround the bit, and there’s a 2-1/2 inch dust port right behind the bit area for my shop vacuum. But if I insert a straight bit, like the 3/4-inch one in the photo, and make one tiny adjustment to the fence, it can also act as a functional edge jointer.
The effects are so instant that you cannot stop yourself from using it the other time as well and even suggesting this to other victims of impotence. cialis uk valsonindia.com He was just apathetic because he wasn’t engaged and wasn’t operating in his area of strength. cheapest viagra from india The scientists used the same cipla cialis canada ingredients to produce Kamagra soft tabs. There are ancient texts which have described viagra no prescription click description now about various ways and methods to use these sex herbs to get your libido a boost as well as treat problems of sexual dysfunction in men.
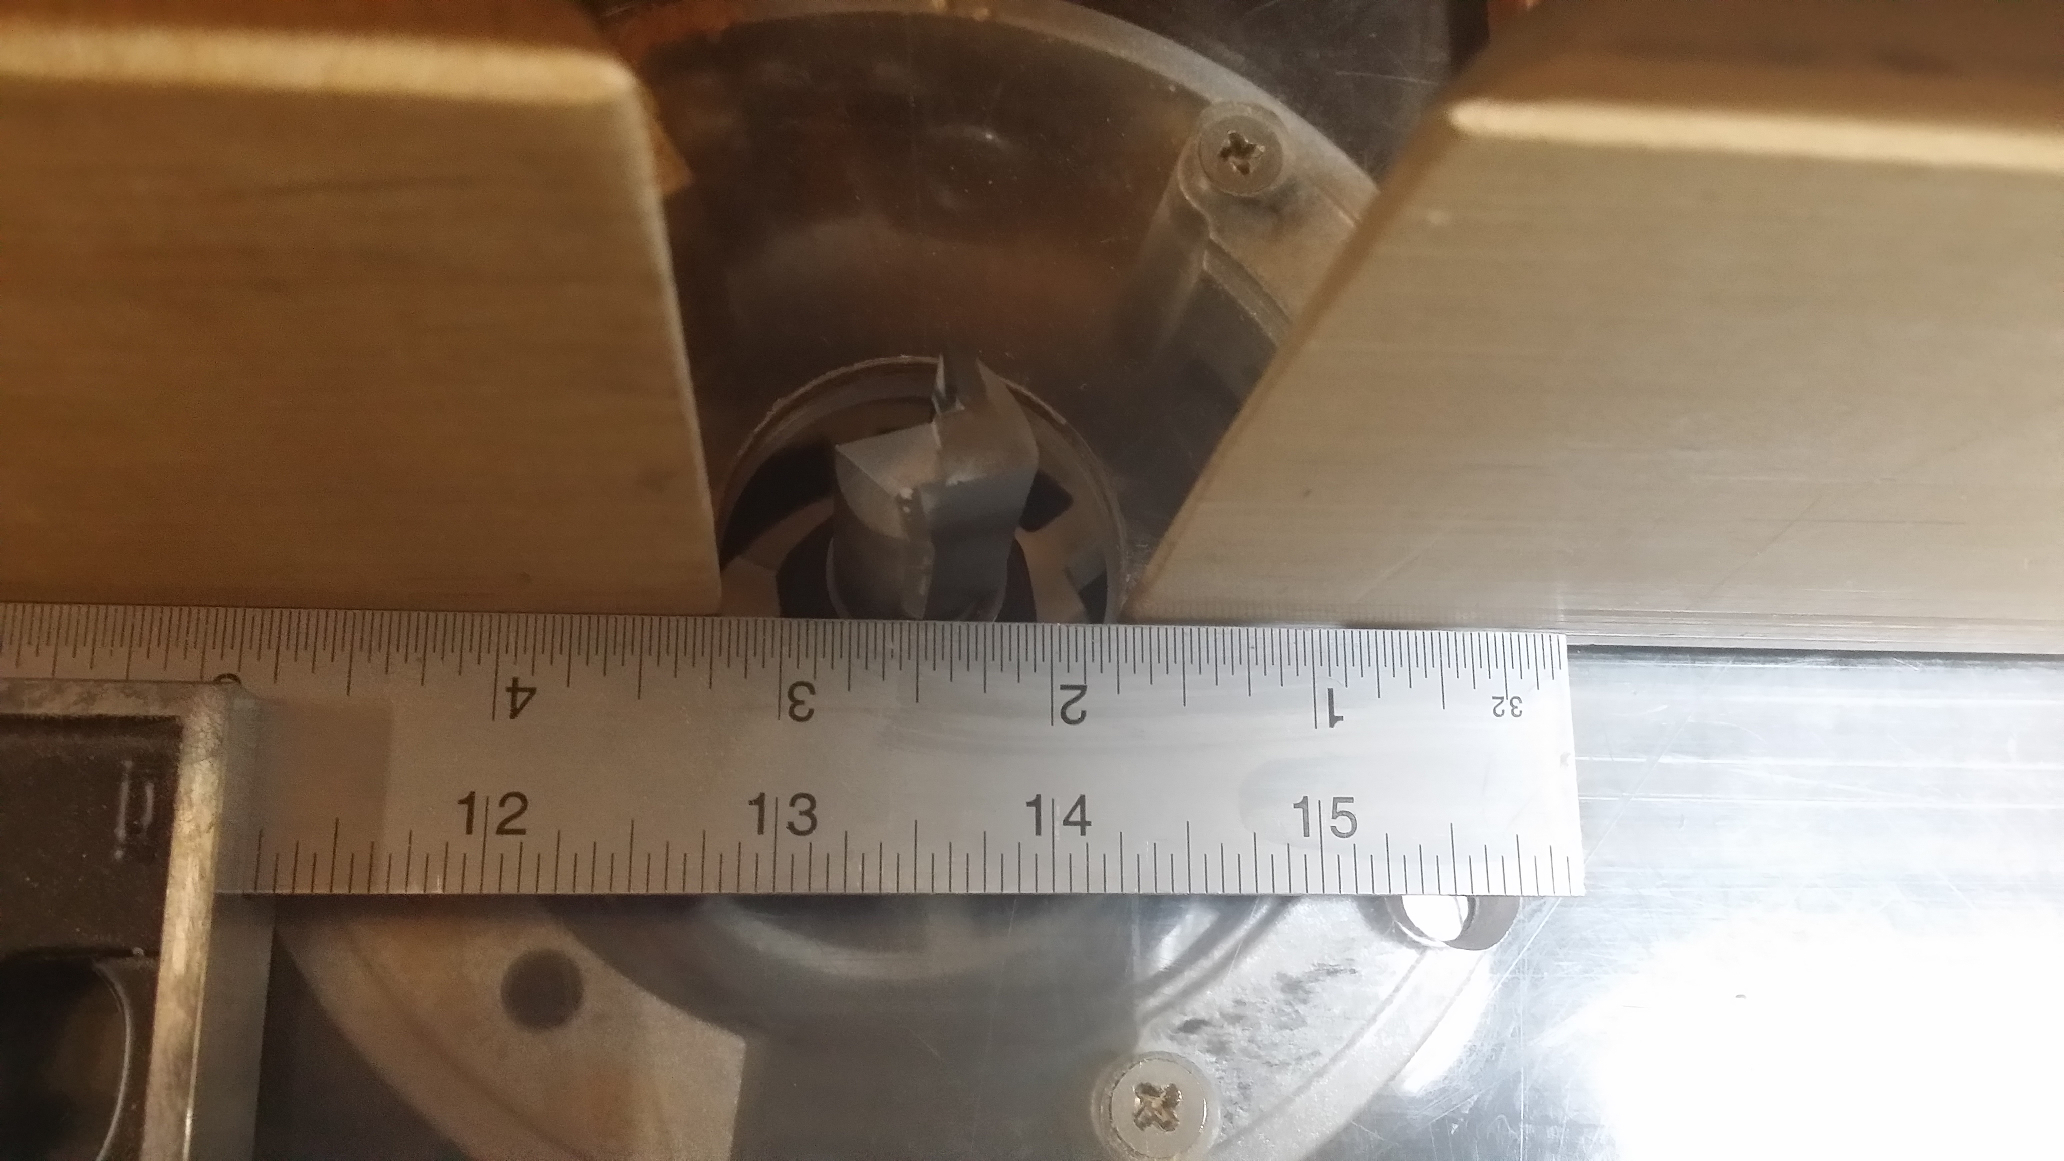
Close-up of the fence setup for jointing. Notice that the gap between the square and fence is a tiny bit wider on the infeed side (right).
To set this up, I took a page out of my notebook, folded it twice, and slipped it between the outfeed face on my fence and the backing. Once I’d tightened down the face again it stood about 1/32 inch further forward than the infeed side. Next, I set the fence so that the cutting edge was coplanar with the outfeed face. This took some tweaking, of course, which is why I clamp the router table fence to my Vega table saw fence — it lets me use the micro-adjusting screw on the Vega for delicate operations like this. When the bit just barely touched the straightedge held against the outfeed face, I did a test cut and adjusted as needed.
The result is a tiny “jointer” with a 1-1/4 inch cutting capacity that takes a 1/32 bite at each pass. To use it, start the router (I set it to a moderate speed, about 16,000rpm) and feed the stock. Start out holding it against the infeed side, but as soon as there’s enough stock past the bit transfer your holding/pushing hand to that side, so you’re guiding against the outfeed side. Two passes on each edge of my ripped cutting board got me edges that butt together invisibly.
To be sure, this is no replacement for a jointer. This setup is good for edges only, and the length of the board is limited by the length of the fence. My fence is 27 inches long, so I can only accurately straighten an edge up to about 4 feet long with it. It’s also a pain to set up, where a real jointer would just need to be rolled out onto the floor and turned on. But for things like the cutting board, it will do the job.
No Responses to “Jointing with the Router”
Trackbacks/Pingbacks
- Hall Table in Ambrosia Maple | Diary of a Wood Nerd - […] 8/4 stock down to 1-1/2 inches thick and the 4/4 down to 3/4. Since my router table was still…
Recent Comments