


Piano-key Coat Rack
I wanted to do something for my physical therapists, because they’ve been really good to me this year. (And, though they don’t know it yet, we’re not as done as they think. More on that later.) They often play classical music, so I figured why not make them a coat rack shaped like a (partial) piano keyboard?
I’ve seen similar coat racks, and there are even a couple on Pinterest that adopt the piano theme. This one would be modest in size, only incorporating about an octave and a half for a finished length of just over 14 inches. And to balance out the design I included a bar below the “keys” in the same contrasting color to carry a few hooks of its own.
The “white keys” are made from maple, and the dark ones from thermally modified (aka ‘roasted’) ash, because I had scraps of both of those and the straight-grained ash seemed like a really good choice for the keys. I mocked up the design in SketchUp to make sure it would work, but then I went to the workshop and got to cutting.
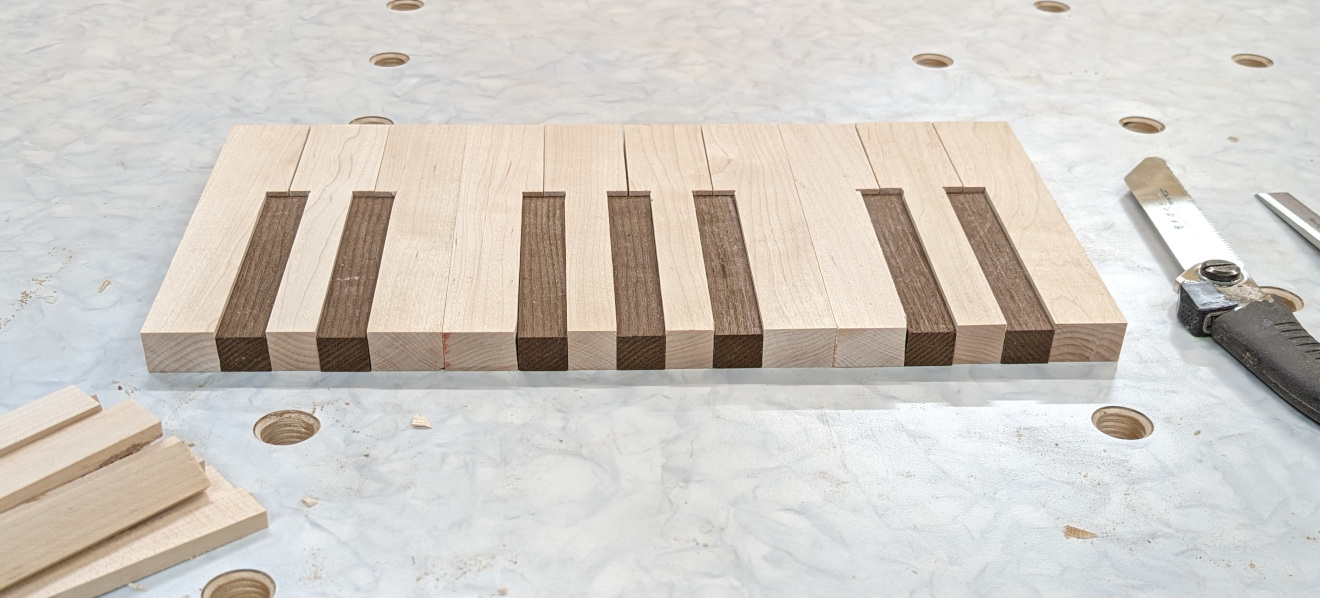
I made 10 white and 7 dark keys, notching the whites to accommodate the darks. It was far easier to work with 10 white keys individually than to leave that as one piece, though later I knew I’d end up going them all together again.
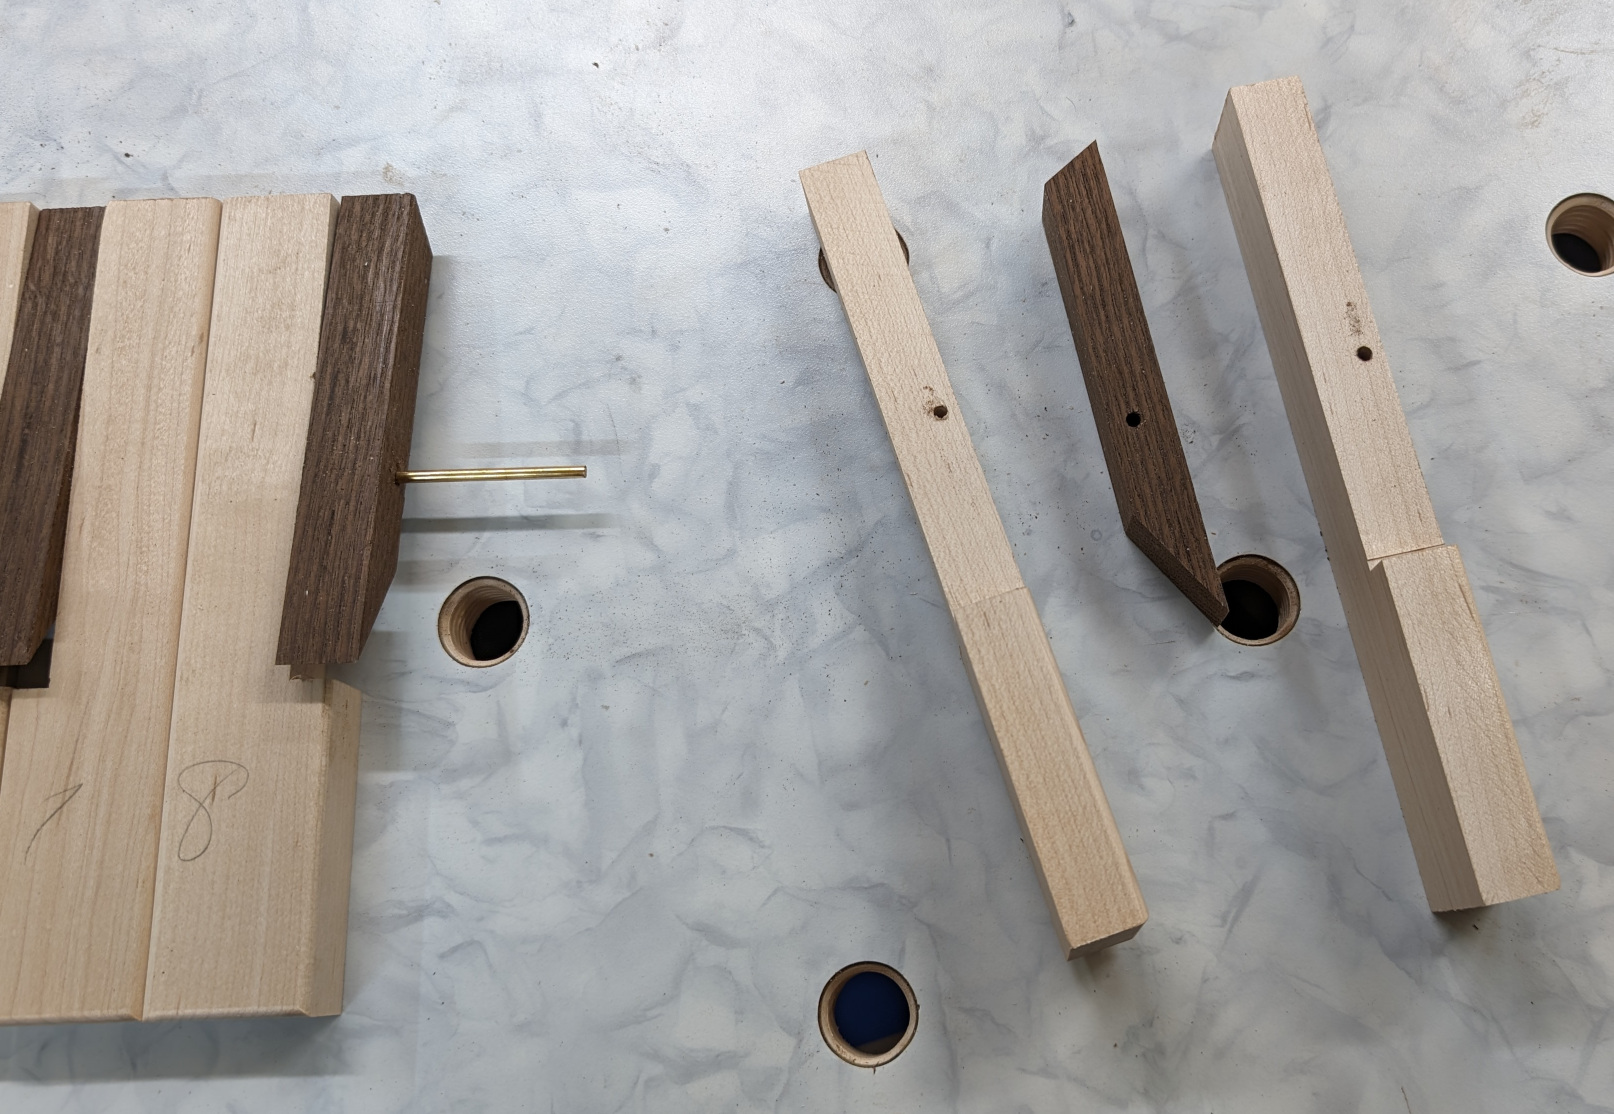
Shaping the dark keys was a little more challenging. I needed the bottom to be tapered at about 60 degrees so that they would be flat against the wall and provide a stop; I needed the top tapered at about 30 degrees so that when pulled out they would appear flat and form a hook. It would have been so much easier to cut those tapers on one long block and then rip it to make the individual keys, but I couldn’t do that — the grain on the ash was only straight for a narrow part of the board. Fortunately, my miter gauge goes all the way to 61 degrees, so with a sacrificial fence I was able to cut these safely.
Next came the challenge of the pivot point for these keys. Because the keys are only 5/8″ thick (the thickness of my scrap), and the white keys are 3/4″ thick, I needed to offset the holes. I also needed those holes to be very small because they would be very close to the edge of the stock. Experimenting with a 1/4″ dowel worked, but was way too close to that edge; instead I went with a 1/8″ rod, and for strength I used brass instead of wood. I set up a stop block on my drill press and drilled a 9/64″ hole 3 inches from the top on everything. On the first and last white keys I only drilled about 3/4″ out of the 1-1/2″ width, and everything in between I drilled through. My brass rod worked out exactly that way — I didn’t even have to shorten it.
The white keys got a 1/8″ roundover everywhere except where they met the dark keys, and I hand-sanded everything and just broke the edges of the dark keys. So far, so good. And now the dark keys sat about 1/4 inch up from the white ones, like on an actual piano.
Now I had a rabbet and a dado to cut in all my white keys. The dado went near the top, for a cross piece that would (A) help hold it together and (B) act as a stop for the dark keys, so they wouldn’t push inward too far. I cut this cross piece from 1/4″ plywood so that I wouldn’t have to worry about grain direction. The rabbet went at the bottom, to give me a place to attach the 1-1/2″ bottom rail. This rail holds it together and provides a mounting point for four more hooks. But since this rail is solid ash, I attached it with screws in slotted holes. I doubt this will move appreciably, but it’s good to make sure.
Before I could actually assemble anything, though, I had to finish the parts. If I assembled it first, there was too much chance of getting finish on the brass rod or too much in the cavity for the dark keys, preventing them from working smoothly. So I laid out the dark keys on a spare brass rod, put masking tape over the edges of the white keys, and sprayed them all with 3 coats of aerosol lacquer.
When the lacquer was dry, I could then take off the tape and begin the assembly process. I put glue on the edges of all the white keys where they would touch another white key, nowhere else. I threaded the keys on the brass rod, inserting the dark keys without any glue, and used just a little clamping pressure to hold them until the glue dried. Then I flipped it over and added the back grace and bottom piece, using screws. Finally, I lacquered the back and added the four hooks to the front of the bottom piece.
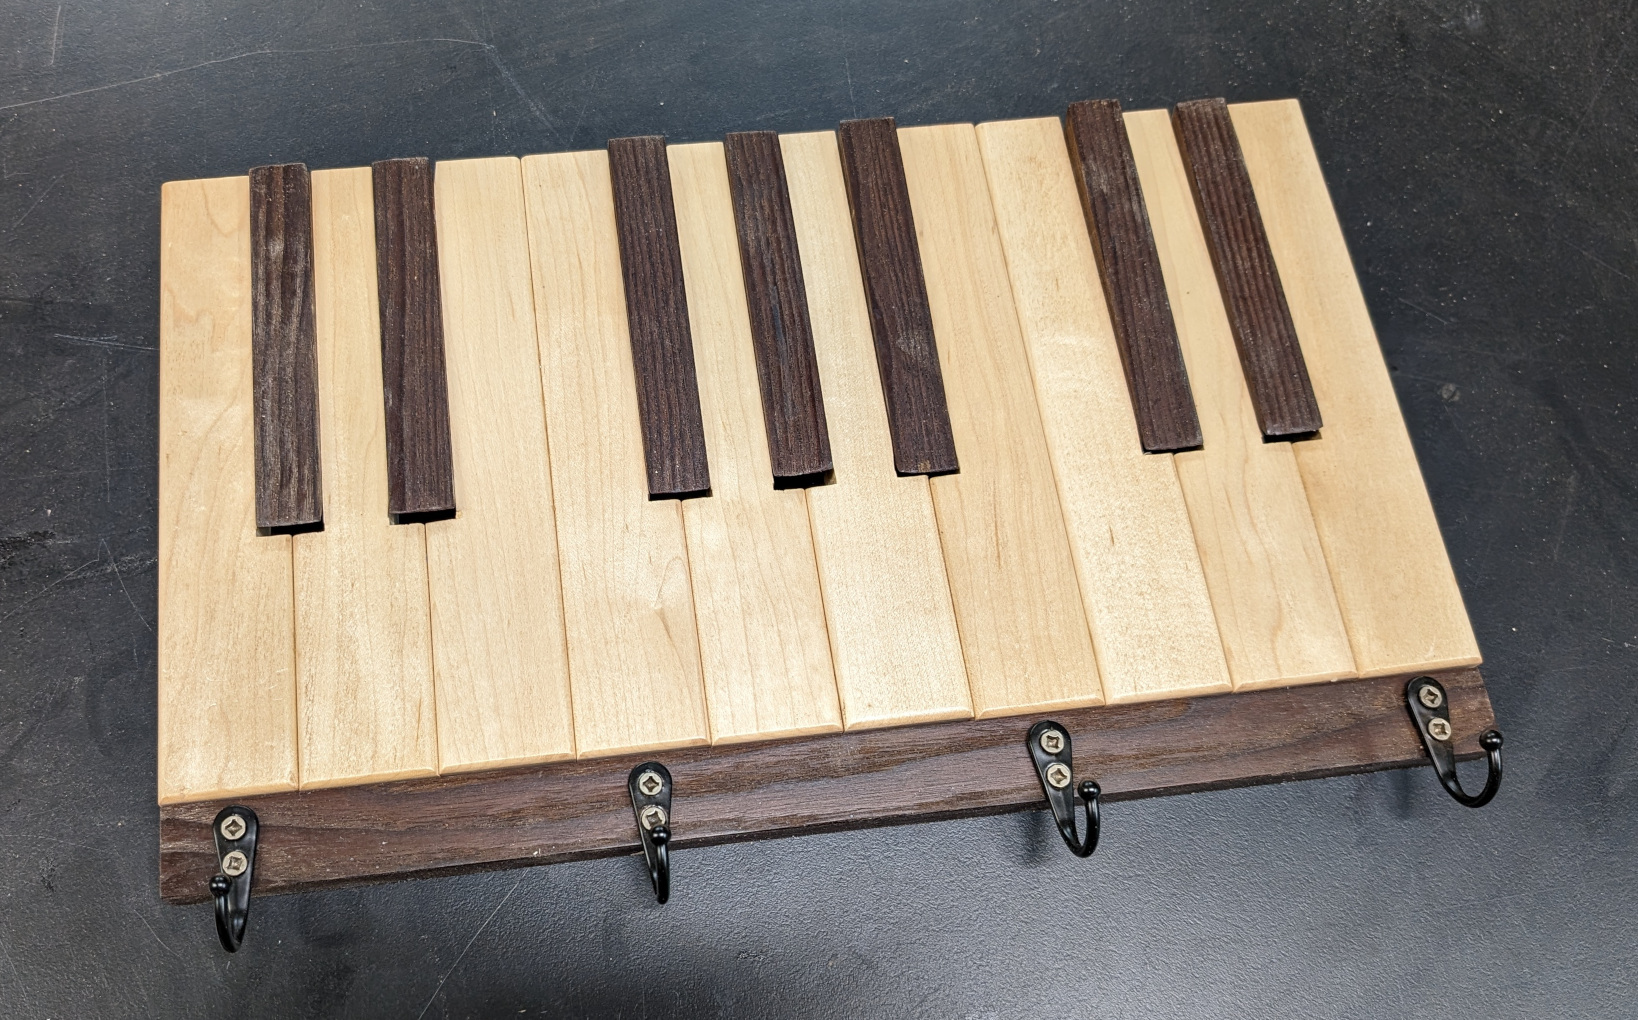
The roundovers make the white keys look separate, and the bar at the bottom serves the purpose of rounding out the look and providing a little more coat storage. This turned out to be pretty cute, and if I had any excuse I wouldn’t mind making a longer version.
But that won’t be happening soon. I’m actually going to have to take an extended break from the workshop, because I’m having surgery to repair a badly torn rotator cuff. That means at least 6 weeks in a sling (the beefiest damned sling I’ve ever seen — it’s meant to immobilize the arm, not just to support it) and months of physical therapy to regain the ability to lift anything heavy. So I’ll be back this summer, hopefully.
Recent Comments