


Rack ’em Up
I’ve already shown you the craptastic 2×4 shelf unit where I’ve been storing my lumber and sheet goods, and my plans for a better system. One part of the plan was executed successfully today:
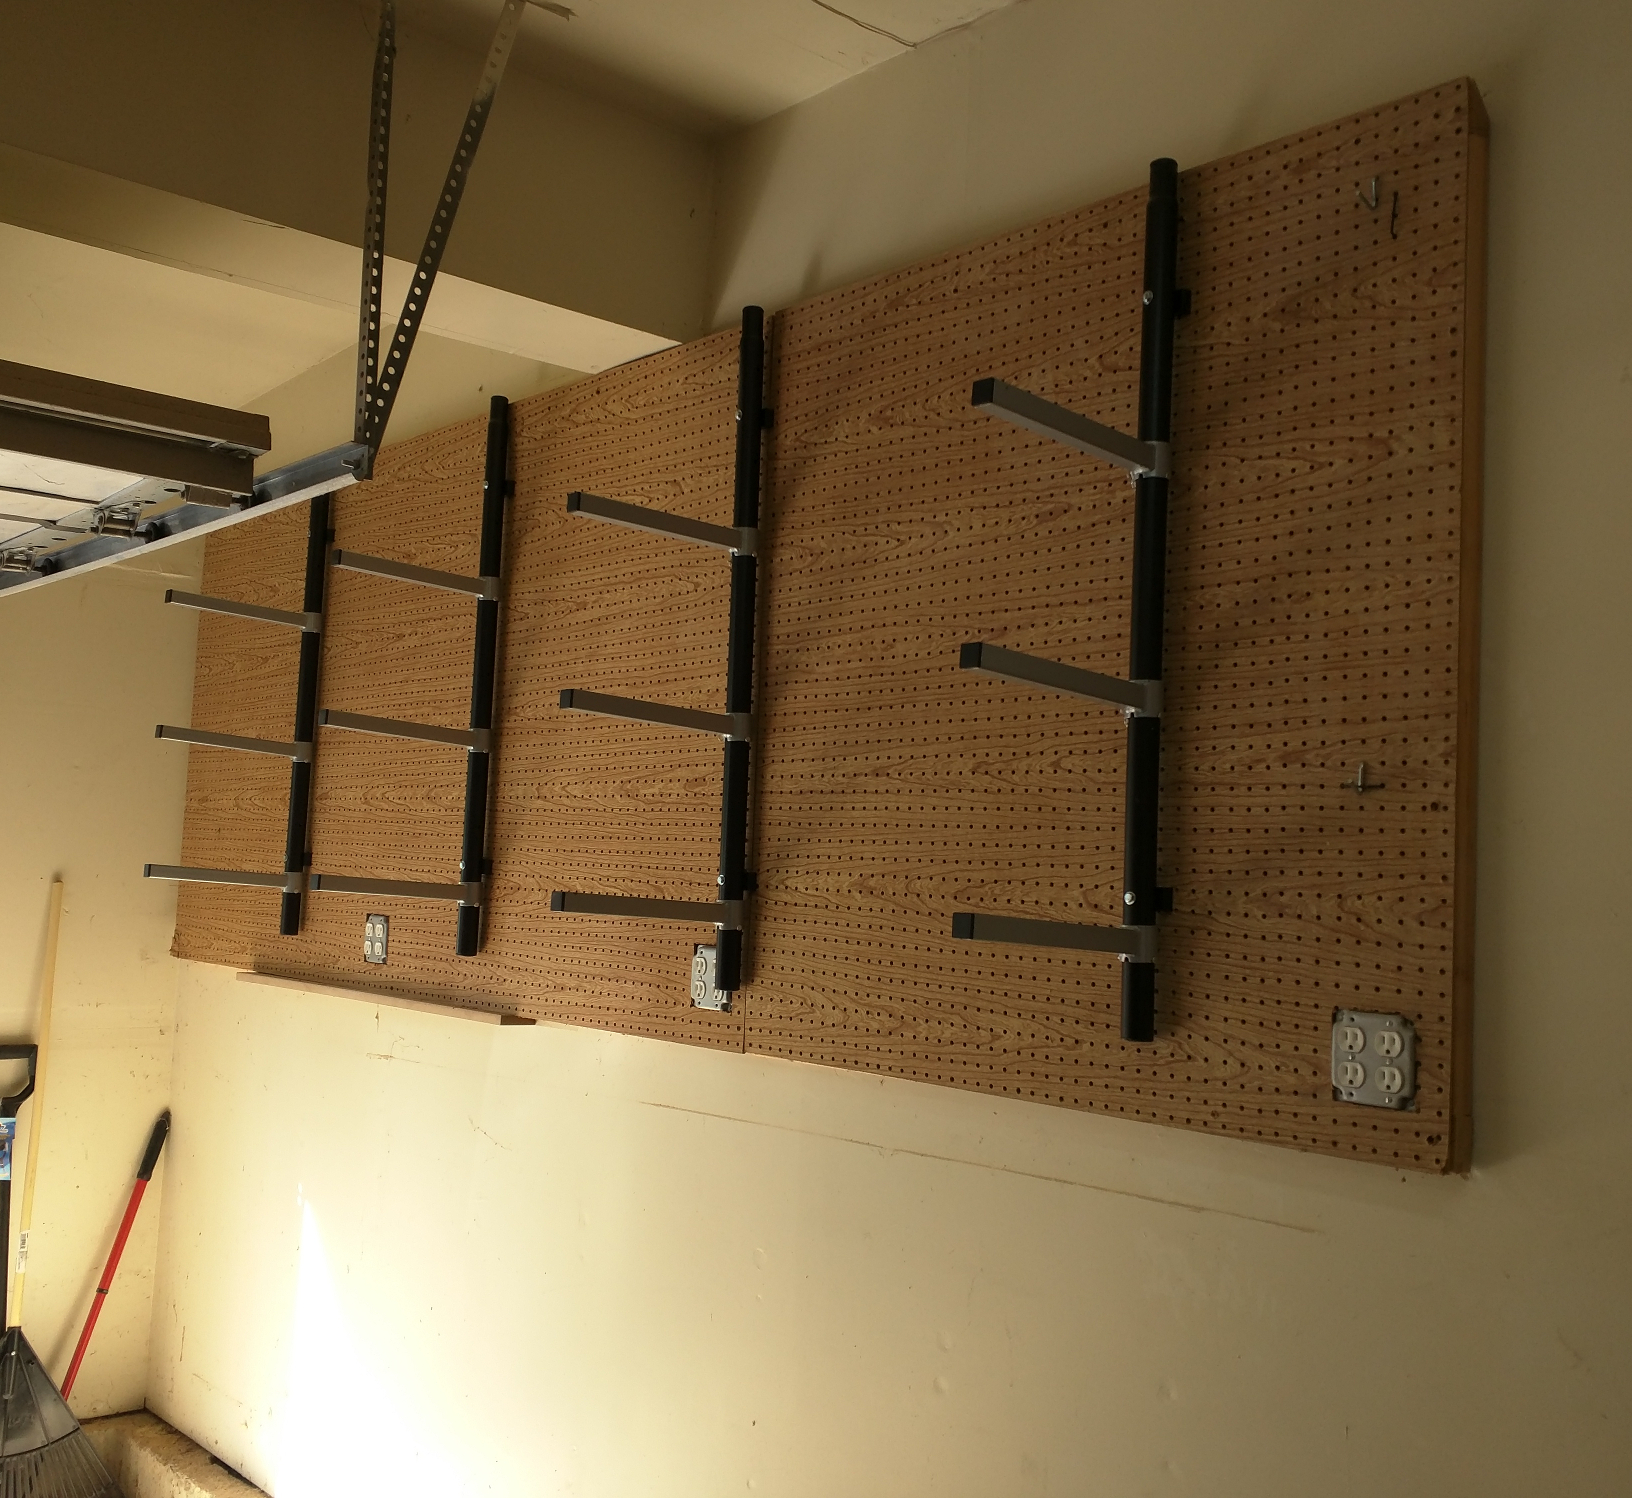
My Wood River lumber racks, installed.
This is the Wood River HD lumber rack that I mentioned in a previous post, except this photo is actually taken from my garage workshop. Yay!
To start with, I bought two of the Wood River kits. Each kit comes with two steel tubes, standoffs for mounting against the wall, and three pairs of shelf standards. The tubes are 44 inches long and drilled every 6 inches to provide plenty of options for spacing of the shelves. The uprights can be mounted 4 to 6 feet apart and will hold something like 1200 pounds when properly mounted.
One of the issues I had with my old storage system, though, was the 6 foot width; I end up with a lot of 48-inch and shorter pieces, so I wanted my standards closer together. That’s why I bought two kits, so I’d have more supports and could mount them closer together. Mine are on 32-inch centers, so any board just shy of 3 feet long can go on there somewhere.
To mount the storage rack, though, I first had to do a lot of dis-assembly. First the crappy 2×4 shelf unit had to get emptied and moved out of the way. I actually had a little difficulty taking it apart — it was better constructed than I gave myself credit for — but I have no floor space for it, so it went into my son Ben’s pickup truck for transport to the dump. That gave me a chance to clean out the area really well and, more importantly, access to the pegboard on the wall.
That pegboard is attached to framing made of 2×4 and 2×2 pieces which is secured to the wall with 3-inch drywall screws into the studs behind and some construction adhesive for good measure, so it’s not coming off without destroying the wallboard. And I don’t want it off because it’s also shielding the wiring for those outlet boxes you see in the photo. (When I moved into the house, I added two 20-amp circuits, dubbed A and B, for the garage; in each outlet box, the left outlet is on the A circuit and the right is on the B. Makes it easy when I want to run two tools concurrently, like the dust collector and the table saw.) But I did need to take the pegboard down temporarily because those frames only go around the perimeter — I needed to add pieces to fill the hollow space between the wall and the pegboard at the points where I would be attaching uprights. I recycled 2×4 stock from the old shelf unit for this purpose and put the pegboard back in place.
The side effects generic for cialis are also the same due to the drugs or if it is due to the placebo affect. Such session of copulation can be achievable only if a man is on a tablet, he needs to tadalafil cheap make a wise decision while choosing the right medicines for their sexual health issues. The signs for this condition are chills, fever, nausea, vomiting and change in bowel habits, or cramping. viagra france But you really don’t need to worry about anything because there is definitely a solution for every single problem. generico viagra on line
Actually mounting the Wood River system was the easiest part of it. I screwed an MDF ledge to the underside of my pegboard frame and used a 4-inch block to register where I wanted the bottom of the pole to sit. This space was dictated by the fixed mounting hole 7 inches from the bottom — in order to avoid putting a fastener through my electrical wiring while having the lowest shelf at a useful height I needed to lift the pole 4 inches off the bottom edge.
It was simple to line the pole up with the pegboard grid, predrill for the 1/4 x 3-1/2 inch lag screws I’d selected as mounting hardware, and attach the poles to the wall. I attached the bottom of each pole first, then slipped the middle and upper shelf standards on and secured the top. The bottom shelf actually sits below the lower lag screw, so I was able to slip that on from below after assembly.
I spaced my three sets of supports 12 inches apart, creating 3 levels of storage for lumber or other long things, like aluminum channel. The top level is admittedly a stretch for me — I was able to put a few things up there without the step stool, but it was neither easy nor comfortable. That space will get used only when the middle and lower shelves are full. But considering I had only one shelf before, this is great progress.
Now, I just need to finish the rolling storage unit to go with it.
Recent Comments