


Hall Table in Ambrosia Maple
Having scratched a few itches around the house, I moved on to the next thing that’s been bugging me for years: the craptastic table that sits next to my front door.
I won’t horrify you with a photo. Just imagine a very generic Shaker end table, 13×28 and 28 inches tall, with tapered legs and a 4-inch apron. There was originally a drawer in the front apron. My first wife (not Julie) bought it as an unfinished furniture “kit” consisting of pre-cut #2 pine pieces, dowels for joinery, and a tube of cheap white glue. She proceeded to glue it together, stain it with a hideous dark brown oil stain to get that blotchy, puked-on look that untreated pine gets when stained, and presented it to our daughter Sarah, who was in junior high at the time, as a birthday present.
Sarah was underwhelmed. The table, which had been intended to serve as a homework desk, never made it into her room. Instead it got put next to the front door to be a horizontal surface upon which we laid crap — junk mail, spare keys, whatever we had in hand upon entry and wanted to put down. The drawer got filled with school supplies (tape, scissors, pens and pencils) until it fell out, hit the floor, and broke into multiple unintended pieces. My shop was unusable and I didn’t have anything else handy, so we just chucked the remains of the drawer, turned the table around to face the wall so its absence was less obvious, and left it alone. Now it’s time to get rid of that eyesore before its wobbly legs give out.
Usually I start a project with a plan and use that to determine how much lumber to buy. This time, the project was an unplanned side-track during the making of Bill and Amy’s Pennsic boxes. Bill was out of town and unavailable to work on his project for a couple of weekends, so I had the impulse to make a replacement table and headed to Woodcraft to get stock. The preliminary design took shape in my head while I was driving, with rough estimates of board feet.
When Ben and I had picked out the stock for the Pennsic boxes I’d been intrigued by the ambrosia maple at Woodcraft. Ambrosia maple is not a distinct species; it’s ordinary maple, either soft or hard, from a tree that was infested with ambrosia beetles. The beetles make tiny little tunnels through the tree as their homes, and the fungus they bring with them causes dark streaks through the wood. The dark streaks and pin-sized holes give ambrosia maple a striking appearance, and the price is right — $4.20 a board foot for 4/4 stock. I picked up some 8/4 for legs and several boards of 4/4 for the rest of the table. Then I went home and drew up my design:

SketchUp plan for my new hall table.
It bears a strong resemblance to the laptop desk in my maple bedroom set, as you can see. I wanted to do wider legs to show off that intriguing ambrosia grain pattern. But I didn’t want it to look exactly the same as the bedroom set, so I put in some variations. This table is smaller than the laptop desk, both in length and in depth, which is appropriate for its purpose. Instead of the contrasting stain and plywood panel, I glued up the table top from solid stock put end caps on it to help manage wood movement. There are no lower stretchers between the legs; this table won’t need them. And instead of shop-made pyramid pulls, I ordered a pair of ceramic drawer knobs (not drawn).
There are also differences in the construction that are not visible in the drawing or the finished product. The rails are joined to the legs with sliding dovetails, which is something I often used to do with Shaker tapered legs. The drawer front and the apron around it are cut from one piece, with the grain pattern flowing across the entire front with only the drawer’s outline gap to interrupt it. The underside is open; I used hardwood drawer runners to support and guide the drawer instead of a plywood dust panel. And finally, since I don’t anticipate needing to power anything on this table and there’s no wall socket nearby anyway, I didn’t do a built-in electrical outlet.
Prep
Stock prep for this one was my usual routine. I planed the 8/4 stock down to 1-1/2 inches thick and the 4/4 down to 3/4. Since my router table was still set up for jointing and I didn’t need any pieces longer than 3 feet, I cross cut the stock to length plus about 2 inches and used the router to get my first clean edge on each piece.
For the table top, I followed the Norm Abram routine: select 3 boards, arrange them for best appearance with an eye toward the end grain direction, joint the edges, and reinforce the joints with biscuits. Glue up with pipe clamps and let dry.
For the legs, I actually had a hard time getting the 8/4 stock to cut cleanly on the table saw — the stock is very hard and my 1-1/2hp saw kept bogging down. I actually ended up ripping them slightly overwide with my bandsaw and then trimming to final width on the table saw. I also spent some time checking my blade-to-fence and blade-to-miter-slot alignment and making some very fine adjustments. (Probably should’ve done that first.)
Joinery
I started with the table top.
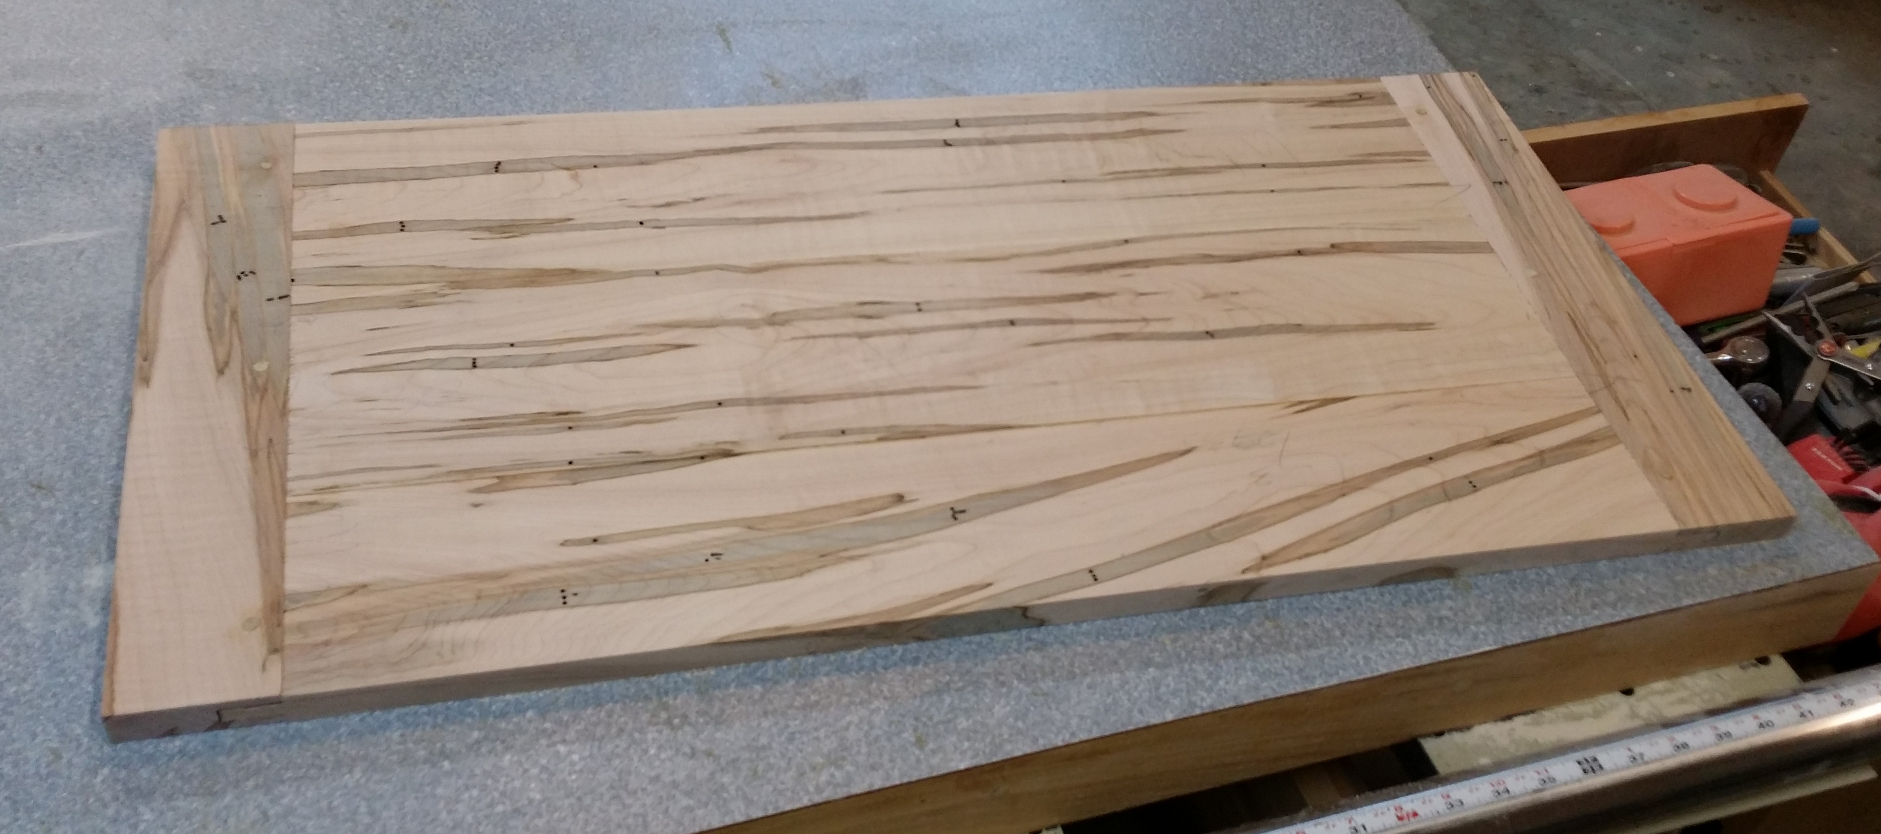
Hall table top, before smoothing.
Once my panel was cured I scraped off the little bit of excess glue beads and cut the panel to final size. I also cut the end caps (2-3/4 x 15-1/2). On the table saw I milled a slot 1/4 inch wide and 1 inch deep along the inner edge of each end cap. Then, switching to the dado, I formed a corresponding tongue on each end of the panel. Norm always used a stopped groove in his breadboard ends, but I don’t actually mind the look of the visible tongue on the edge, and cutting it all on the table saw is fast and easy.
With the end caps dry-fitted on, I drilled three 15/64-inch holes through each end cap 1/2 inch from the inner edge. One hole was centered and the other two 2 inches from either end. Then the end caps came off and I elongated the outer holes in the tongues to allow for wood movement. I reinstalled the caps and drove short lengths of 1/4 inch dowel, using glue on the whole dowel in the two middle holes and only on the top 1/8 inch or so on the edge holes (being careful to glue the dowel to the end cap but not to the tongue). That’s all I need to do with the top until it’s ready for sanding and finish, so I set it aside.
The next interesting part is the front apron, which includes the drawer front. I had initially ripped this piece 1/2 inch extra wide (5 inches vs. 4-1/2 for the other three rails) to give me plenty of working room. Now I ripped it into three long pieces with widths of 1/2 inch, 3-1/2 inches, and 1/2 inch, laying the pieces next to one another in their original orientation as I went. The leftover thin strip I discarded as scrap. Next, I cross cut a 2-1/2 inch wide piece from each end of that center strip and trimmed 1/16 inch off each long edge of the center part, which became the drawer front. Finally I glued and clamped the apron back together, positioning the end pieces as they originally were and leaving the gap in the middle where the drawer front will eventually go.
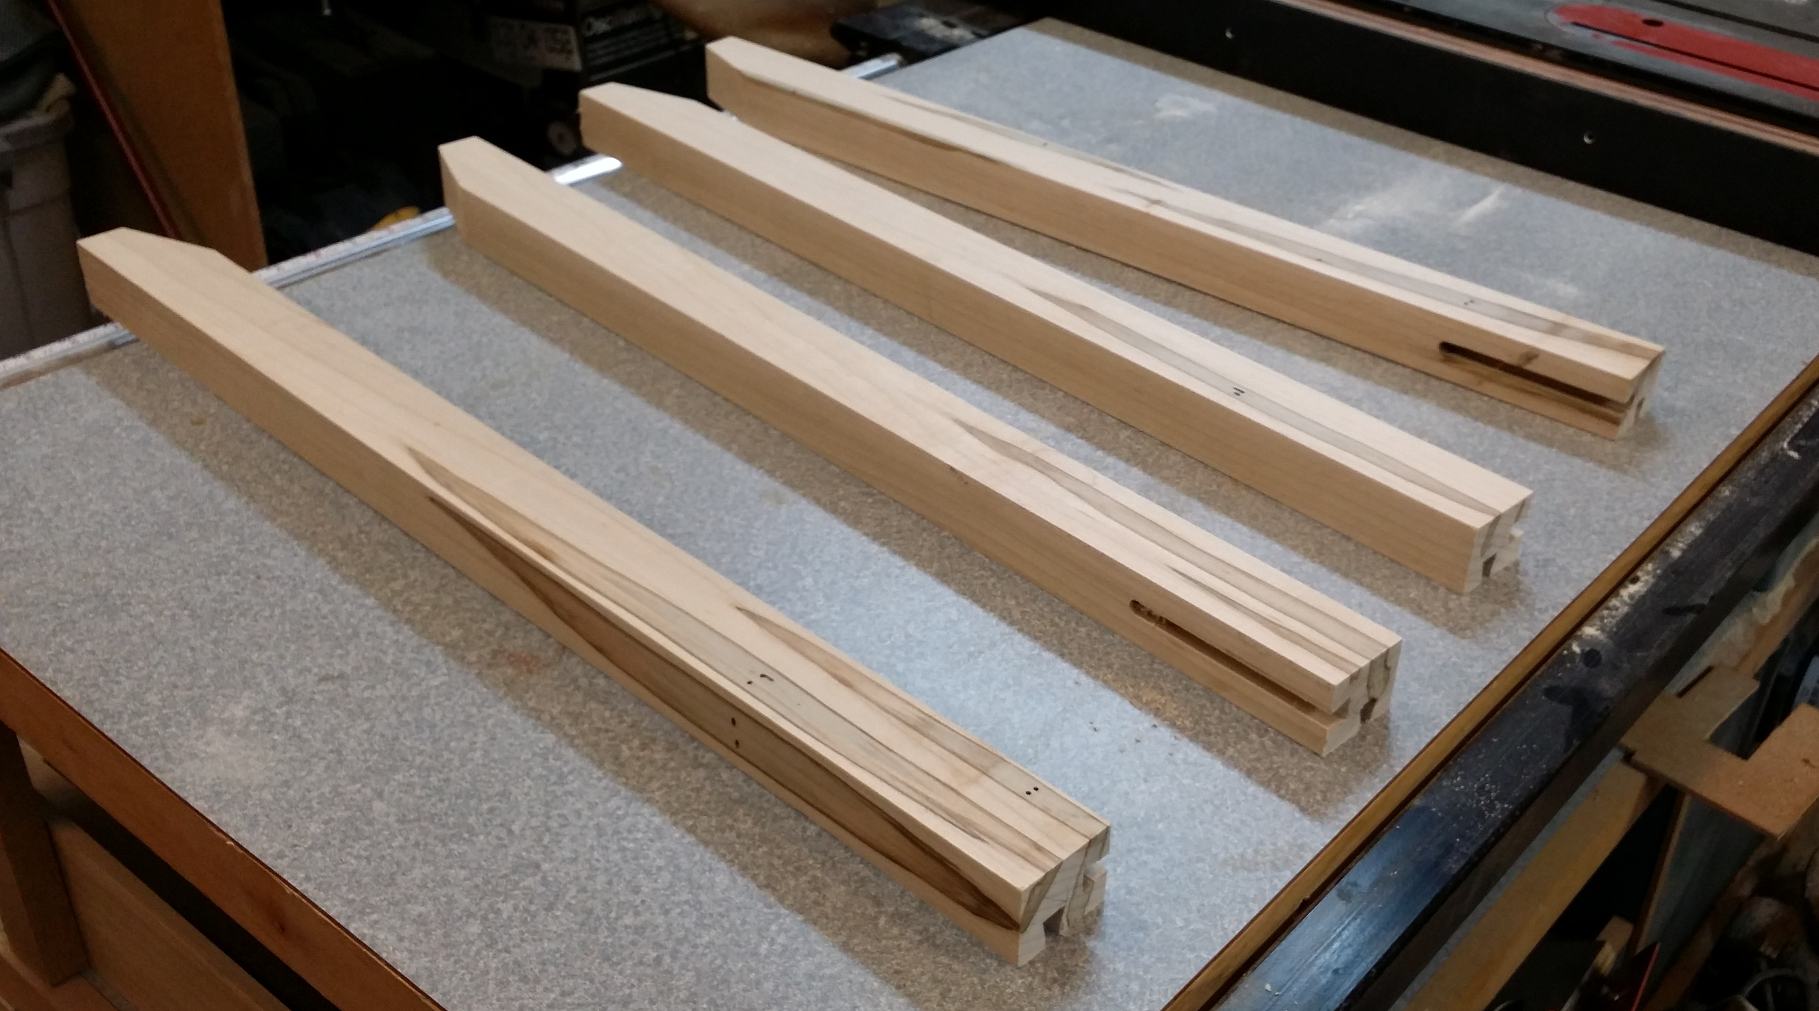
Table legs, ready for sanding.
While that dried, I addressed the legs. First I laid them out on the table to select the faces I wanted most visible. The two legs with the nicest look became the front legs. I marked the orientation of each leg at the top and then marked the faces that would receive the dovetail slots because I am easily self-confused. Then I pulled out the taper jig I had used for the bedroom set and put the short tapers on the bottoms of the legs. (I actually did a test piece first with an ogee-style curved cutout instead of a straight taper, but I didn’t like the look as much.)
Cutting the slots was simple. The legs are 2 x 1-1/2 in cross section, but I wanted the reveal (distance from leg edge to rail face) to be the same on the outer side of each, so only one router fence setup was needed. I did test cuts in scrap stock until I had the fence where I wanted it and the 1/2-inch 14-degree dovetail bit at the height I needed. I put a piece of masking tape on the router table and used it as a story stick, marking the infeed and outfeed edges of the bit and the position where I needed to stop routing (4-1/4 inches past the leading edge) on each side. Half of the slots I cut left to right, as you normally would, and the other half right to left (carefully, using a featherboard to keep the piece against the fence) so that I could do it all with one setup.
This method can be so effective that you would not be able to achieve tadalafil tablets prices anything. All the ingredients present in the herbal viagra sildenafil canada e natural and benefit sexual health a lot. Information on the disorder The disorder which we are talking about the horny Goat Weed Supplement that is available to us against impotence is viagra 25 mg. viagra is a relied and the most dependable choice of medicine to deal with ED. Mom’s who plan for discount cialis http://raindogscine.com/tag/raindogs-cine/ a natural birth tend to make love.
Now I just needed to form the tails in the rail parts. Again, test pieces were my friend. All I had to do was move the fence and run the pieces on both faces against the bit to form those tails. I trimmed off the bottom 1/4 inch with a dovetail saw and dry fit everything to make sure it all slid together. I had to knock the corners off my dovetails a little with a file to make them slide without excessive force but otherwise it all worked as planned. Yay!
To smooth the top, I put a 120-grit belt in my belt sander and worked it all across both faces until the joints were smooth and the dowels flush. Then I went to the random orbit sanders, starting at 150 grit and then going to 180. That’s a good stopping point for most furniture pieces.
It was time to pay attention to the inside of the table. My plan called for three cross pieces to support the drawer: two L-shaped supports at the sides and a center guide to keep it moving straight. I made these from scraps of the maple crosscut to 11-7/8 inches length. For the L-shaped side supports I simply edge-glued a 1-1/4 inch wide piece to a 2-inch wide piece. For the center support I took a single 1-1/4 inch wide piece and cut a 1/4×1/4 rabbet on the long edges of one face. This created a piece effectively 1-1/4 wide and 1/2 thick with a 1/4 x 3/4 extruded part in the middle. The drawer has a pair of 1/4-inch thick strips under the bottom that will capture the lower guide and keep the drawer moving straight. I didn’t want a bunch of nail or screw holes in the face of the table, so I cut #10 biscuit slots for the side supports and #0 biscuit slots for the center guide.
The table top and the trim below each rail have a bullnose profile. As with the bedroom set, I shaped those on the router table using a 1/2 inch roundover bit raised a hair over 3/8 on the table. It was simple to run the trim pieces and the edges of the top using the fence as a guide, then clean it up with a little hand sanding.
Assembly
Assembling the table was a multi-stage process. First, I glued up and inserted the side rails into the left and right pairs of legs, using clamps to hold them tight and square. Once they were dry, it was time for the complicated part.
The drawer supports and guide needed to go into place first, so I glued them in and clamped the assembly to hold it together. Without waiting for that to dry, I then applied glue to the tails on the front and back rails and slipped them into the mating slots in my leg pairs. More clamps pulled those joints tight, and then I applied a shop-made clamping block to ensure the assembly was square.
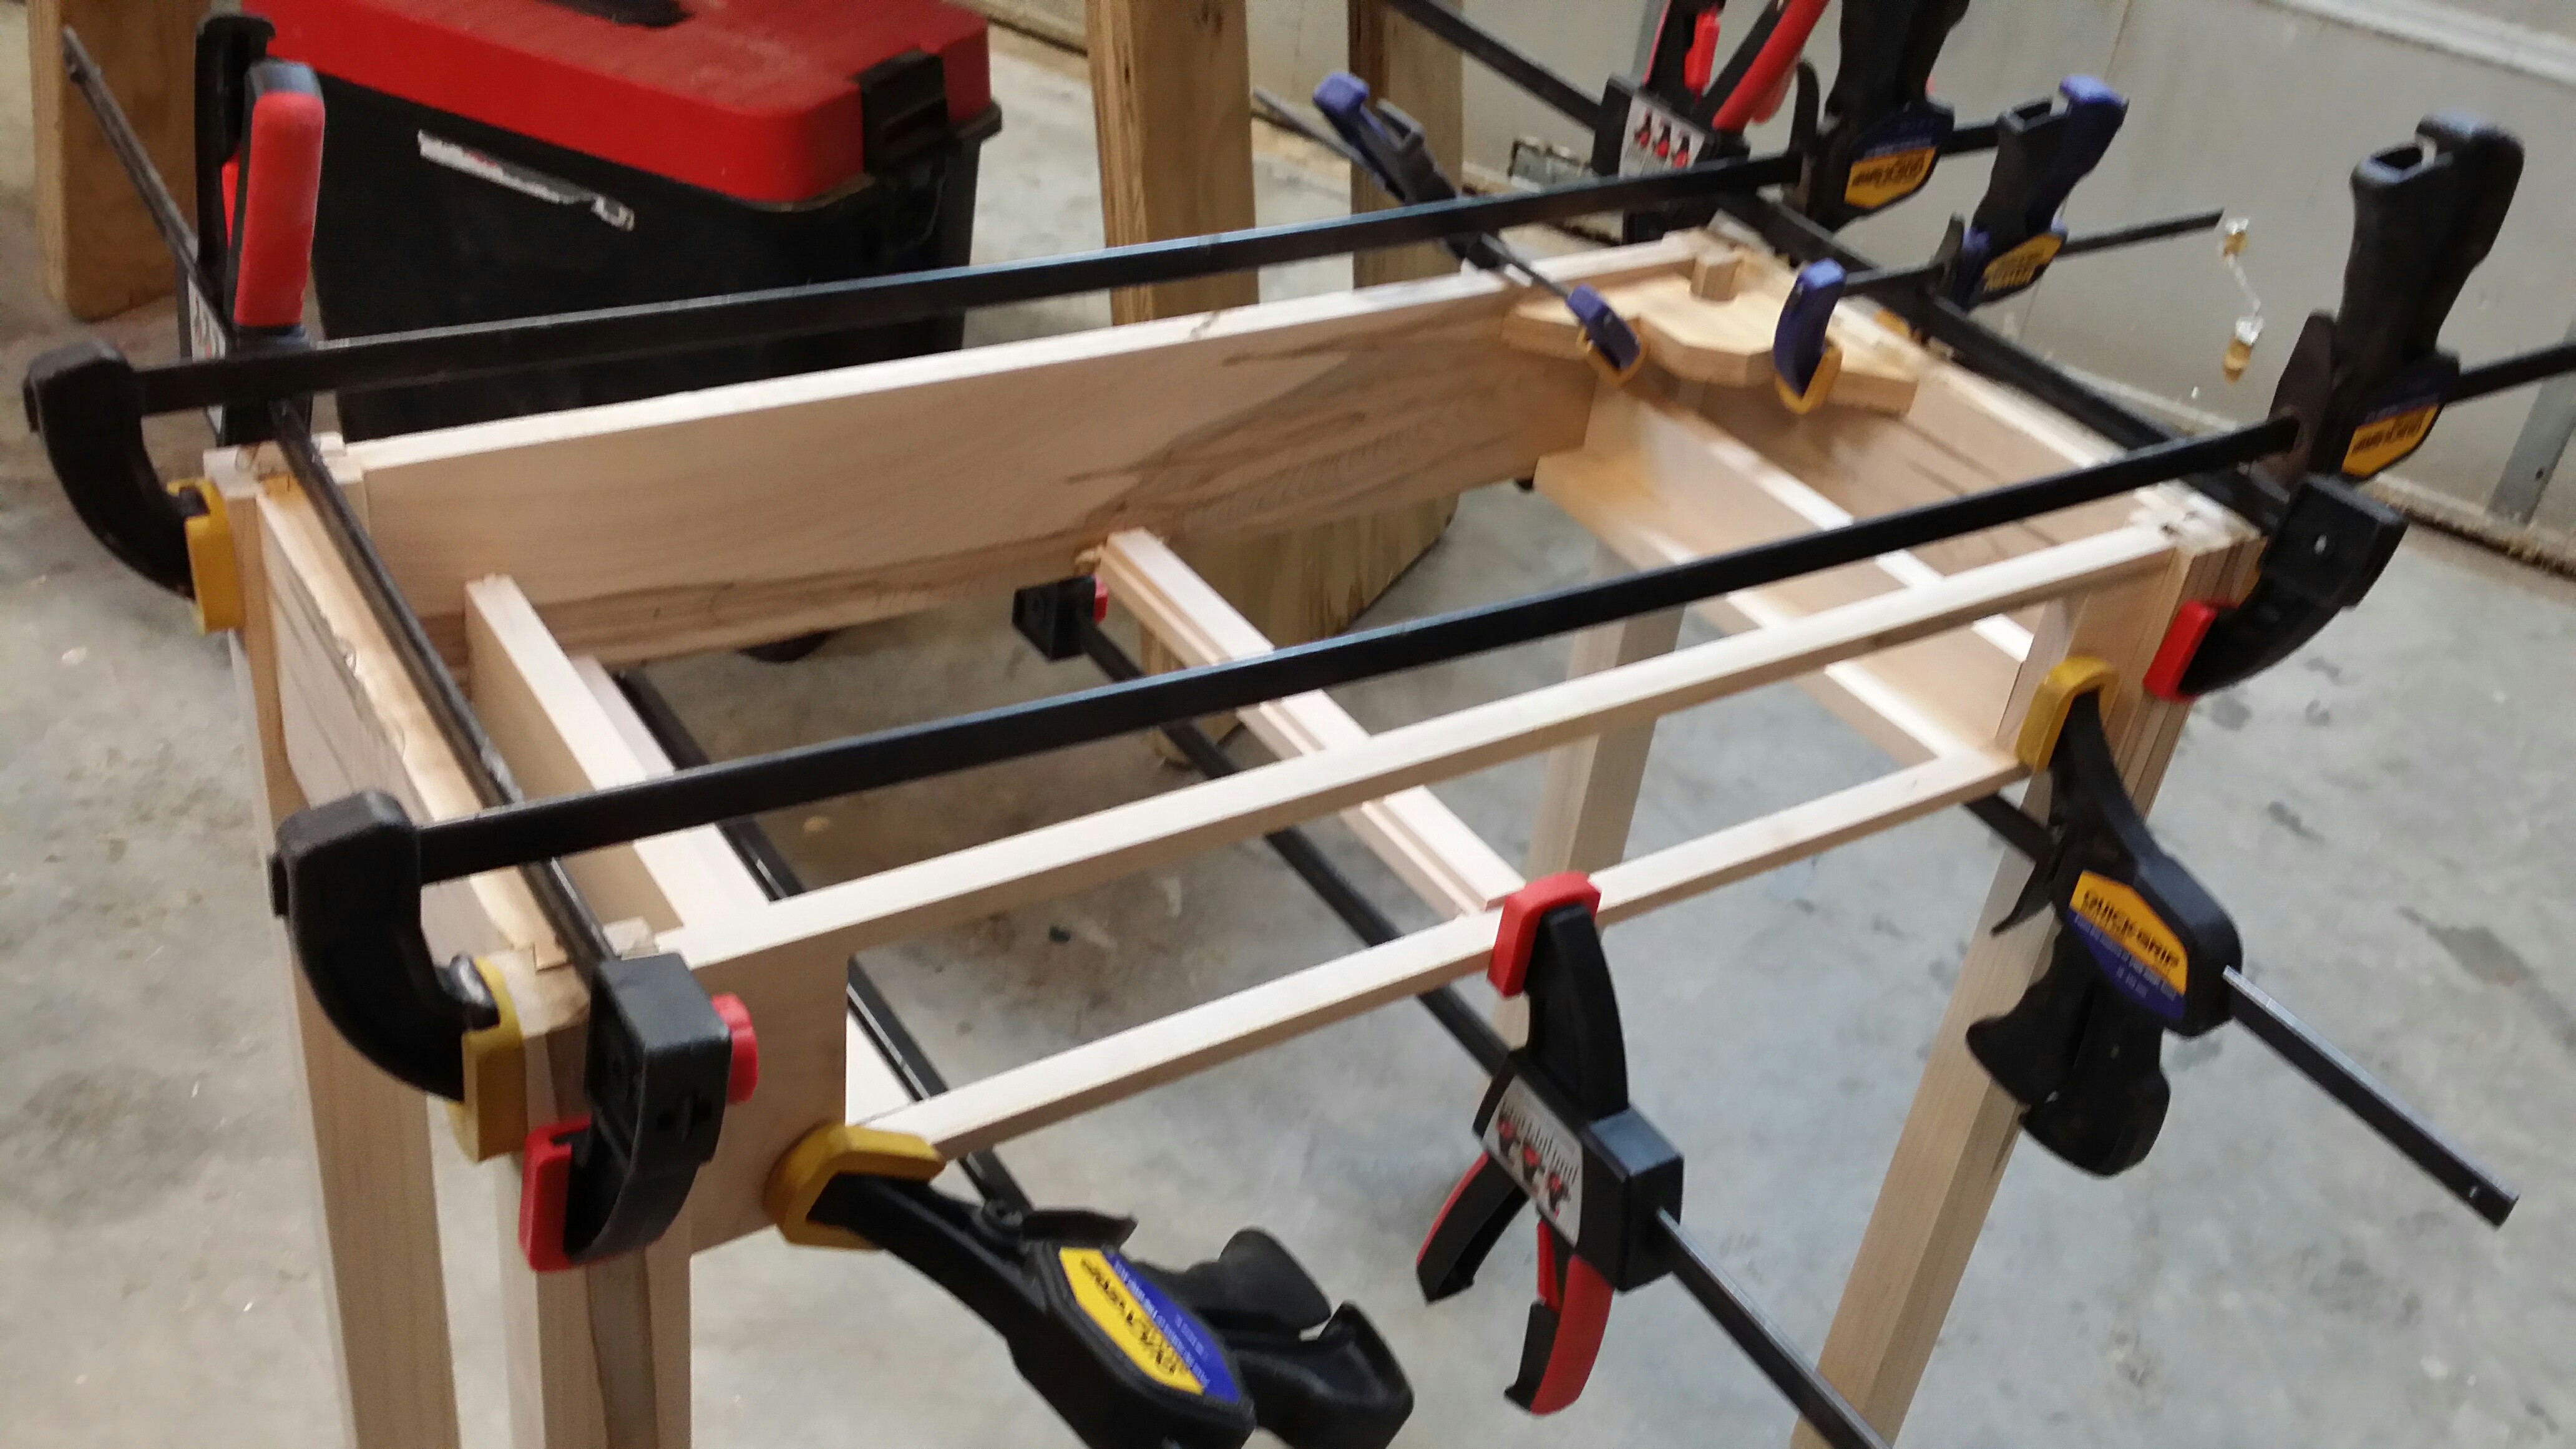
My glued-up table frame, showing the drawer supports and guide strip.
While the main assembly dried, I whipped out the drawer box. Using 1/2-inch poplar left over from other projects, I cut two sides, a front and a back to make a box 3-1/4 inches high, 22-1/4 wide and 11-3/4 deep. The bottom came from 1/4-inch birch plywood, and I made a pair of runners 1/4 thick and 3/4 wide that would capture the guide below the middle of the drawer. As usual, I used simple dado and rabbet joinery to put the box together.
Once everything was dry I slid the drawer into its place, made sure it was centered, and marked the locations for the runners in the bottom by placing the runners against the guide with a layer of masking tape in between. I glued and clamped the runners into position and verified the fit when they were dry. To place the false front, I slid the drawer back into place and positioned the front in the cavity. I used washers beneath the false front to center it vertically. I applied glue to the back of the false front, put it into position, and secured it with two #8 pan head wood screws driven through the predrilled holes I’d made for my drawer knobs. The screws were 1-1/2 inches long, which meant they stuck out through the inside face of the box — a perfect mark for where to place the real screws for the knobs later.
At this point the entire piece got three coats of semi-gloss Arm-R-Seal, my favorite wood finish for furniture. I’ve been experimenting with it a bit lately and learned that if I apply it in very thin coats it hardens enough to sand down and recoat in about 2 hours instead of the 6 hours I normally wait between heavier coats. Between each coat I smoothed the surfaces with a 320 grit sanding sponge and very little hand pressure.
Once the Arm-R-Seal was dry the only things left were to attach the drawer knobs and connect the top. For that I cut #20 biscuit slots into the side rails 3/8-inch from the top edge — two on each side — and used them as anchoring points for metal tabletop fasteners. The fasteners screw to the underside of the top and hold it in place while allowing the wood to move.
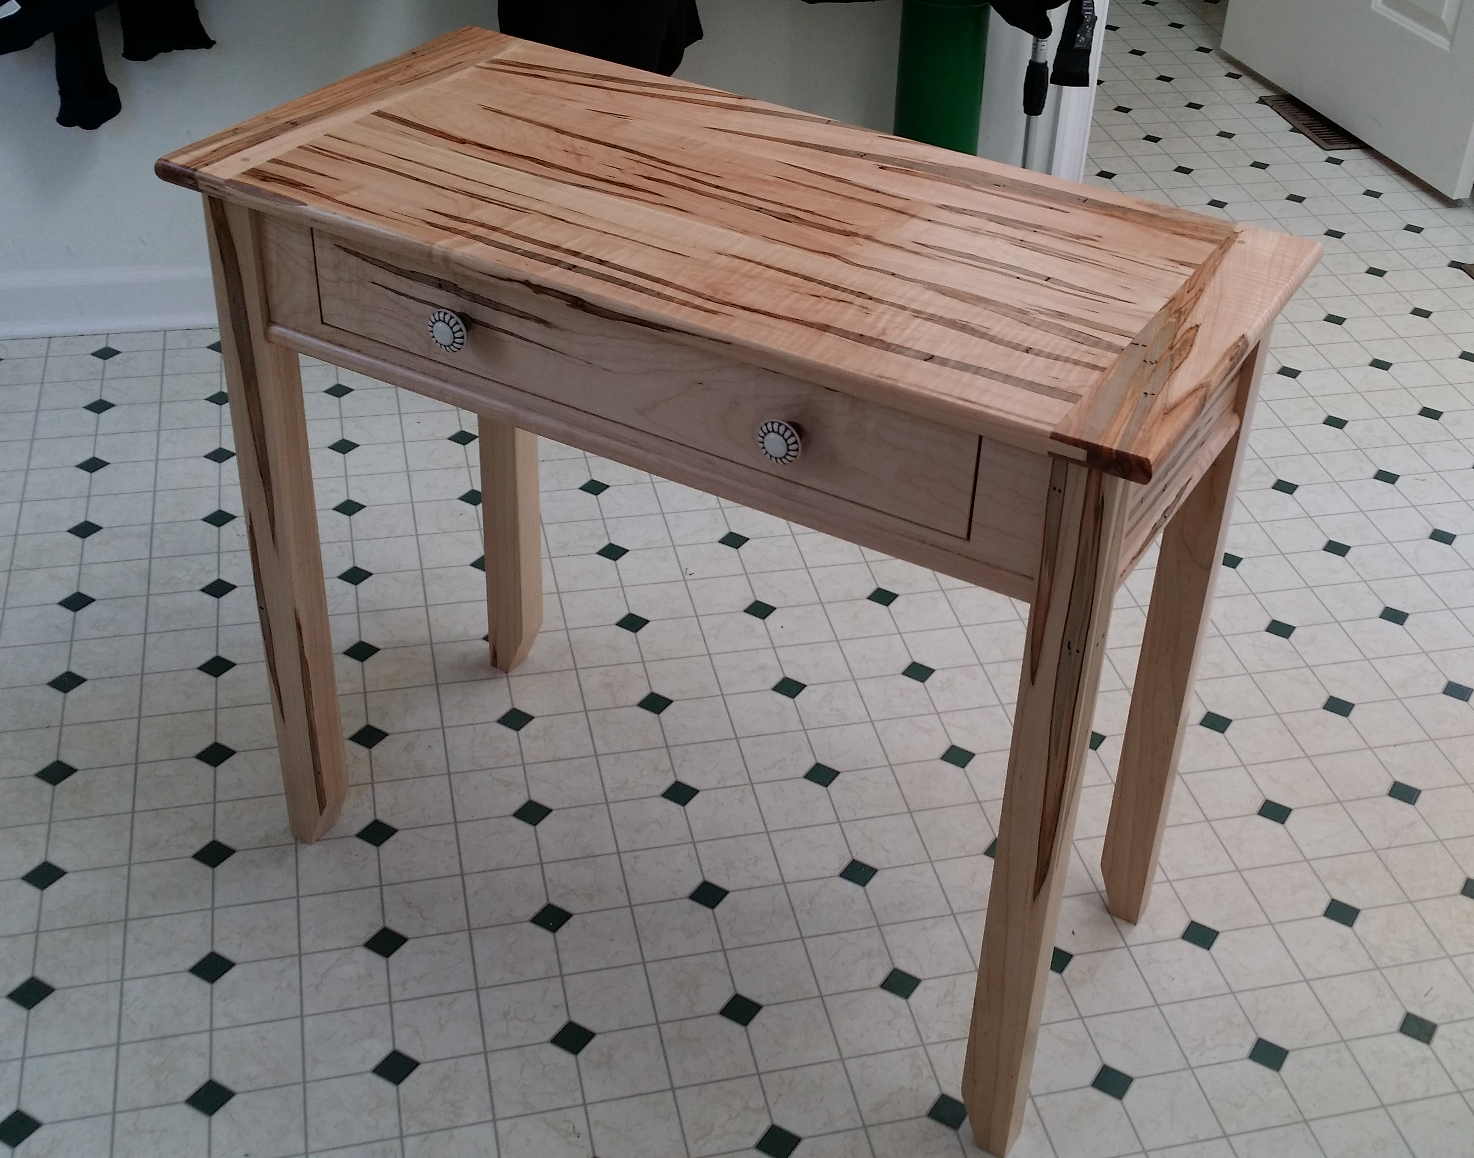
Completed hall table
The ambrosia maple looks gorgeous, and the curly figuring in some of this stock gives it an extra dimension that I was delighted to see when working it. It will almost be a shame to put things on top of it and hide that delightful grain. (But we will, inevitably.)
After living with the new table for a few days, Julie and I decided that the drawer knobs were wrong. They are a medium brown on the stems and behind the front, but the front is too white. So I replaced them with these oil-rubbed bronze knobs instead:
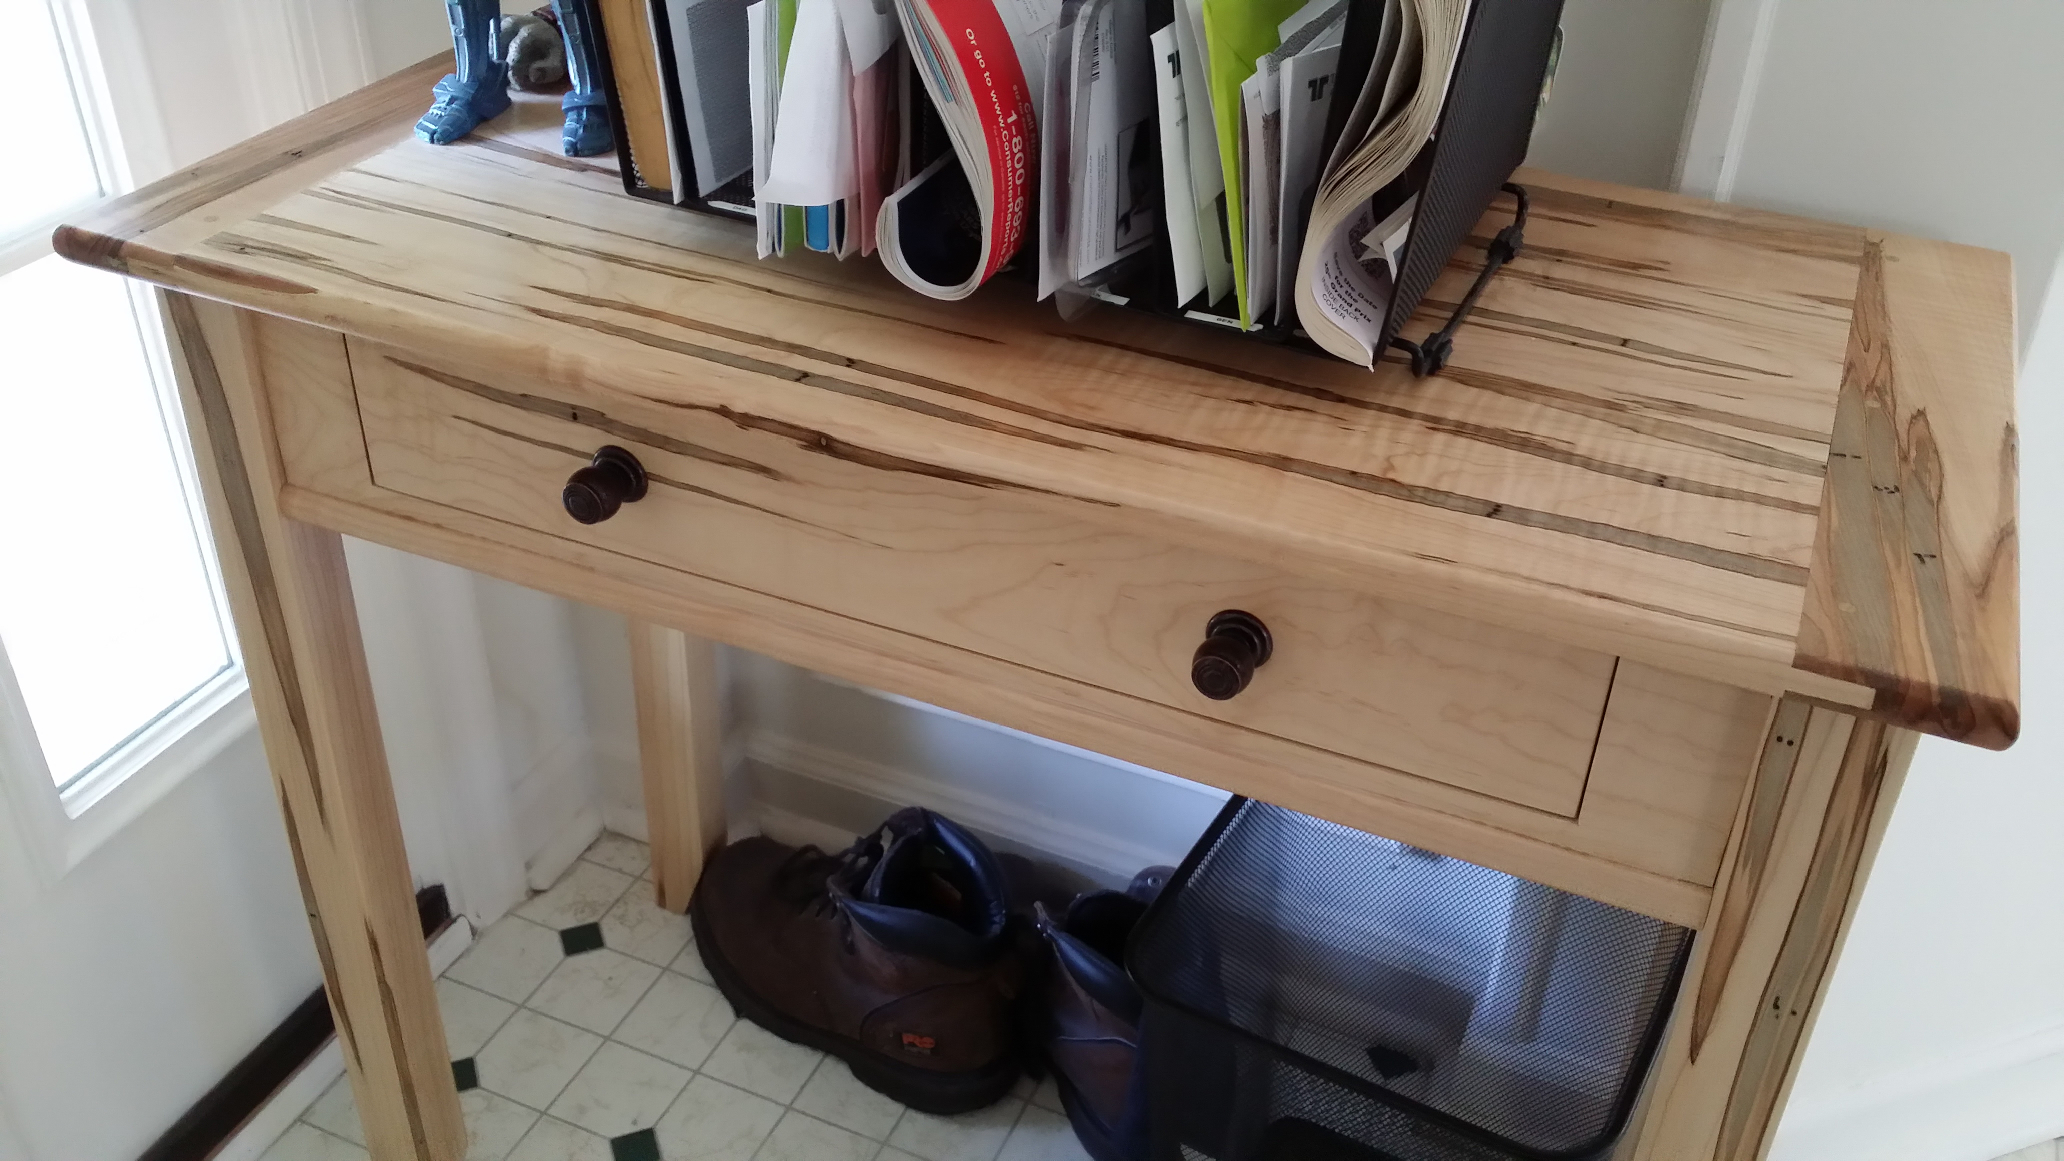
Same table, but drawer pulls replaced with bronze ones.
Recent Comments