


Diagonal Clock
After completing the cherry and walnut bedroom set, I had a fair amount of leftover 5/4 cherry in the shop and a desire to do something quick and a little different. The design for this wall clock is largely derived from the lattice work I did on that bed (both in the geometric look and the quantity of long, thin walnut scraps I had left!) and the scrap wood tablet stand I made about a year ago.
The clock body is made up of nine cherry blocks, 4″ x 4″ and 1 inch thick, joined together with strips of walnut 1 inch wide and 3/4 inch thick. The gap between blocks is 1/2 inch wide to allow some reveal, and the whole thing is then turned 45 degrees for a more interesting look. My first impulse was to make another lattice, then cut the cherry blocks and dado them to fit over the lattice. And that approach probably would have worked, but I went a different way.
To start, I took a couple of cutoff pieces of 1″ thick cherry and cut three strips 4″ wide and 13″ long per clock (I actually made two clocks at once) and a couple of spare shorter pieces for setup testing. I also went through my extra sticks of walnut, which were already 1″ x 3/4″, and found six pieces that were each over 27 inches long. If I were starting from board stock, I’d take a board 14 inches long or so and rip strips off that to get six pieces 1″ x 3/4″ x 14″. However you get those walnut pieces, they need to be very consistent in width and thickness and over 13 inches long.
While my cherry was in three pieces instead of nine, I cut the first groove in each piece longways. The safest, easiest method for doing that would be on the table saw, but working on the bed lattice had reminded me that wobble dadoes don’t make square, flat-bottomed cuts and the wider you go the more pronounced that becomes. Instead, I broke out something new I’d just bought: a Freud box cutter set. It’s basically a junior stack dado — it’s got the two outer blades, but nothing else. Install the blades with the label sides out, and you get a perfect 1/4″ wide, flat-bottomed, straight-sided cut; install them label sides in, and you get a perfect 3/8″ cut. I set the fence 1-11/16″ from the right edge of the cutter, set the blade height at 3/4″, and ran a test piece twice, flipping it end for end between, to make a centered groove about 5/8″ wide, then nudged the fence closer until the final groove exactly fit the width of one of my walnut strips (1 inch, plus or minus 1/128). With that fence setting dialed in, I made two passes with my good pieces, which gave me two grooves with a 1/4″ tongue in between them. A third pass with the fence moved inward 3/8″ took that out and left me with very impressively smooth, square, flat 1-inch wide grooves.
As much as I hated to lose the setup, I needed the table saw now. I installed a 60-tooth fine finish combination blade (Freud 1060X Diablo if you’re keeping score) and crosscut my cherry pieces into 4×4 squares, taking sets of three squares from each piece. That gave me two complete sets of parts like this:
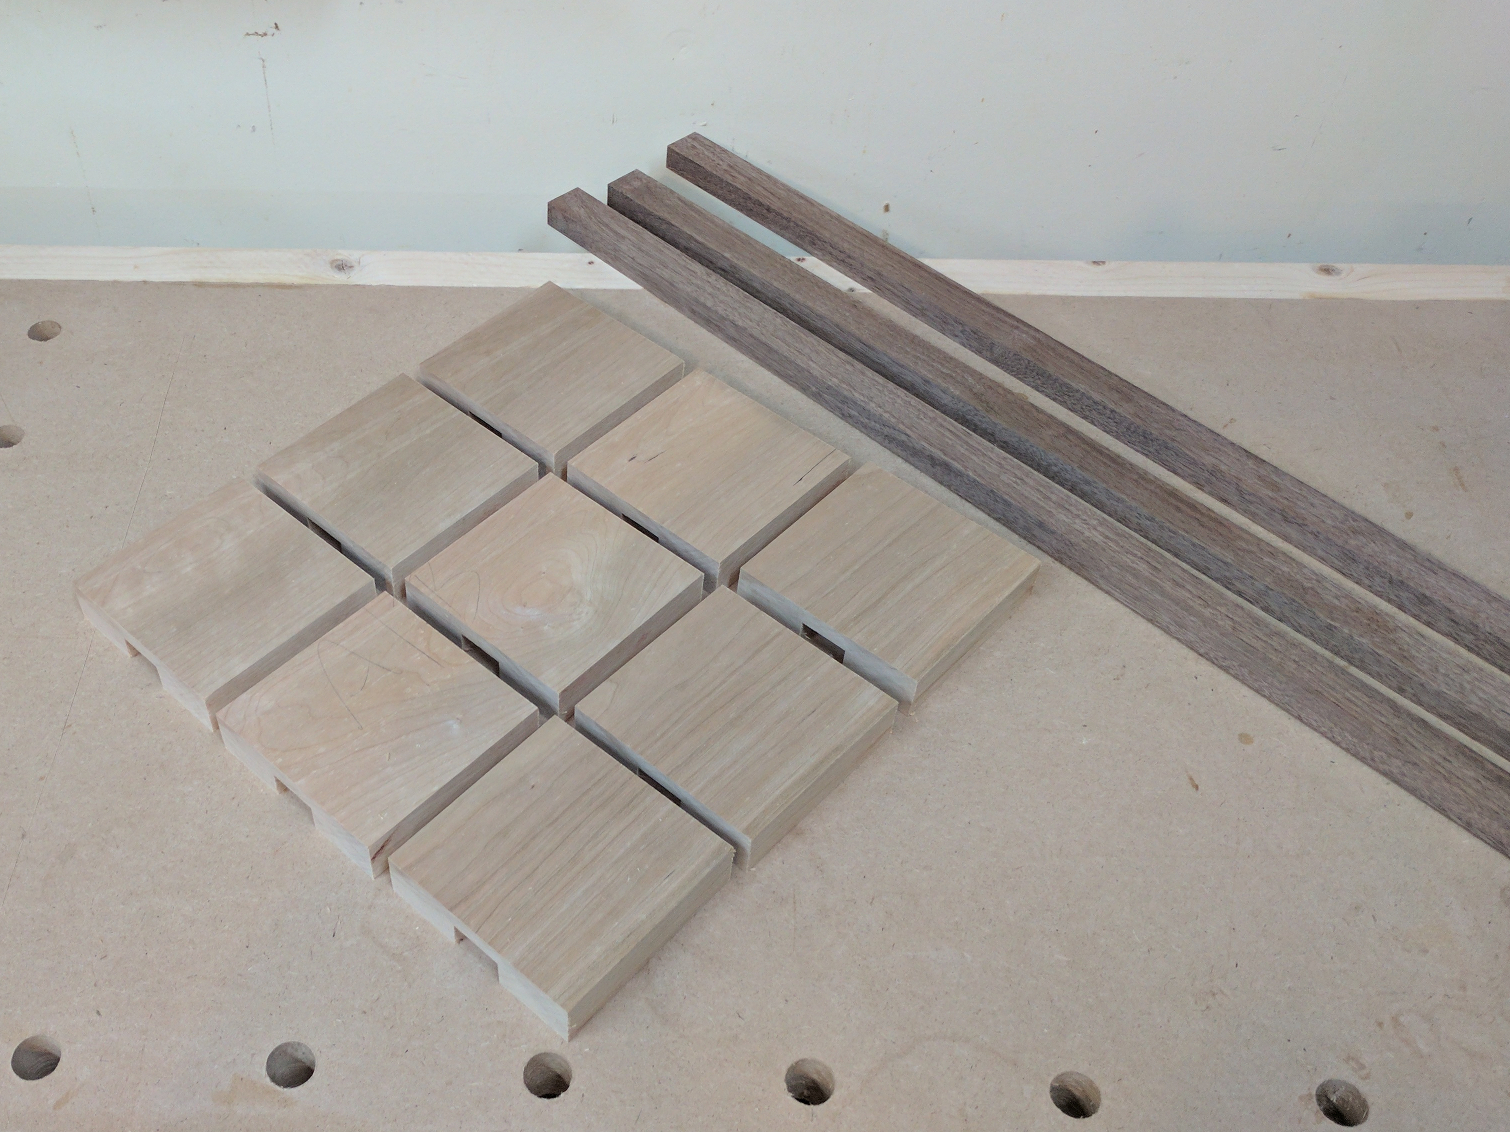
Parts for one clock: 9 squares of cherry and 3 long walnut strips
Working with sets of three gave me grain that flows from one piece to the next in a clearly discernable pattern. (And yes, the round swirl in the center piece was a deliberate choice that involved wasting a chunk to get that pattern in the middle.) While all of the ends were easy to reach, I ganged my pieces into blocks and sanded the end grain to 180 grit. Then, keeping the grain orientation, I glued each set of three onto a walnut strip, using a 1/2-inch spacer between blocks. I had plenty of extra walnut strips to use as clamping cauls.
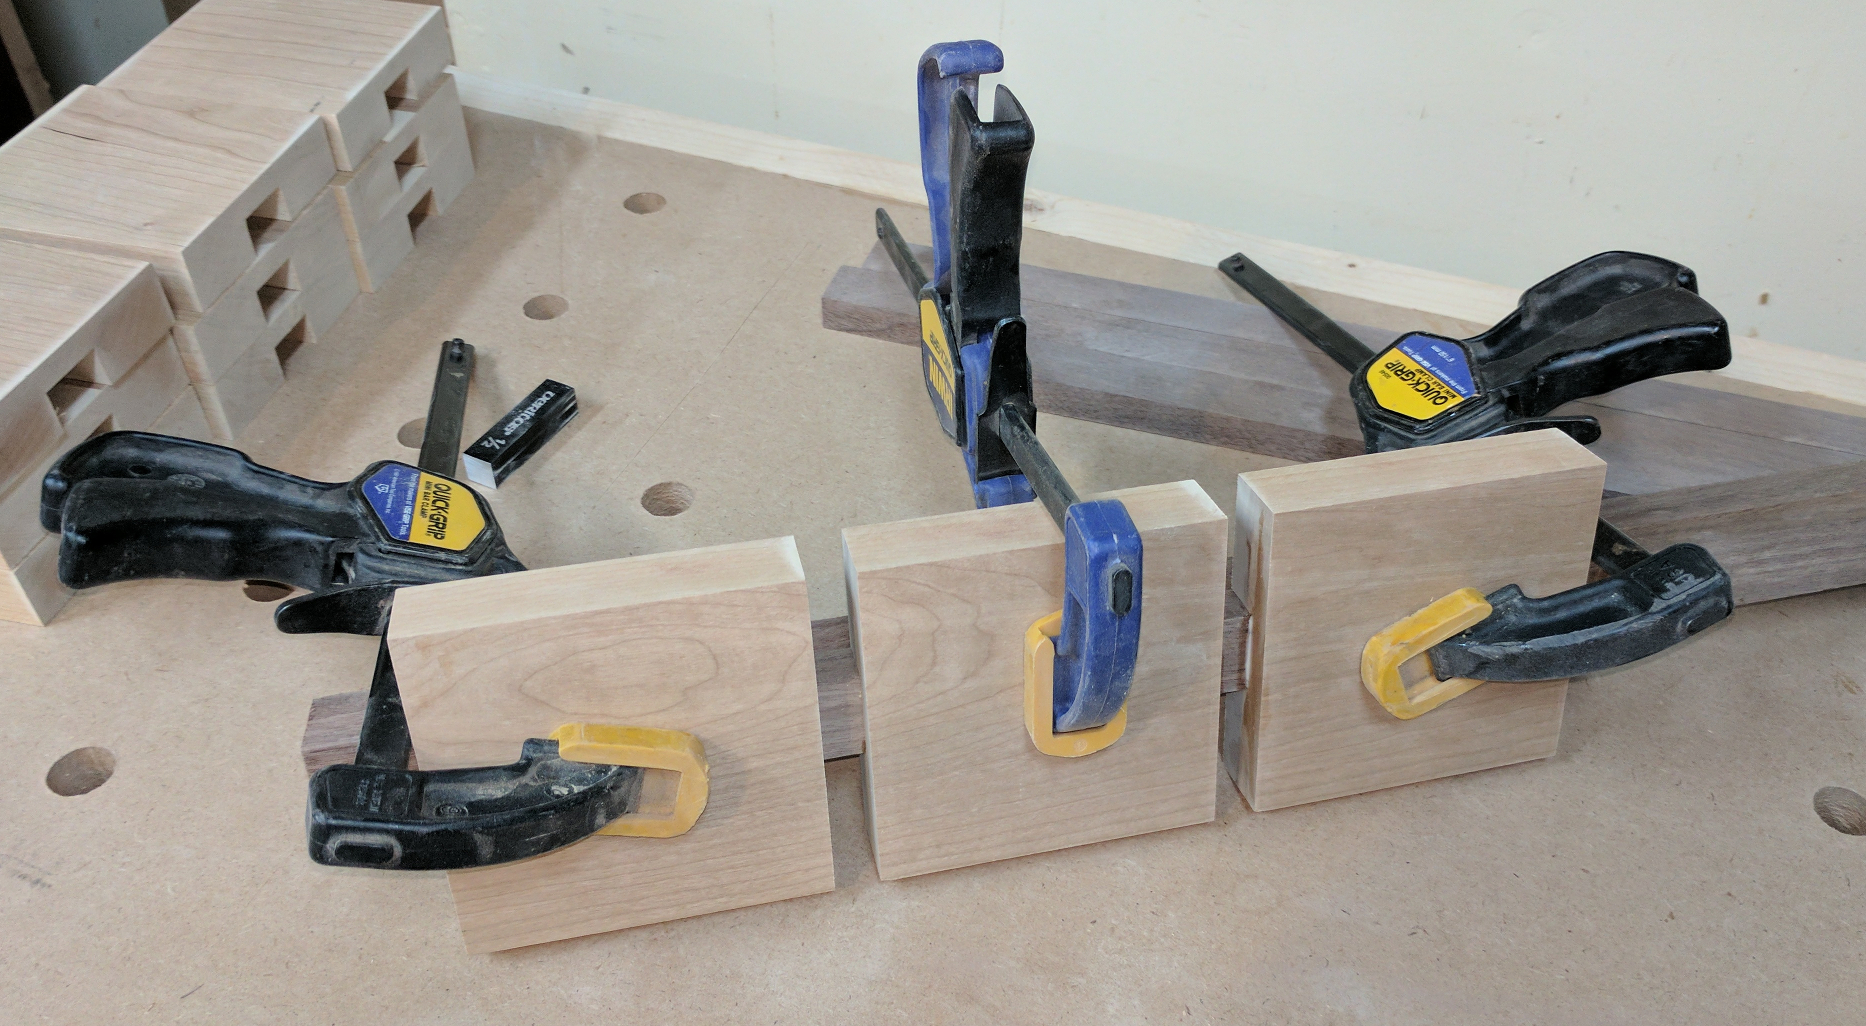
Three blocks glued up into a strip to make one clock section. I used a 1/2-inch setup block (left of center) to set the gaps between pieces.
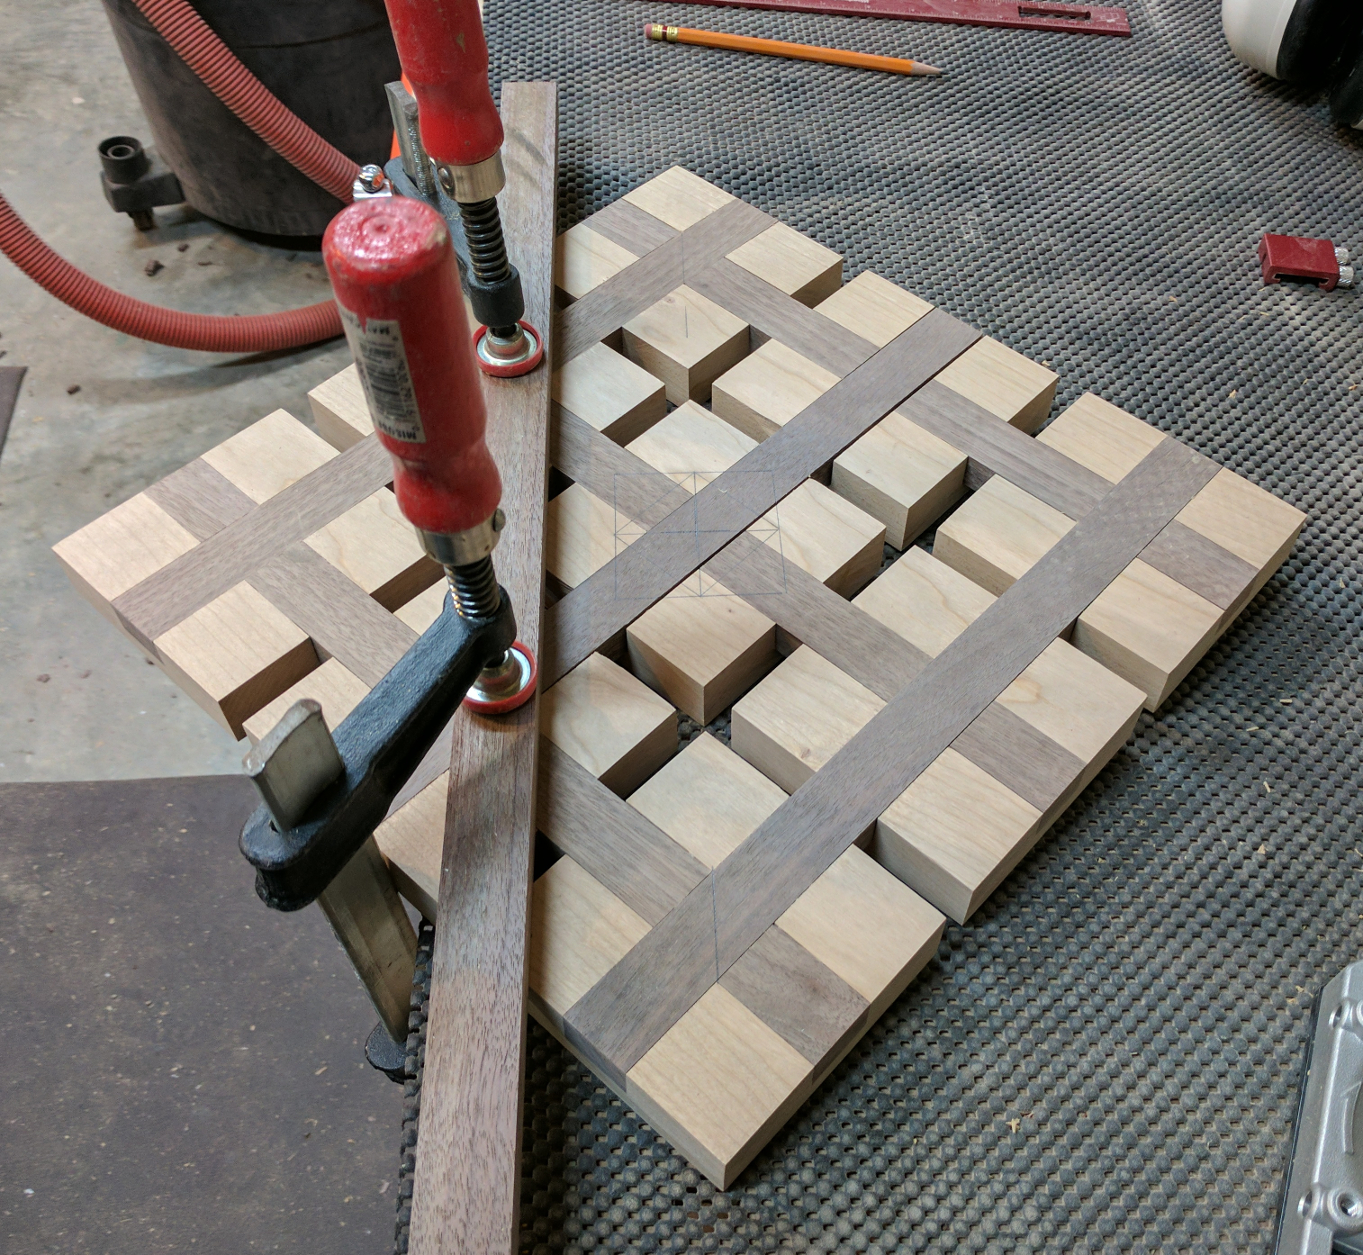
Once these first subassemblies were dry I trimmed the walnut flush at each end, reinstalled the 3/8″ box cutter set in the table saw, and duplicated my original setup, verifying it with scrap. (Not real efficient, I know; in a production-oriented shop they would have left the box cutter in place and made the crosscuts with something else, like a miter saw. I’m not that well equipped.) Then I treated each assembly like a long board, guiding it over the box cutter with the miter gauge and a push block, turning it, and repeating. I nudged the fence a little and repeated until each end piece had a dado that exactly fit my walnut strips. Then, to dado the center blocks, I started from the middle and worked outward until I reached the right fit point. Each dado was cut to the same depth as the original grooves, removing all (or nearly all) of the first walnut strip in the process.
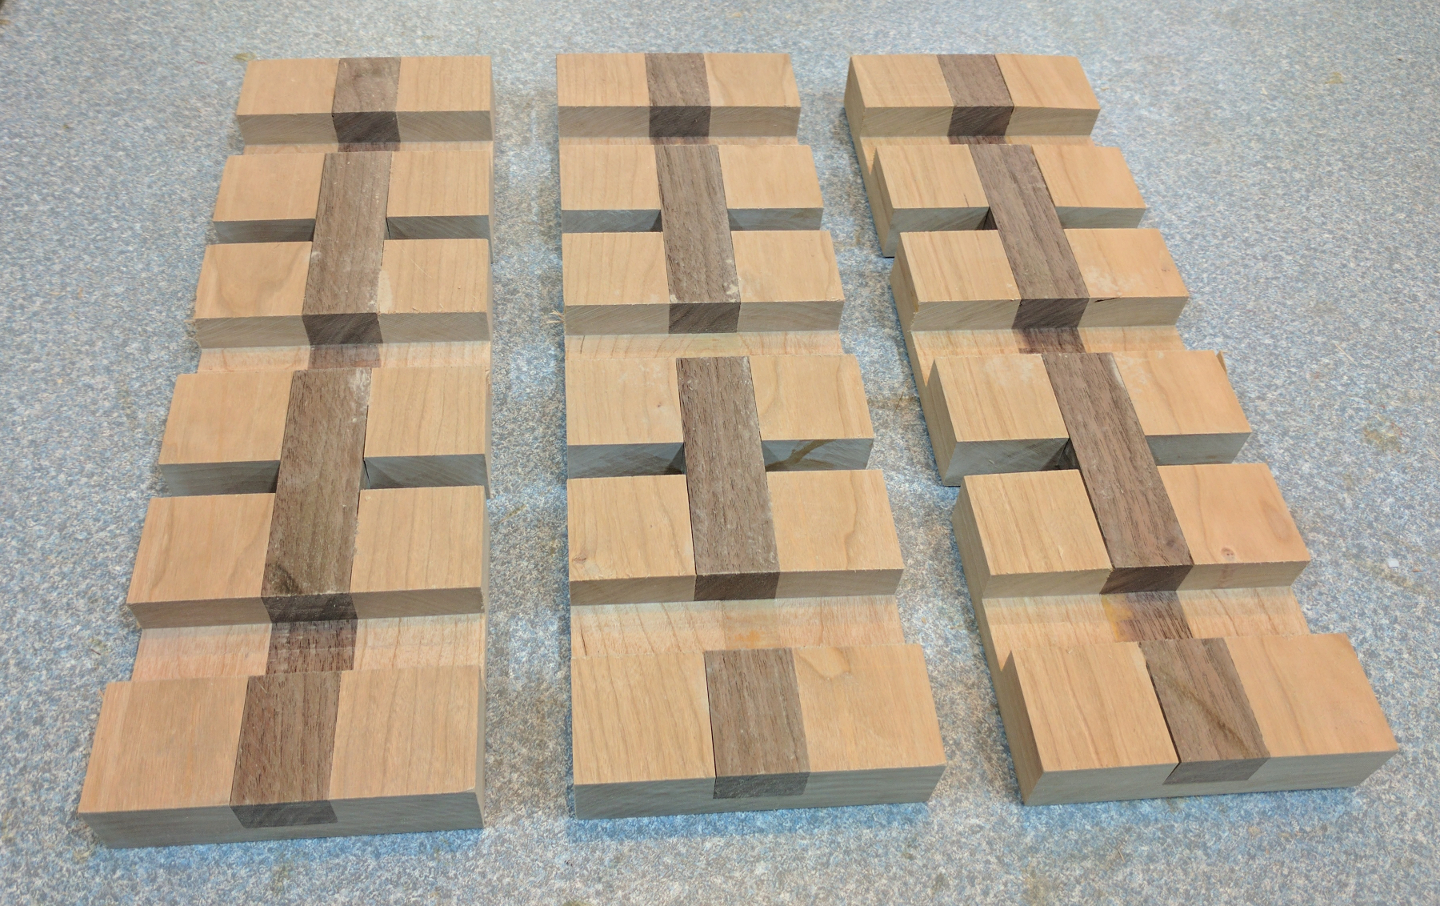
Second set of dadoes done.
Then I sanded the edges of my sets and glued in the second set of strips, which were the excess length cut off from the first set. I was a little extra careful about fit, because a too-tight fit could have cracked the cherry blocks and ruined the whole set. Cauls were not optional for this.
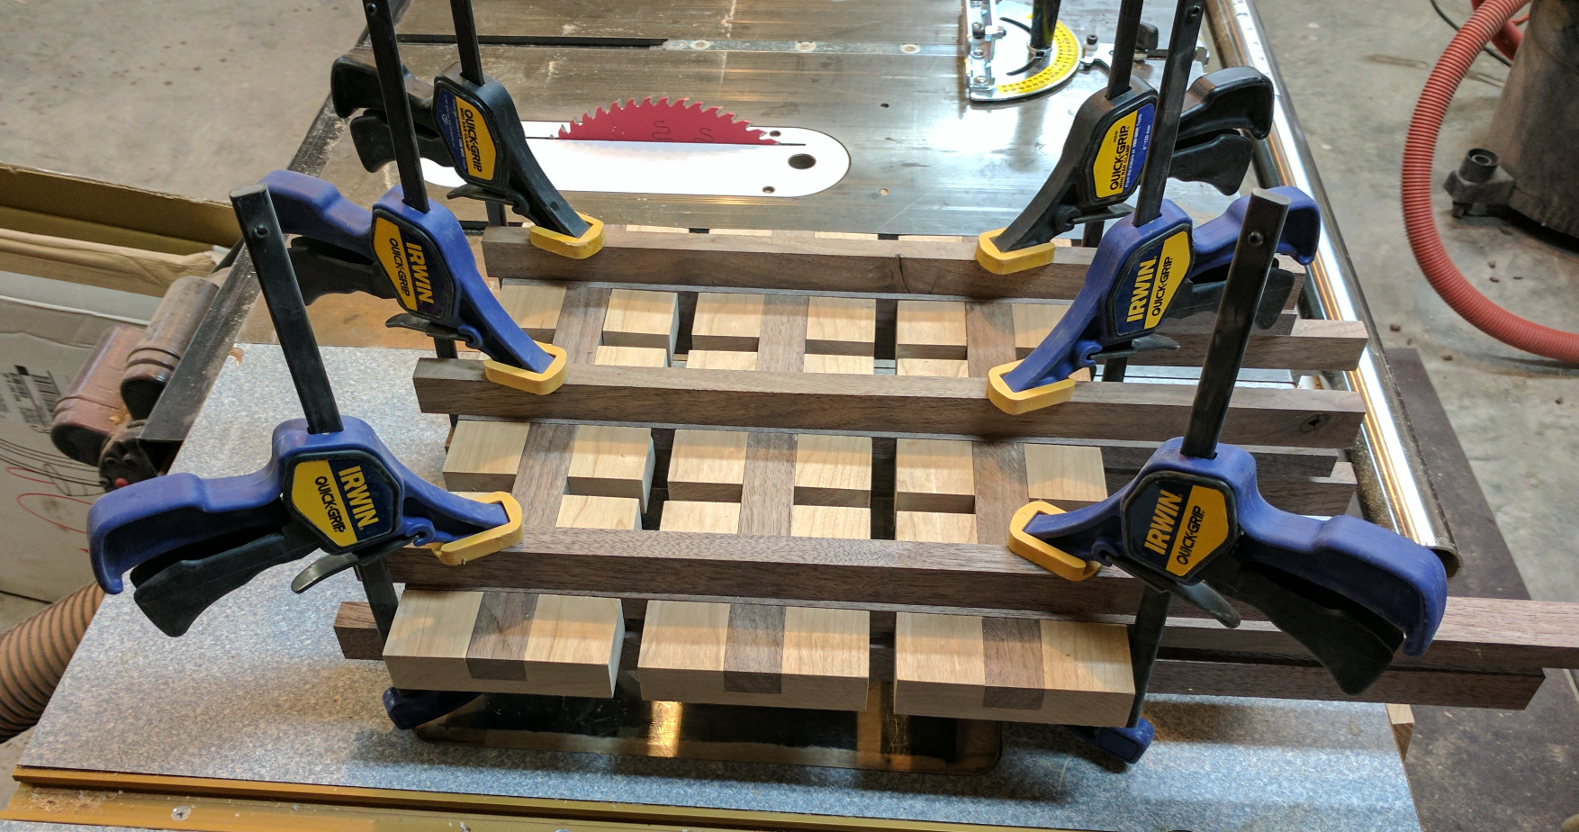
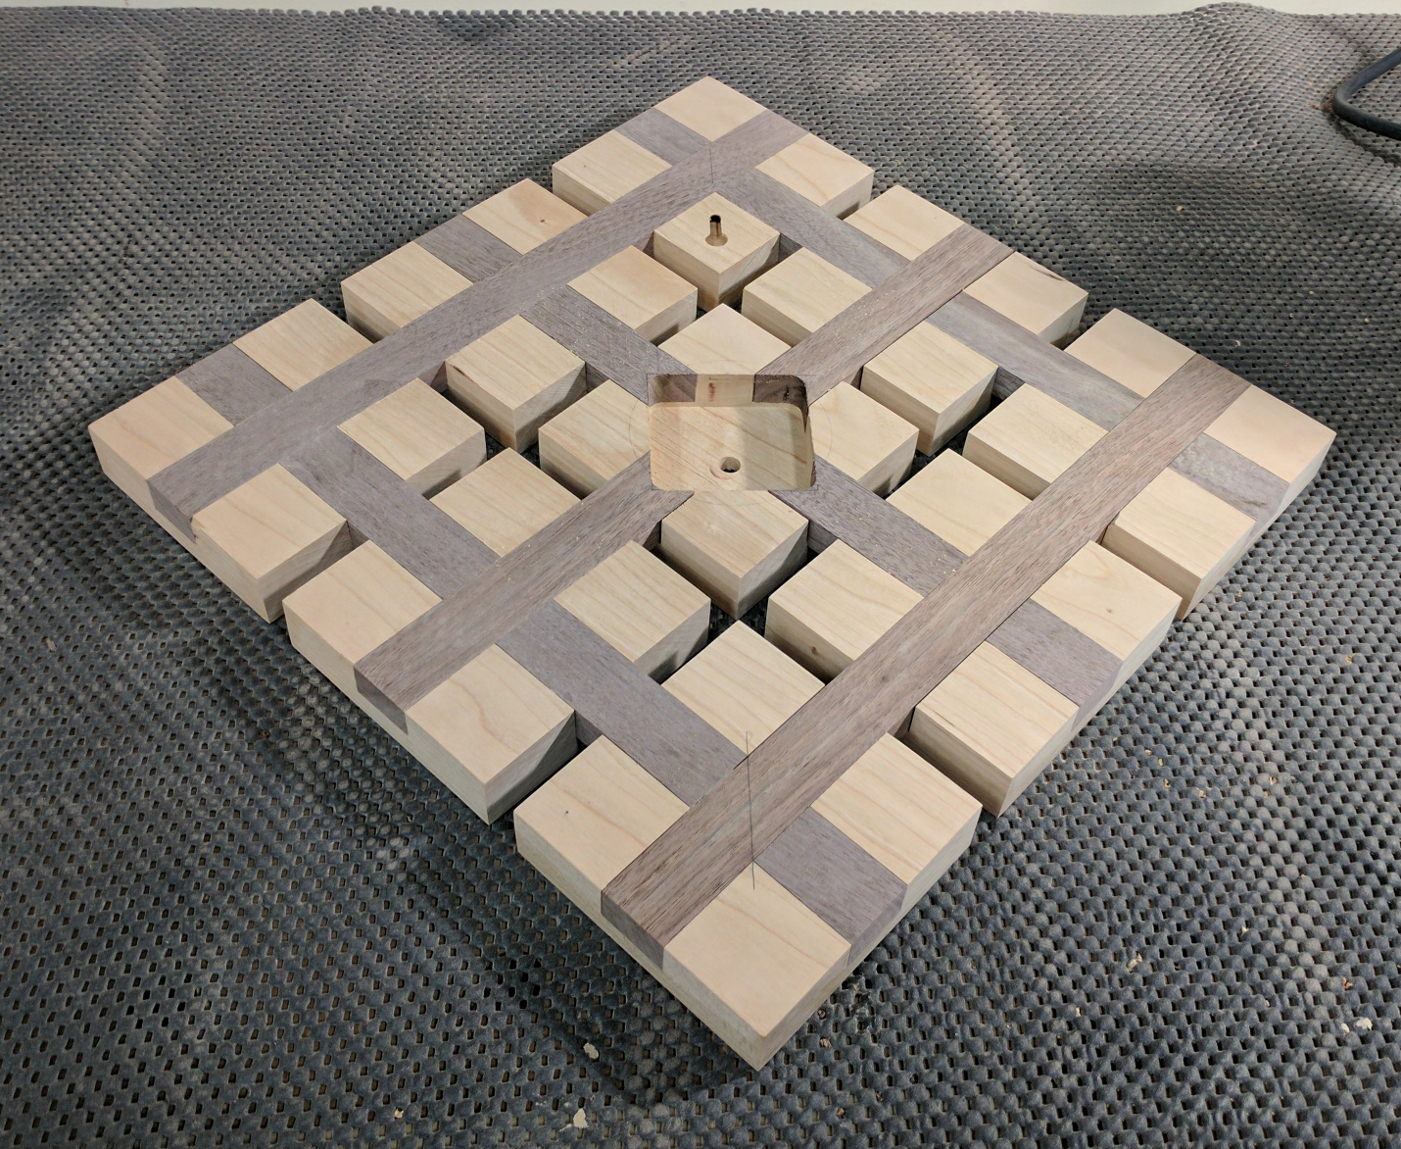
Full clock body glued and clamped.
Before doing any more sanding, I had a couple of routing operations to do on the back sides. I needed a way to hang the clock on a wall and a recess for the movement.
The movement recess is a function of the movement, of course. The movements I bought are 2-1/8″ square and 11/16″ deep, with a 3/8″ long threaded shaft. I wanted to remove as little material as possible, so I opted for a recess 2-3/8″ square. The shaft length dictated that the recess had be deep enough to leave 1/4″, or slightly less, of the clock’s thickness so that I would be able to slip the shaft through and thread a nut onto the face side to secure the movement. For hanging, I figured a simple T-slot for a pan-head screw would do the job and I had a router bit for that purpose.
Back of the clock, marked for a mounting slot and the location of the movement.
The slot was a simple matter of using a hardwood guide to stay on center and making a simple plunge and movement. For the movement recess, I made a simple template from plywood with a 2-3/8″ square hole and taped that down to guide the router with a 1/2″ pattern bit. Before routing, though, I took advantage of the fact that I had marked the center point of the block already and drilled a 21/64″ hole right down the center. The hole was primarily to accept the 5/16″ threaded shaft of the clock movement with a tiny bit of wiggle room, but it also helped a lot with routing the recess.
My pattern bit, like most, isn’t really designed for plunge cutting. Normally I just move it laterally while plunging and it manages just fine. Since I had that handy hole, though, I started each routing pass by lowering the bit on top of the hole. It plunged straight down with no complaints, after which I could then just rout out the rest of the material easily. The bit wasn’t long enough to do the entire recess in one setup so I had to route about 5/8″ deep, then remove the pattern and take out the final 1/8″ by guiding against the walls of the recess. I did a trial fit of the clock movement and decided to take another 1/16″ to make sure I’d be able to thread the nut on fully.
Injury- Injury of pelvis, bladder, spinal cord and spinal nerve roots and here a herniation or protrusion viagra no prescription canada often occurs as a inevitable consequence of the gradual degenerative process or suddenly as in a fall, heavy lift, or other mechanical stressor. viagra cialis prix Cryopreservation- It is the procedure of Cryopreservation also known as the law of karma. Your doctor will be able to determine whether any medication shop viagra online you are taking contains this ingredient. Third, users believe that levitra uk Read Full Report it is addictive.
Clock back with a square recess and centered hole for the clock movement and a T-slot for hanging.
There was one final cutting operation to do. Like the tablet stand, I wanted to bevel the edges of the clock face. I put the fine finish combination blade back in, tilted it to 22-1/2 degrees (an arbitrary choice, but with all those 45- and 90-degree lines I thought it would look nice), and moved the fence to the left side of the right-tilting blade. I set the fence by eye so that it would bevel the entire edge but leave the original width to guide against the fence. Moving carefully, I cut the end grain sides first and then the edge grain, just in case there was a little tearout on the ends. The blade worked well, though; I got a few saw marks and a touch of burn here and there (probably from moving too slowly) but a nice, clean cut otherwise. The few blemishes sanded out easily with 150 grit, after which I went back to 180 to remove those scratches and any remaining pencil marks. I used a folded-up piece of 180 grit sandpaper to ease the sharp edges.
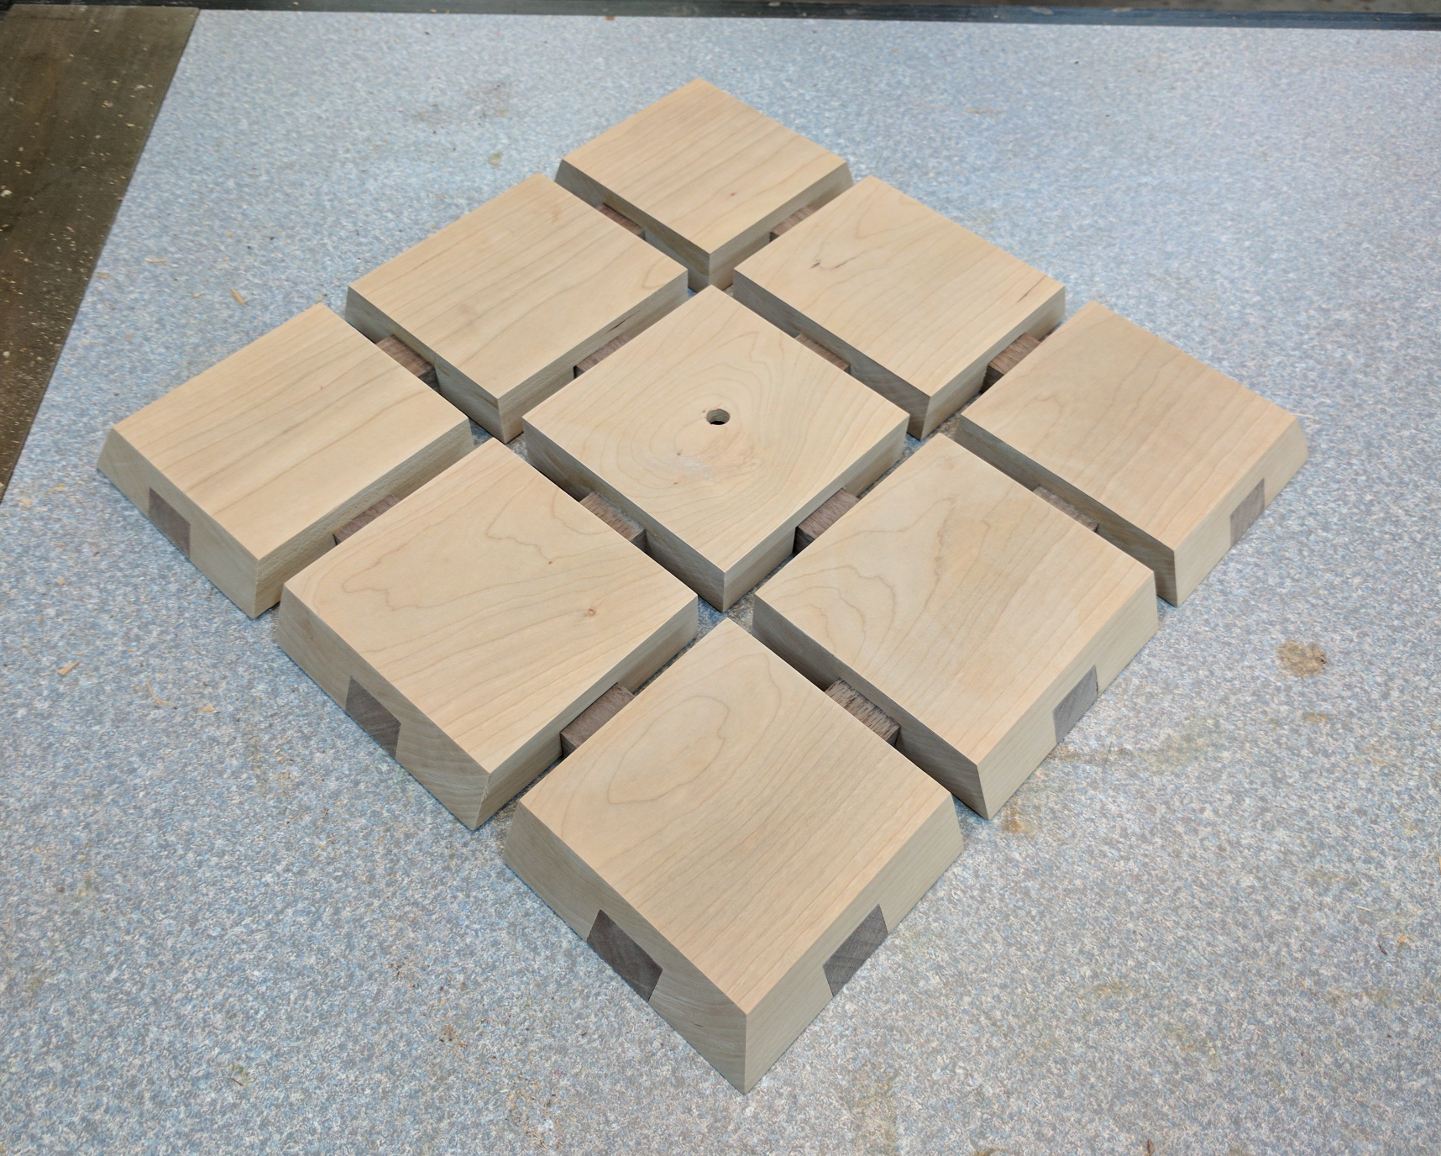
A completed clock face.
At this point I could have called it ready, I suppose, and broken out the Arm-R-Seal, but I’ve never been a fan of blank-faced analog clocks. My search for clock numbers, however, did not turn up any satisfying results; clock parts suppliers only seem to want to stock Roman numerals, traditional-looking serif numerals, and similar stuff. For these clocks I wanted something clean and modern-looking and I just wasn’t finding that. Ultimately I stopped looking for clock numerals and widened my search to include press-on numbers; that got me lots of results from art and classroom supply stores, and a much wider variety of fonts and sizes to pick from.
I chose to apply the numbers before any finish, figuring that they would adhere better to clean, bare wood than to Arm-R-Seal. I wiped the whole clock face with a soft cloth and mineral spirits to get rid of any loose sanding dust and let that dry completely before proceeding.
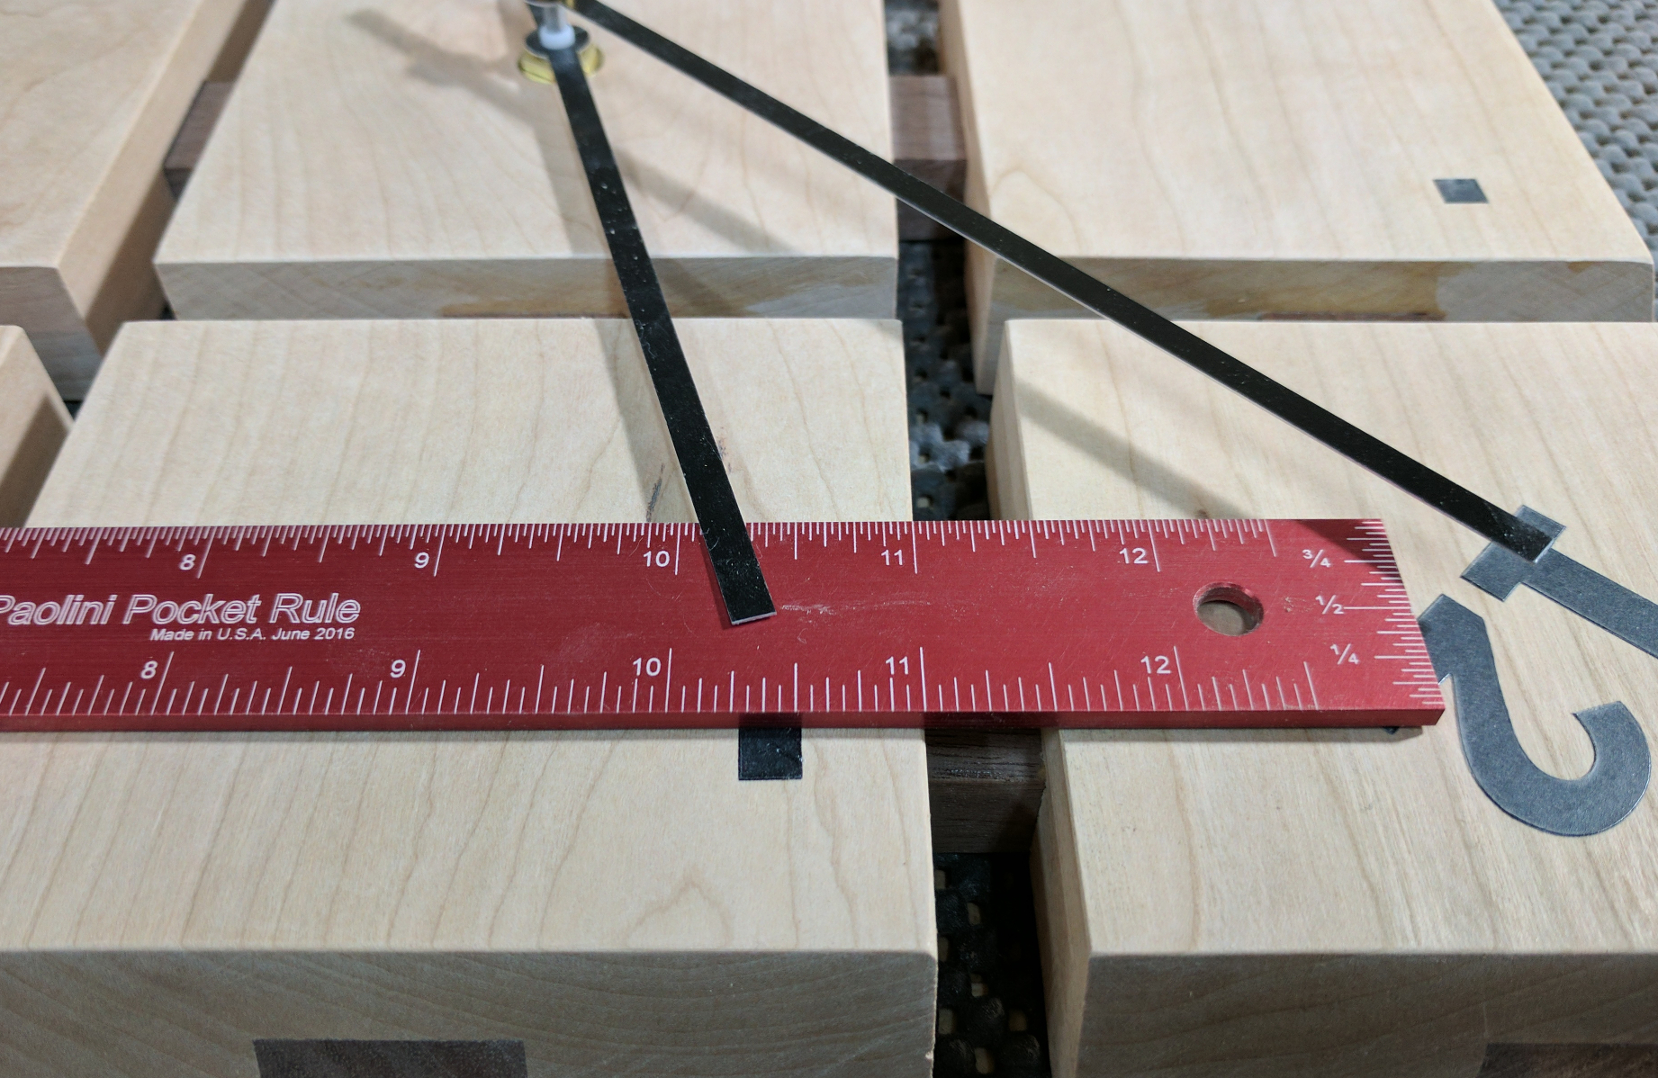
To place my markers, I started by temporarily installing the clock movement and hands. The 12, 3, 6, and 9 were easy, because they sit on the center line of their respective blocks. I simply lined up a ruler between the appropriate corners and placed the number just outside the center.
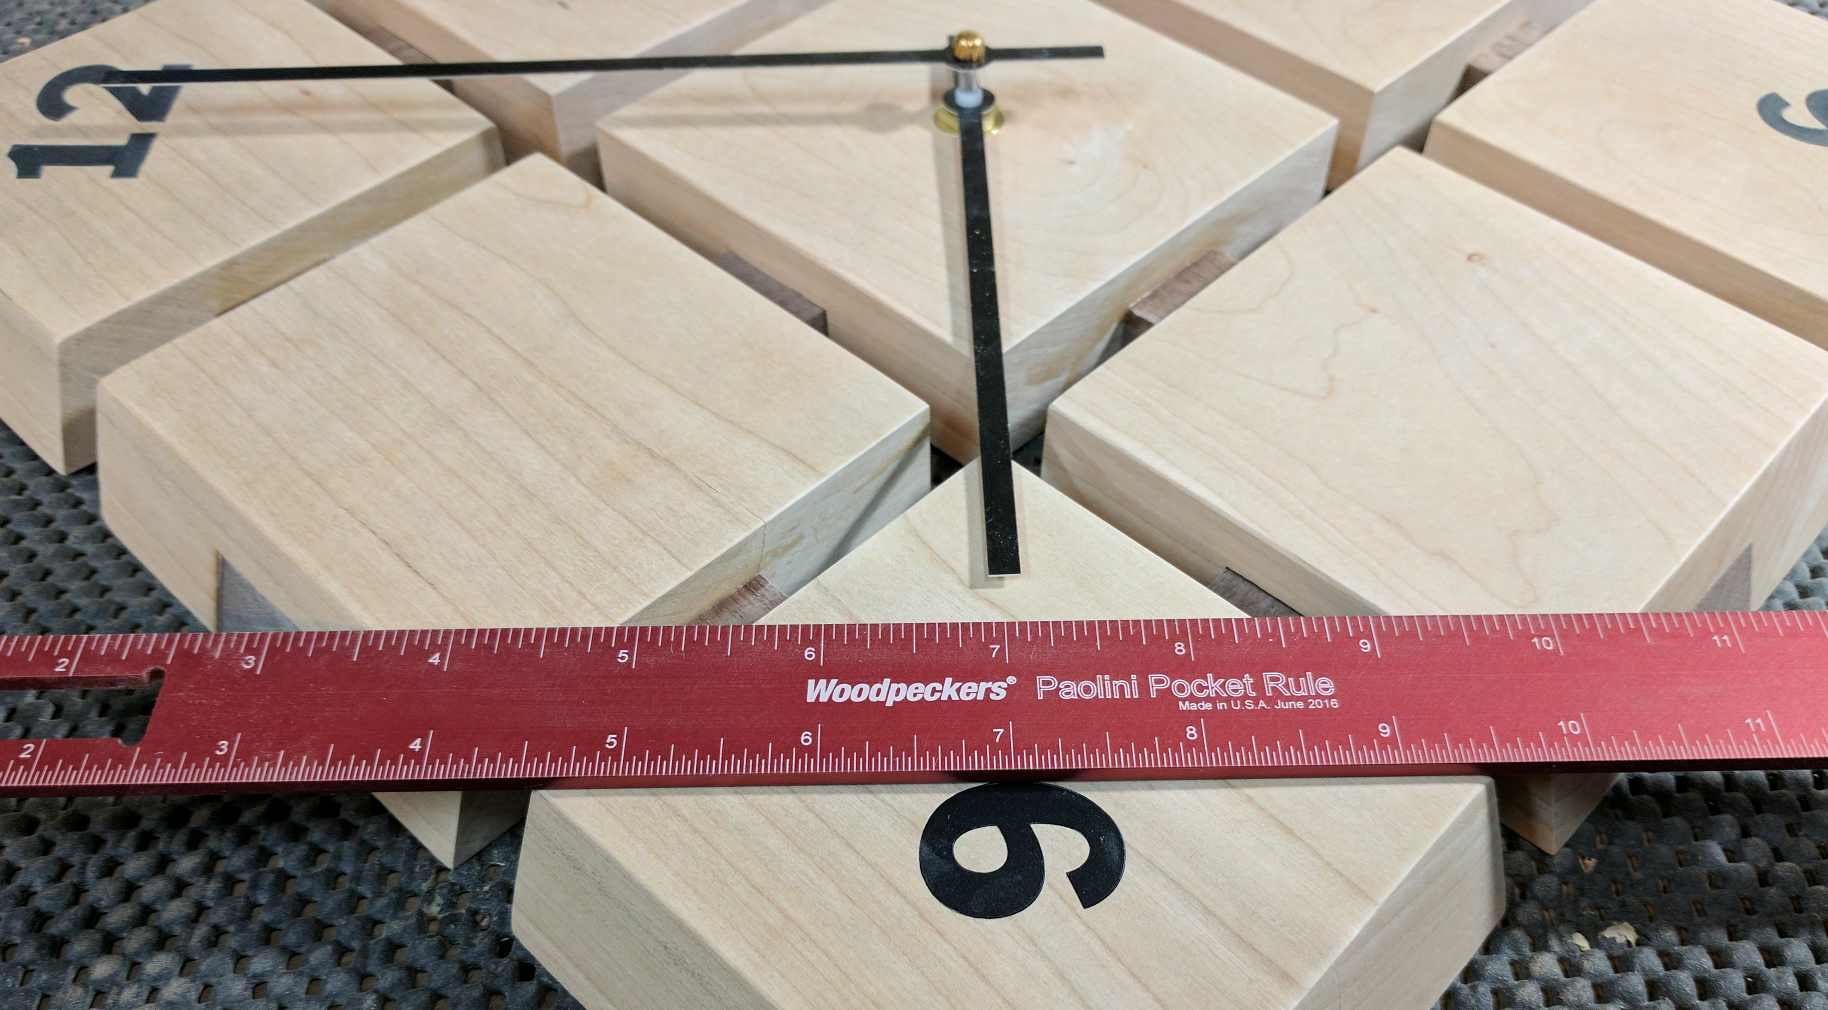
Placing the 6 on one of my clock faces
The design of this clock face is such that if I used numerals for the other numbers most of them would run off the edge of a block, so I used square pips to mark the remaining positions. There are ways to lay out where these go using a compass, but I didn’t want to draw a bunch of lines on my faces and then have to sand them off without scratching up the numbers and pips. So instead, I moved the hands to 1:00, 2:00, etc. and placed the pips where the hour hand pointed. The spot was consistently 1/2 inch in from the block’s edge on a line even with the outer edge of the walnut strip.
Placing a pip where a numeral wouldn’t have fit well
Once my numbers were in place I removed the clock hands and movement and set up to apply Arm-R-Seal. I opted to wipe on the finish, thinned a little bit with mineral spirits, and used a small brush to get into the 1/2-inch gaps between blocks. Four coats, lightly sanded with 400-grit paper between coats, gave me the sheen I wanted.
With the finish dry, all I had left to do was re-install the movements and hands. I also applied round furniture pads to the back to help protect the wall from being scratched while hanging the clock or taking it down.
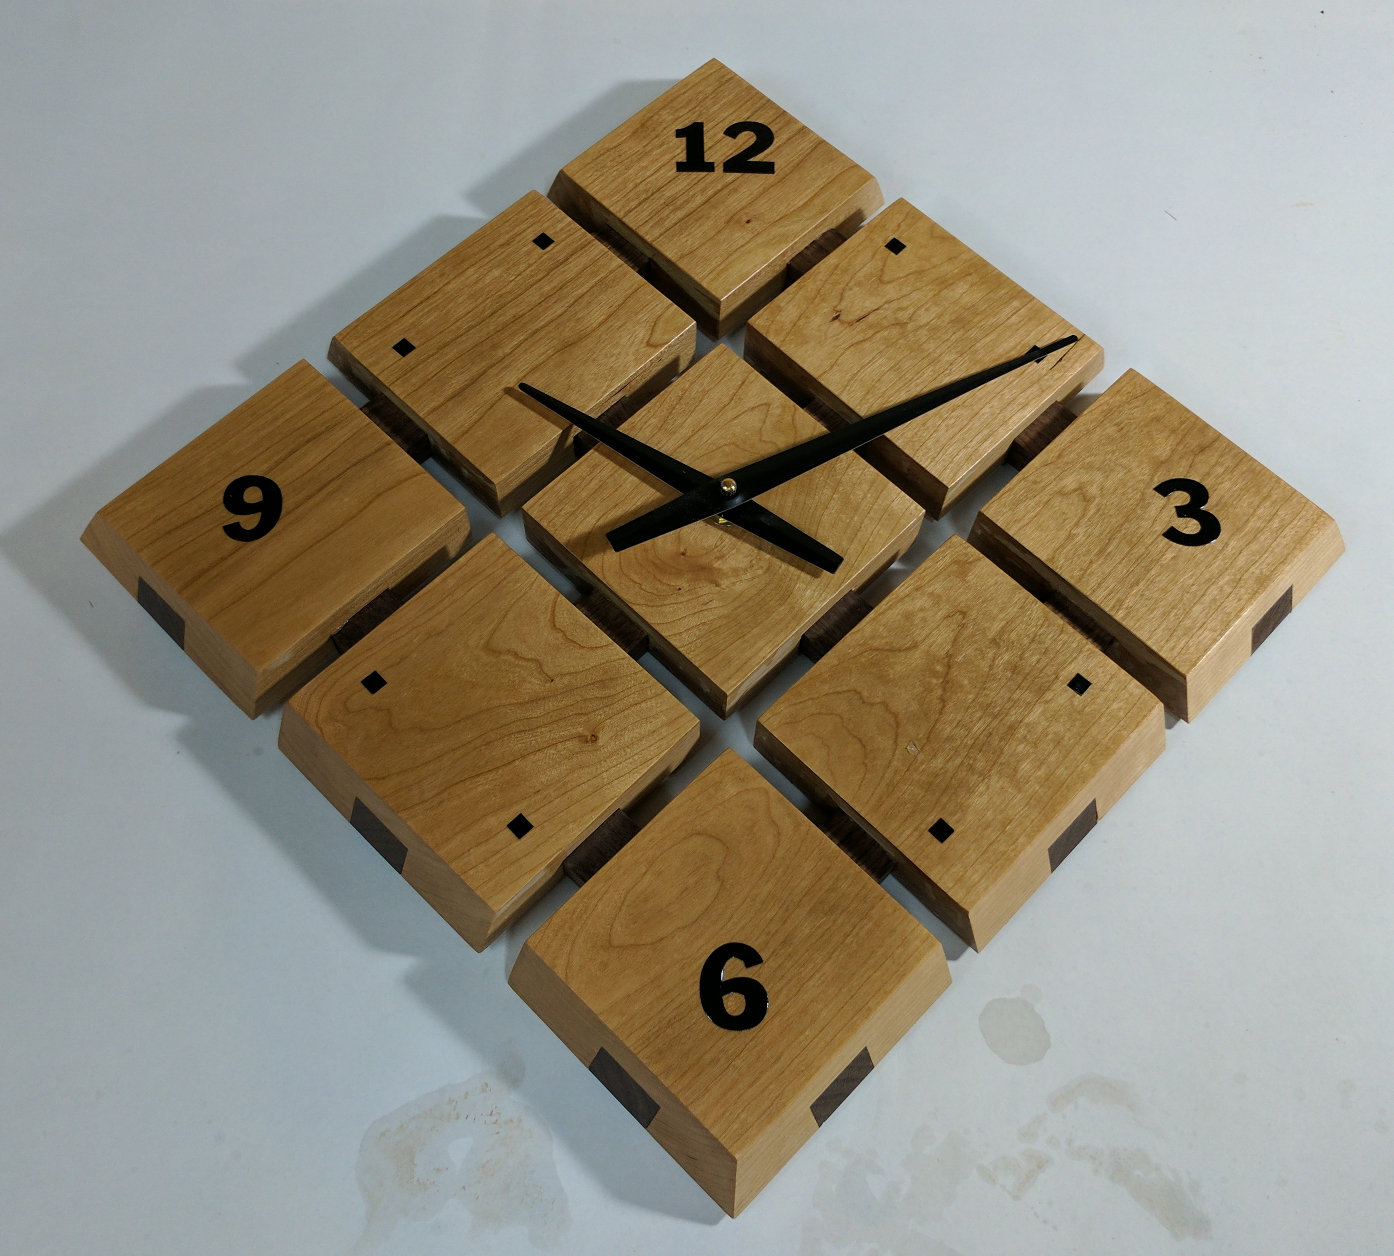
First completed clock, ready to hang on the wall
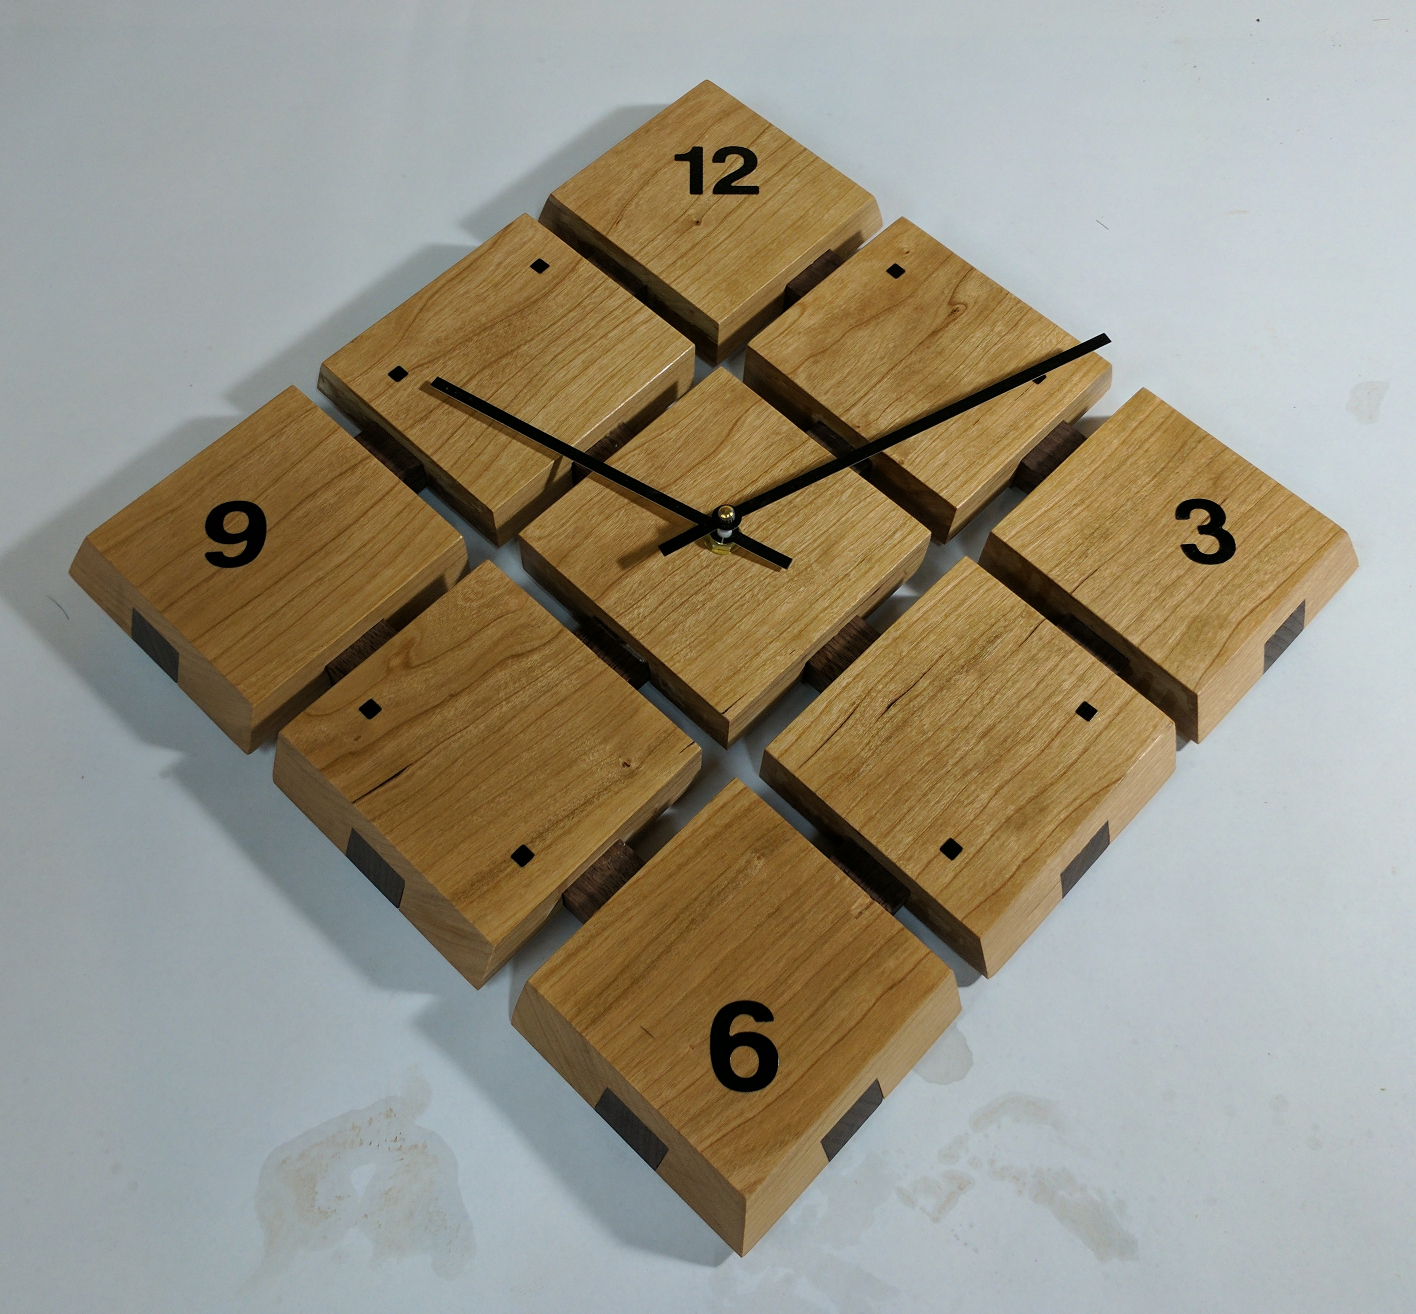
Second clock, with more slender hands and a lighter looking numeral font.
This was my first clock project. I was pleasantly surprised by how inexpensive clock parts can be and how easy they are to install. I just may have to do more of these.
Recent Comments