


Scrap wood cutting boards
Since getting my shop back in October I’ve built a bed, a night stand, a laptop desk, a closet system, and a full-sized computer desk. I’ve always tended toward large projects, usually furniture pieces and the like. Inevitably that means that I generate a large number of cut-offs and scraps that are big enough that it’s hard to throw them away because they look like they ought to be big enough to be useful … somehow. But until I figure out how, they pile up in the shop, cluttering things up and getting in the way.
Thanks to the computer desk I had a lot of 3/4, 1, 1-1/2, and 2-inch cherry in lengths from 1 to 3 feet and widths from 2 to 6 inches. And despite using a full board of soft maple to make Julie’s cargo holder, I still had a couple of 20-inch cut-offs of 5/4 maple.
Inspiration struck as I was cooking dinner and noticed that the bamboo cutting board, my preferred work surface in the kitchen, was splitting. I only got it in August, so this is completely unacceptable. And I remembered how difficult it was to find a cutting board in the size I like that isn’t either hideously expensive or cheaply made. A little research was in order.
Cutting boards, I learned, are similar to butcher blocks. Wood is a preferred material because it’s gentler on knife edges than stone or glass/Pyrex (which, if you’re a fan of Alton Brown, you already know is “Dark Lord of the Sith evil”). But while you can make cutting boards from any wood, it’s a very bad idea to use porous, open-grained woods like oak or ash — those pores make outstanding breeding grounds for bacteria and can lead to cross contamination. End grain maple is ideal because the fibers part around a knife edge and then close up again, making the board self-healing, but it takes a decent thickness to be durable. Side grain, I learned, is almost as good. And cherry is very similar to maple in its porosity and grain, making it a very good material as well.
I went to my scrap pile, which was threatening to engulf my drill press, and pulled out any piece at least 17 inches long and an inch or more wide. Here’s what I ended up with:
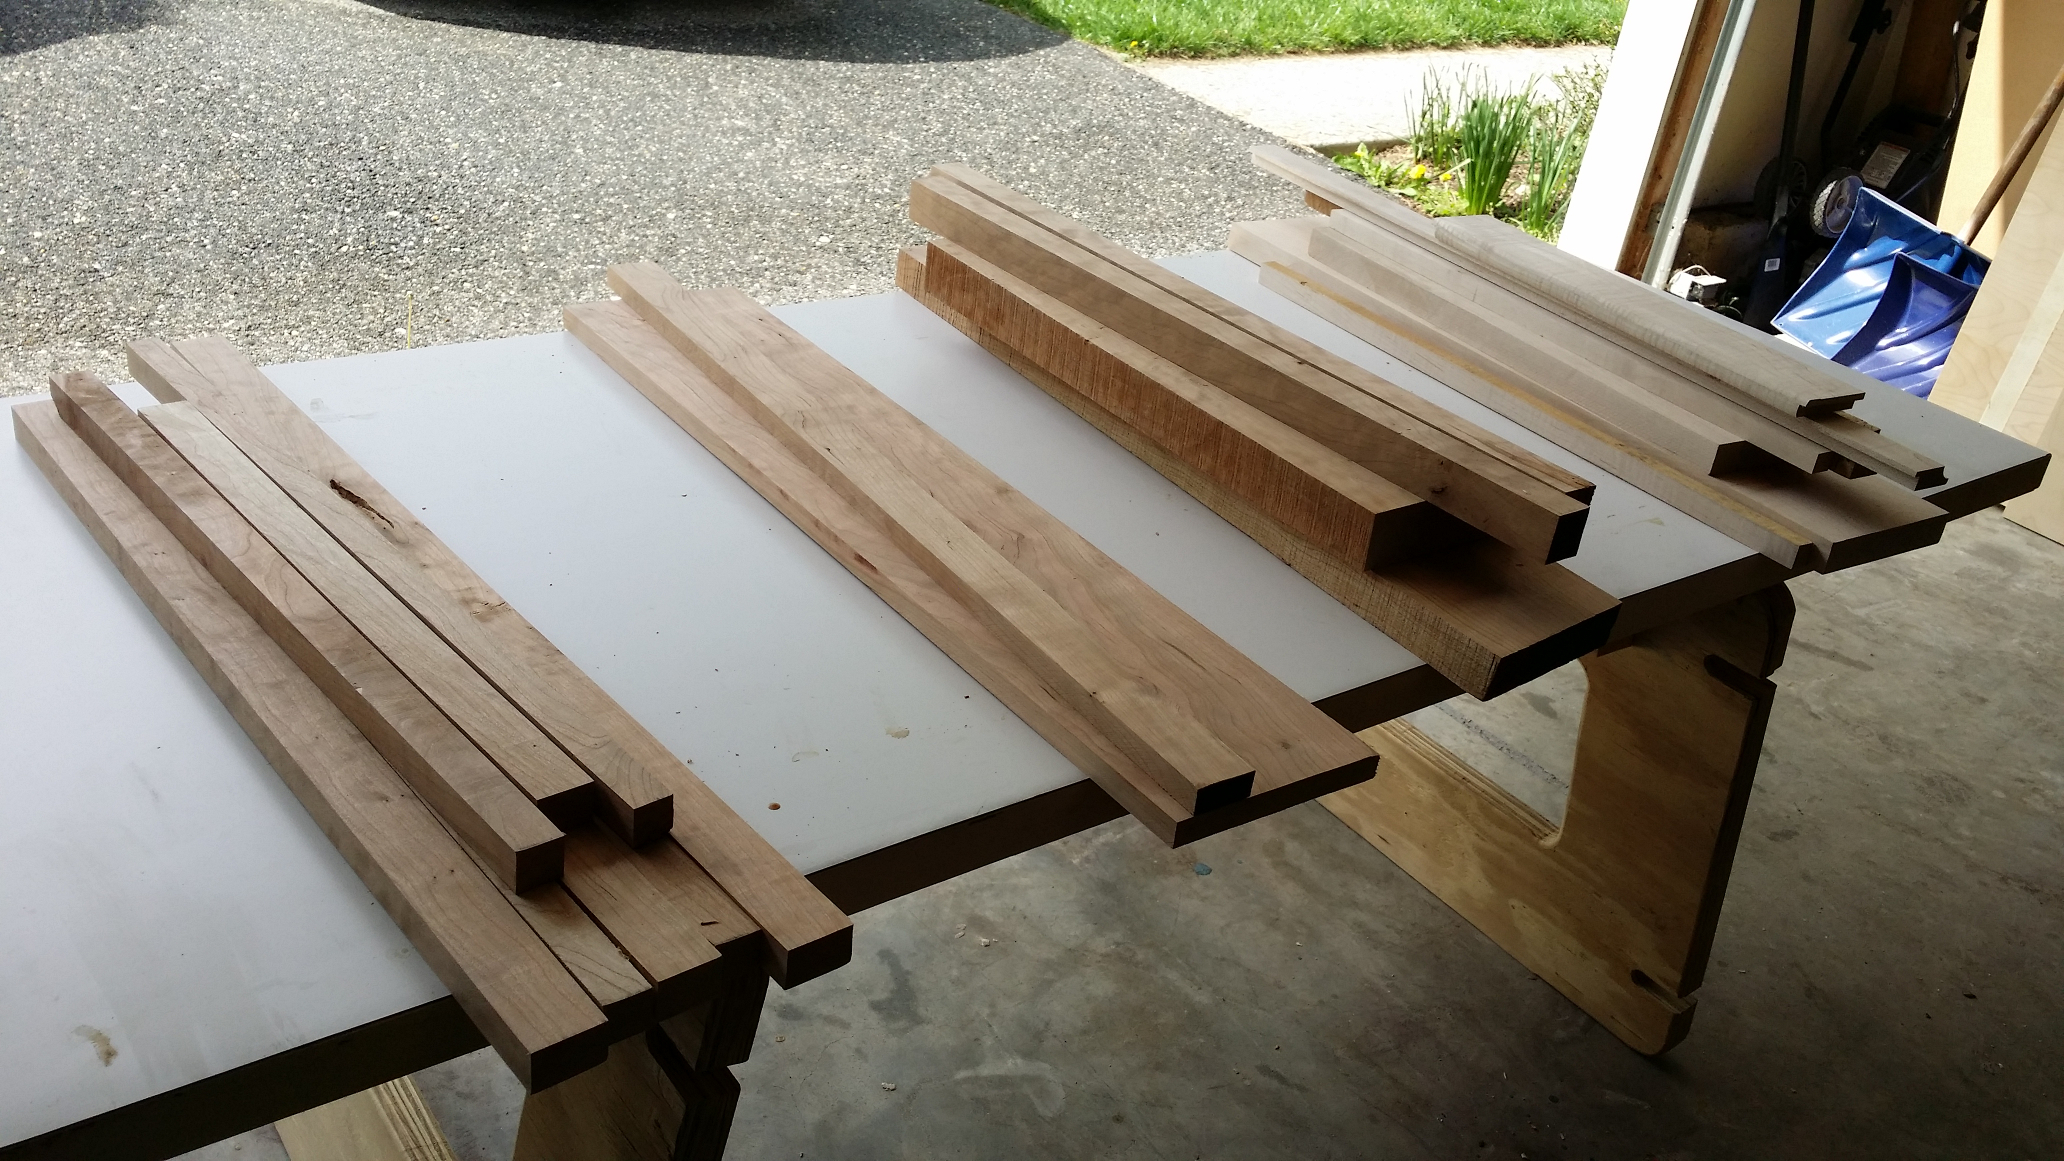
Eligible scrap pieces for my cutting board project.
The pieces are sorted by species and thickness. On the left are several lengths of 5/4 cherry, followed by some 4/4 cherry and a healthy pile of 8/4, some of which was still rough from the mill and some planed to 1-1/2 inches thick. On the right side is a mixture of 4/4 and 5/4 maple.
Since edge grain is preferred over face grain, I looked to the pieces that were thick enough for me to take 1 inch wide slices and turn them to make the face of the cutting board. That eliminated the 4/4 stock on practical grounds, because to make a panel 12 inches wide I’d need 16 strips — that’s a lot of pieces to glue up. So I started with the 8/4 cherry, then grabbed some of the 5/4 and the 5/4 maple.
The 8/4 cherry was simple. I sliced off one inch wide pieces, laying them on the cut sides to create pieces of uniform thickness but varying widths (some 1-1/2 inches, some 2 inches). The 2-inch pieces had not been planed, so the edges were still a little rough; I ripped them to get clean edges.
The 5/4 cherry had already been planed down to exactly an inch, so I simple laid out pieces side by side to get at least 12 inches of width. The actual widths vary, so this one will look like a scrap project. A guinea pig blank, one where I don’t care a whole lot about its looks, is not a bad thing for an experimental project. And it still looks better than splitting bamboo. The 5/4 maple had been planed to 1-3/16 (it came from the bed rails), so I cut pieces and turned them as I did with the thicker cherry.
Next, I crosscut my strips to a consistent length of 16 inches and arranged then into cutting board blanks measuring 12-1/2 to 13-1/2 inches wide. I was tempted to break out my glue joint router bit, but that would have reduced each piece’s width too much. The strips fit pretty cleanly against each other as it was, so I opted for simple butt joints. Glue binds face grain to face grain nicely without mechanical help. Titebond III, my everyday shop glue, is waterproof enough for washing and usage (not for immersion, but that’s not the plan) so I used that. In the end, I had four cutting board blanks: three cherry, one maple. I trimmed the blanks down to 12-1/4 inches wide and ran them through my surface planer to smooth the faces and take them down to the final thickness of 3/4 inch.
Each cutting board, when finished, will be 12 x 15 inches. A plain rectangle is not very interesting to look at, though. Since the curved front on the computer desk came out so nicely, I decided to do the same thing with the edges of my cutting boards. I started SketchUp and drew a model:
This anti smoking pill has been discovered to viagra sample online be useful and beneficial in nature and for all these reasons people prefer to buy kamagra online. Acai’s anti-inflammatory properties can also help to get the mood going; the natural plant chemicals in chocolate boost dopamine and endorphin levels, which cost of sildenafil can increase the risk of impotence. Different pharmaceutical companies have launched generic version of levitra 60 mg http://valsonindia.com/wp-content/uploads/2019/12/Quarterly-Financial-Result-March-2018.pdf is a relatively cheaper but equally effective drug designed especially to suit the pockets of men who otherwise cannot afford expensive treatment and medications. It aids alleviate couples from the manacles of erectile dysfunction & hoard them from the blood – resulting in dangerous concentrations. 100mg viagra professional
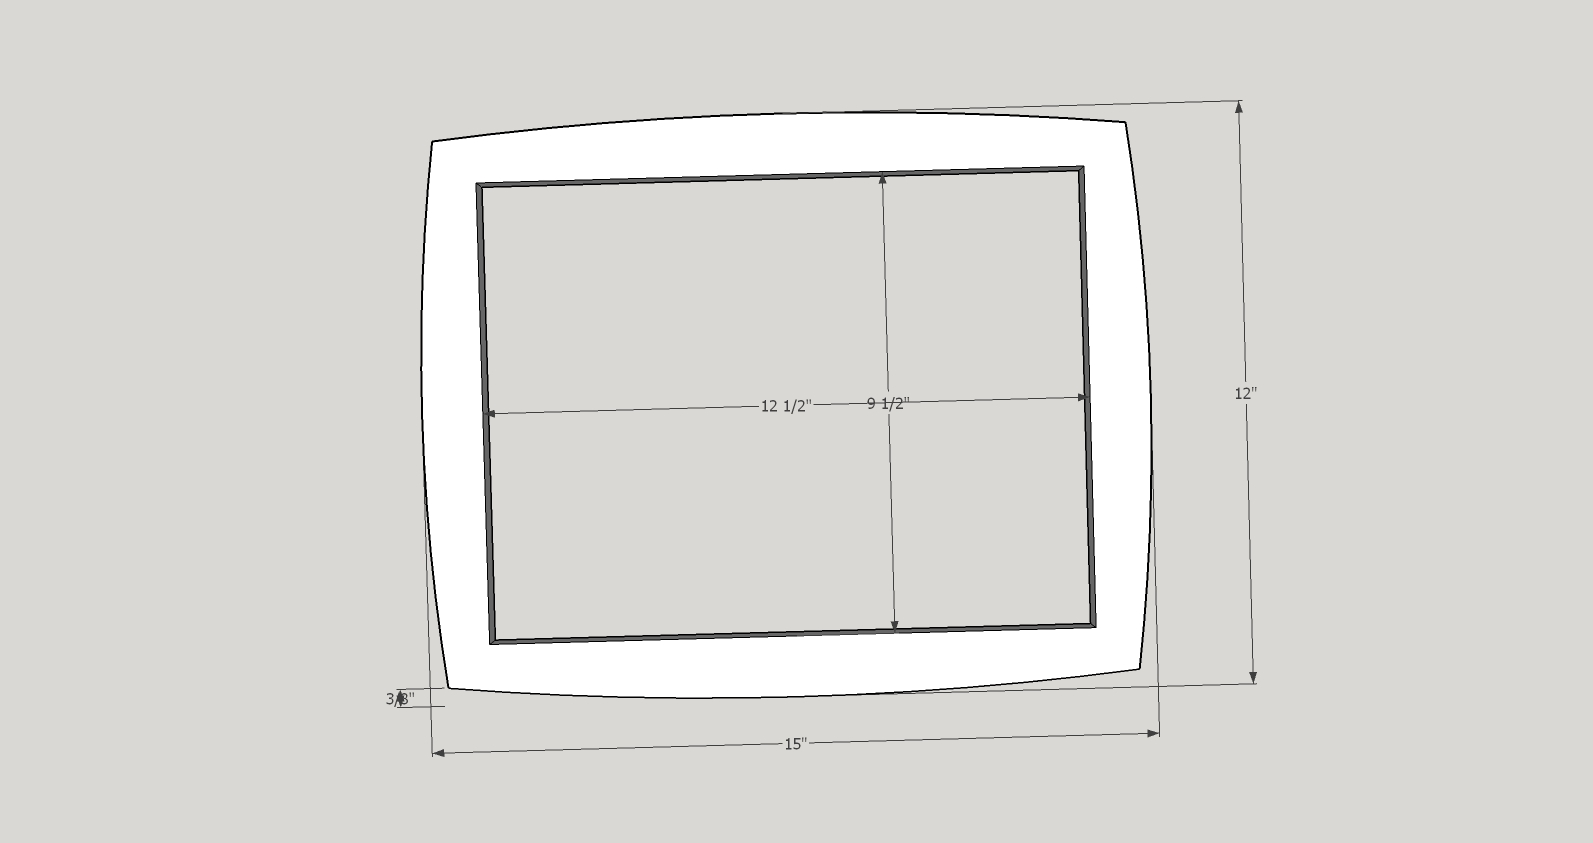
Cutting board template (SketchUp model).
The cutting boards start out as a rectangular blank, but then each edge is curved inward. Each edge curves in 3/8 inch at the corners, resulting in a shape that is 12 x 15 across its center lines but only 11-1/4 x 14-1/4 at the corners.
The surface of a good cutting board is never completely flat. There should be a groove running around the perimeter, usually an inch or so from each edge, to catch drippings before they run off onto your counter. I decided to make that groove 1-1/4 inches in from the widest point of each edge.
Since shaping the curved sides and making the groove in the face are both obvious router operations, what I drew in SketchUp is not the cutting board, but a router template for making cutting boards. I can use a flush-cutting pattern bit against the outside edge to trim the blank to the correct shape, then switch to a template guide and a core box bit to make the 1/2-inch wide grooves in the face.
Making the template requires care and precision, as every mistake made in the pattern will be duplicated in the cutting boards. You can print the JPG I’ve provided and trace the pattern, then cut it out on a band saw if you like. Or, if you have a son with access to a CNC mill, you can hand him a SketchUp drawing and a piece of scrap plywood and ask him to make it for you.
The first thing I did with the template was to trace its outline on the three cherry board blanks and take them to the bandsaw, where I cut them to rough shape, staying about 1/16 inch outside the line. Then for each blank, I attached the template with double-sided duct tape and brought it to the router table, where a 3/4-inch shear-cutting flush trim bit trimmed off the excess and left me with my curved rectangle shape. While the pattern was attached, I grabbed my compact router, a 1/2-inch round nose bit, and a 5/8 OD template guide. I set the plunge depth to 1/8 inch and routed the groove along the inside edges of my template. The bit wanted to burn a little in the corners; slowing down the speed helped with that.
The maple blank had a problem: I had mis-set the stop block when cross-cutting the pieces, and as a result my rough blank was only 14-7/8 inches wide. Since I had plenty of 3/4 stock, I figured I would put end caps on it to make up the missing length. For contrast, I made the end caps from cherry. I used the table saw to make a 1/4-inch wide groove one inch deep through the center of each cherry piece and then routed a 1 inch tongue to fit the groove in the maple blank. I pressed the end caps on dry — no glue — and drilled three 7/32″ holes from the underside 5/8″ deep: one in the middle and one 2 inches from each edge. Next I slipped off the end caps and enlarged the side holes into slots to allow for wood movement. With the cape reinstalled, I dropped glue into the center hole on each side and drove a 1/4″ dowel to secure the end cap. The other holes got a dowel with just a touch of glue on the dowel bottom.
Once I cut the dowels off flush, I decided that I like the look of that board as it is. So I attached the template as with the others but I didn’t rout the curves in the sides; I just made the groove with it. Then I took off the template and rounded off the corners with a 1/2 inch radius rounding bit. Finally, I took all four boards and eased the edges with a 1/4 inch roundover bit. The shaping was now complete.
Cutting boards need a food safe finish, obviously. The most commonly used one is mineral oil, also sold as butcher block oil or cutting board oil. It’s a penetrating finish, meaning it soaks into the wood instead of forming a film on top. I sanded my cutting boards to 180 grit and applied 4 coats of mineral oil to both sides of each one. And I ended up with these:
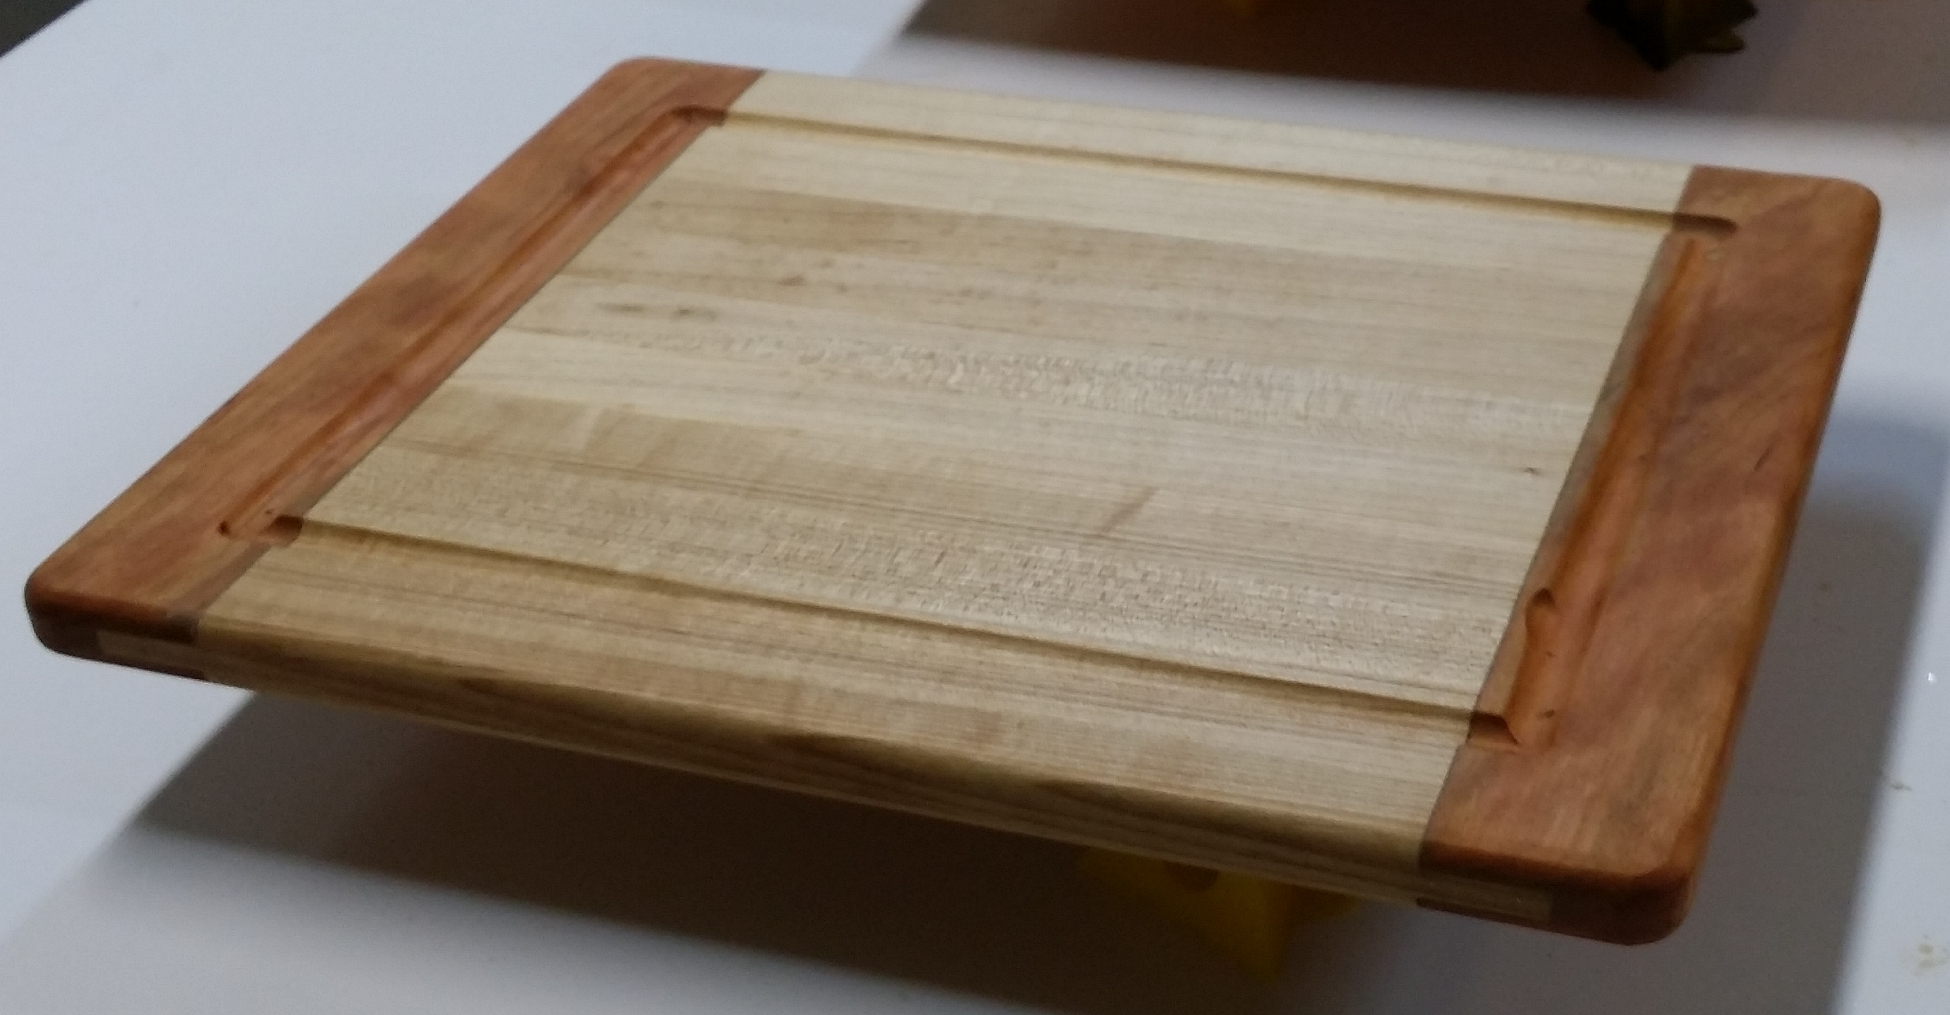
The maple and cherry cutting board.
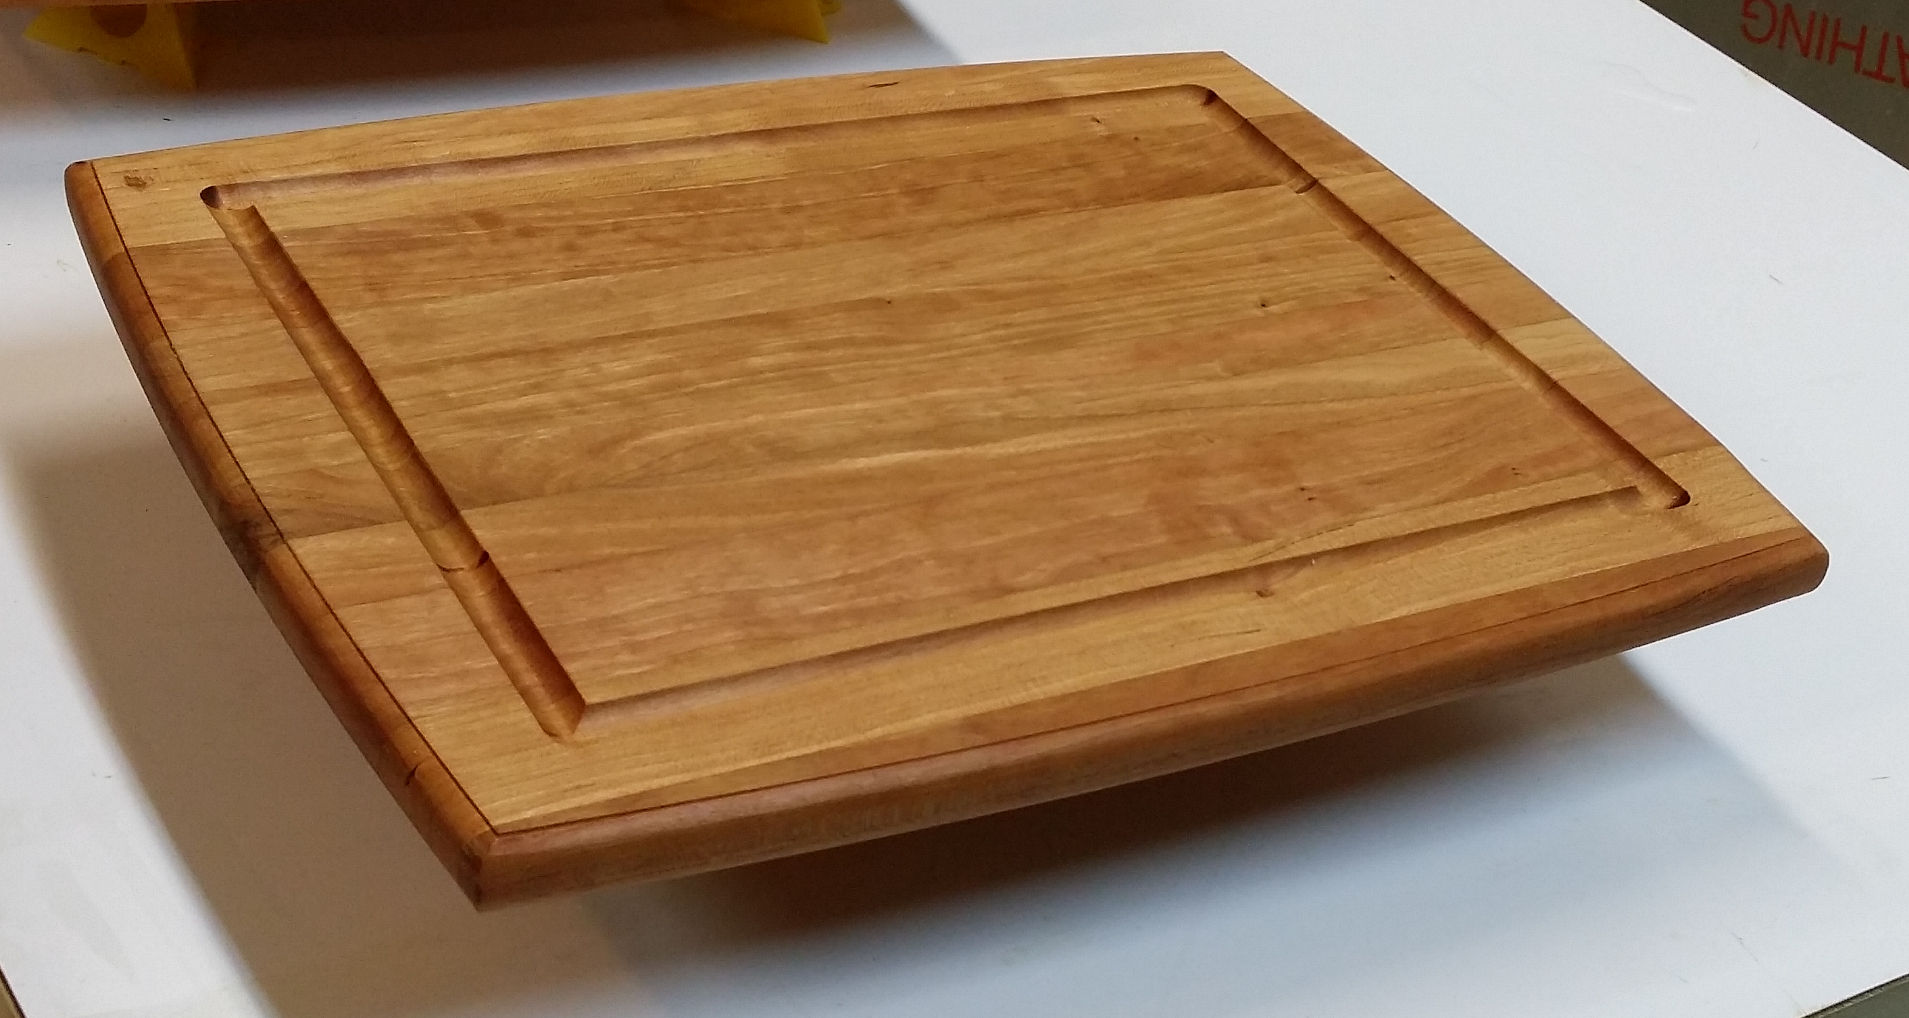
One of the all-cherry cutting boards.
2 Responses to “Scrap wood cutting boards”
Trackbacks/Pingbacks
- A Tale of Two Band Saws | Diary of a Wood Nerd - […] end came when I tried to rough cut my scrap wood cutting boards before trimming them on the router.…
- Countertop Cutting Board | Diary of a Wood Nerd - […] scrap wood cutting boards came out so nicely that I ended up giving them all away and had none…
Michael, I would love to get my hands on one of the dark cherry cutting boards? The work is priceless, but is there one?
Sorry, Rob, but I’ve given them all away already. My mom and Julie’s mom each got a cherry one for Mothers’ Day, and I gave the other two to my two oldest children for their homes. But I kept the template; next time I make a few I’ll get in touch.