


Tablesaw Accessory Storage
Another project I needed to get done quickly was some kind of storage for the table saw. I’d lost all the storage from the old cabinet, and while I had a hell of a lot of saw now my push sticks, tape measures, stop block, templates, blades, etc. were now taking up most of my back table, router table, and drill press. This was not going to be viable going forward.
One of the things I didn’t really expect about owning a Sawstop is that apparently half of Youtube also owns one, so a lot of things have been solved already in a dozen different ways. This was certainly one of them. And this looked like a great solution:
I actually bought the plans from Brad Rodriguez for this, but of course being me I couldn’t just build it exactly as he did. For one thing, his was sized to fit under a 36-inch table and I had a 52, so I wanted to at least make it wider. And Brad used pocket screws for everything; I don’t have a Kreg jig and I have zero interest in using pocket screws, so my cabinet is held together with dadoes and glue. And I made the bottom extra long so I could put a space behind it to store large jigs, like the crosscut sled I plan to finally make.
I started with 2 sheets of baltic birch plywood (18mm) and most of a sheet of 1/2″ home center plywood. Having to fit the baltic birch into my car meant getting it cut in half at Woodcraft, so I really had 4 pieces 30×60, which was actually easier to work with. Lickety-split I had a bottom panel 32×30, a top panel 32×23, two sides 24-1/2 x 23, and two inner panels 24-1/2 x 22-3/4.
It would have been a lot faster if I had just used pocket screws, but I didn’t need it to be done in a day. I routed stopped dadoes in the bottom panel, and matching through dadoes in the top. For the top, I used my new actual dado stack in the table saw — one of the benefits of upgrading, as my old Delta didn’t have enough arbor length for a dado stack. That was really, really nice.
I dry fitted it together but didn’t glue anything yet — I wanted to go ahead and sand the panels and mount the drawer hardware while it was all nice and convenient. After that I glued the beginnings of the carcase together.
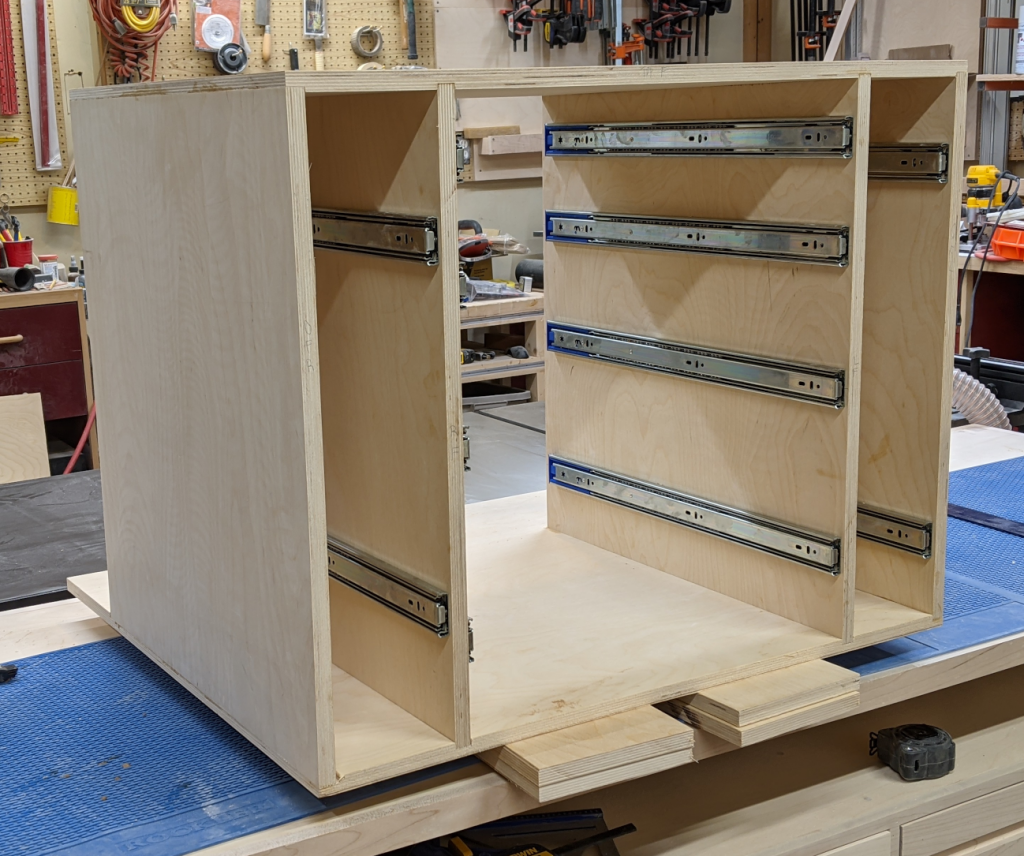
Next up, the drawers. I went with four in the middle and the two sliding panels. For one thing, I got a good deal on a six-pack of 22 inch soft-closing drawer slides; for another, I wanted the bottom one to have good capacity for oversized items, like the blade guards (I got two: the standard one and an upgraded dust-collecting one).
Drawers have been my nemesis lately. After all the fun remaking parts of the drawers in the table, I was extra careful on these and it payed off. I got four drawer boxes in graduating sizes made, glued together, and square in basically a day. I then proceeded to mount them on the drawer hardware, and was frankly surprised that it all went together so easily.
For the two sliding panels, I used 18mm baltic birch (cutoffs from making the dividers) with another short piece just butt-joined and screwed to form an L. Later I’ll mount the drawer front to that, and later still I’ll make pegs and holders for all the things I want to store on it.
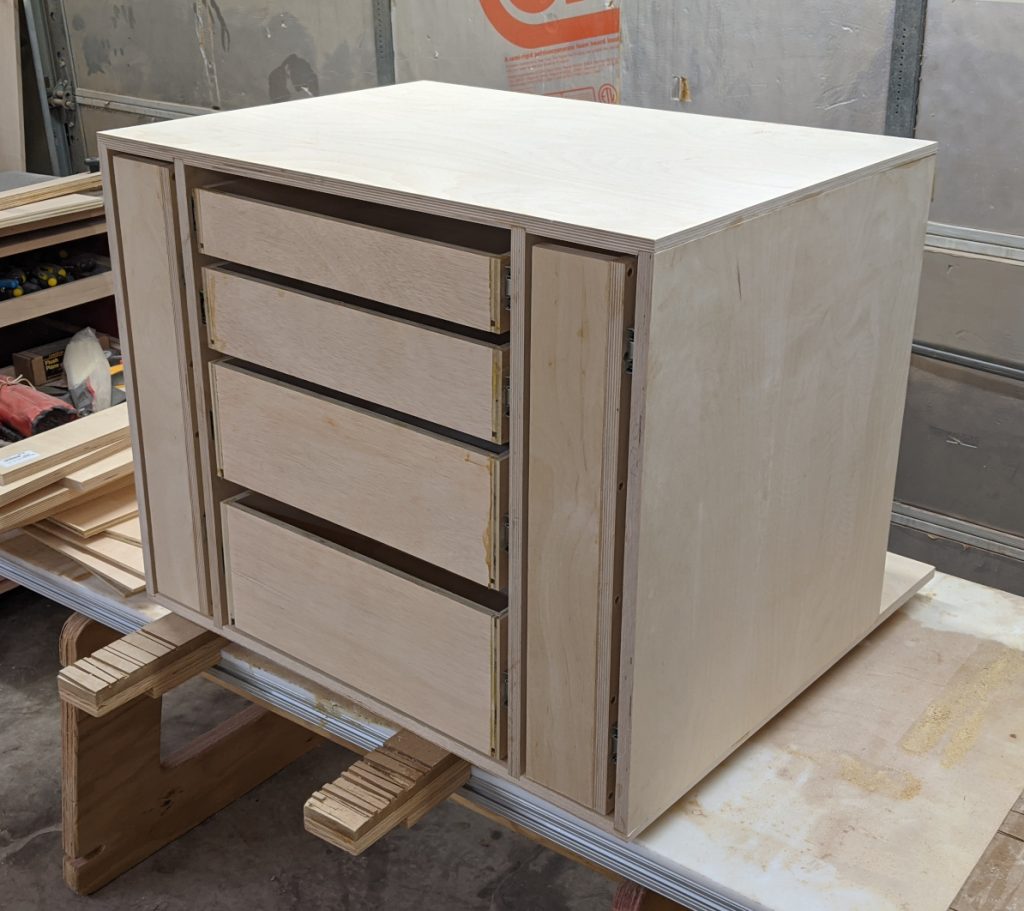
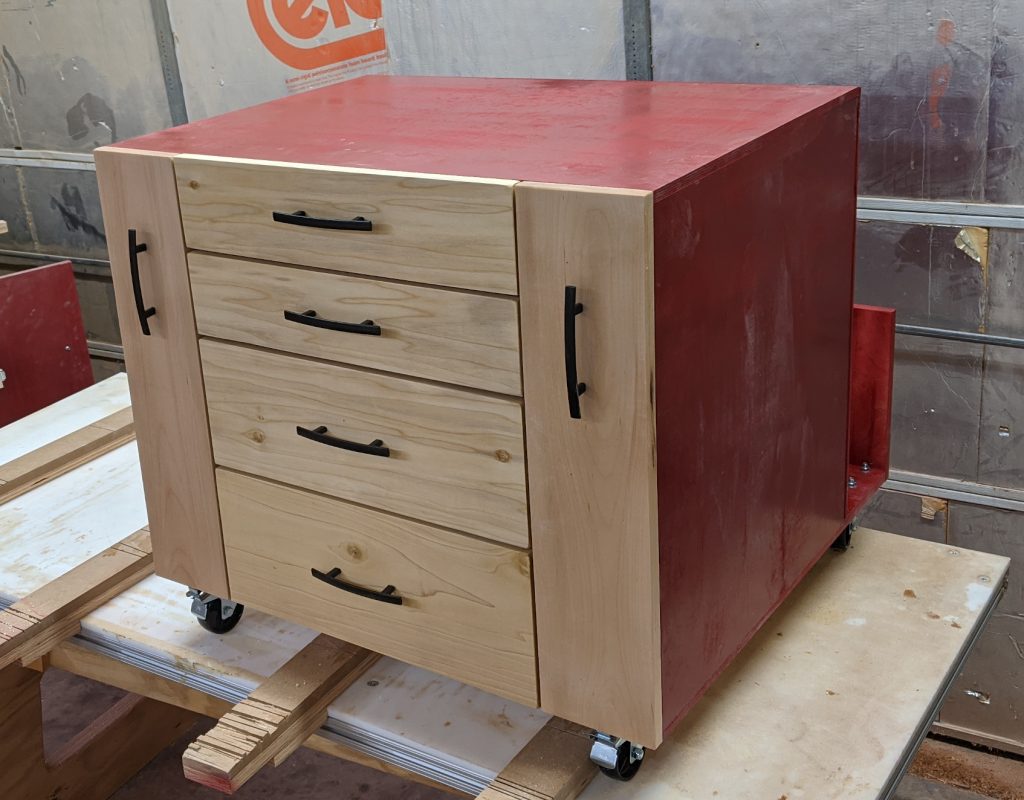
For drawer fronts, I wanted to do solid maple. I liked the look, plus I had a lot of drawer pulls already on hand that were oil-rubbed bronze, so light-colored drawer fronts would look better. But once again, that mistake I’d made with the drawer fronts on the table came back to bite me — because I’d had to recut those, I didn’t have enough maple to do all six drawers. After agonizing over it for a day I decided to use poplar, which I already had leftover from an old project, for the middle four and my last bit of maple for the two pull-out walls. I also decided not to glue the false fronts, so if it really bothered me I could change my mind later without too much problem.
I cut and fitted a cabinet back and a shorter piece to be the back of the open space in the back and fitted those in place. Then there was much sanding and preparation for the finish. For the main case, I figured I’d use the same Rustoleum Colonial Red that most of my other shop furniture is — I still had 4 cans of the stuff, might as well use it.
Learn from this, folks: aerosol paint doesn’t have the same shelf life as liquid paint. I got about one and a half panels done when the spray can stopped working. I could feel it wasn’t nearly empty, but there was no more propellant. Opening another can got me another panel, then died the same way. In the end I threw away the rest and went out to buy new cans — fortunately they still make that color. But yeesh, what a mess.
I put 4 coats of Arm-R-Seal on the drawer fronts. I also put locking swivel casters underneath it so I could move it around easily. It’s going to live pretty much permanently beneath the saw table, but I see myself rolling it out fairly often to get the the jigs I store in the back, so why not make it easy? Then I added the pulls and was home free.
Well, not really. There was one more very important test — would it fit under the saw table? I’d been pretty careful with the measurements, but the rest of the build had gone pretty smoothly so I was suddenly very nervous that I’d screwed up a basic dimension. There was only one way to find out.
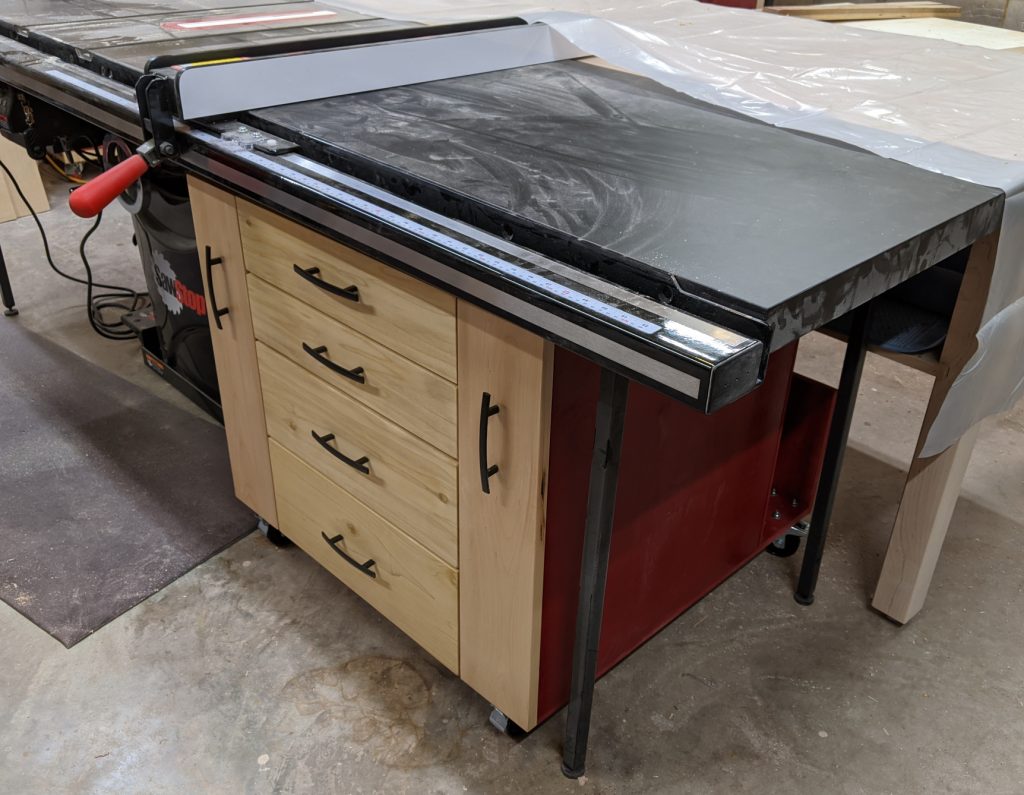
Whew! It fit perfectly, with about an inch all around to spare. Bullyah! Now that I have a place to store a lot of the stuff that’s been sitting on tabletops, I can get back to the outfeed table and finish that up.
Recent Comments