


A little something different
At the end of March I took another Goggleworks class. This one, taught by Denise Palko, was called Traditional Upholstery Techniques for Furniture Makers. After my recent experiences where I farmed out the upholstery work, I wanted to know more about how to do it so I can include that skill in future pieces. And Goggleworks, as I learned last September, is a great place to learn stuff.
The sample project was a simple footstool with cherry legs and poplar rails. This was provided by Denise, as we would be focusing on doing the upholstery for this class. And that was quite enough — I don’t think anybody was able to totally finish their stool in the two days we had. But we all got probably 90-95 percent of the way done and knew what to do to finish it, so I don’t feel cheated at all.
First, we got familiar with the various tools we would be using. I bought several of them on my own to have them, and it was nice that most were really not very expensive. A tack hammer ($9), a staple puller ($7), a long pick called a regulator ($13), a webbing stretcher ($25), and an electric stapler ($35) because my good stapler was pneumatic and I wasn’t sure how much air power would be in the shop. To this I added a pair of very good scissors, cloth measuring tape, and a few minor things I already had at home. And before lunch on Saturday we were already at work.
The stool was literally just 4 rails and 4 legs — no bracing, nothing in the middle (yet), as simple as could be. Which was fine, because we were focusing on the actual upholstery. This was a semi-traditional sprung seat, so the first job was to put webbing at the base of the stool, stretched very tightly and held with staples, and attach to that 4 springs that would provide a lot of the structure and height this seat would need.
The springs were then tied, to each other and to the seat frame, using what is called an 8-way tie (although it involves 10 strings). This was done with jute cord and some simple knots, but we used tension to shape the springs so the would form a rough dome.
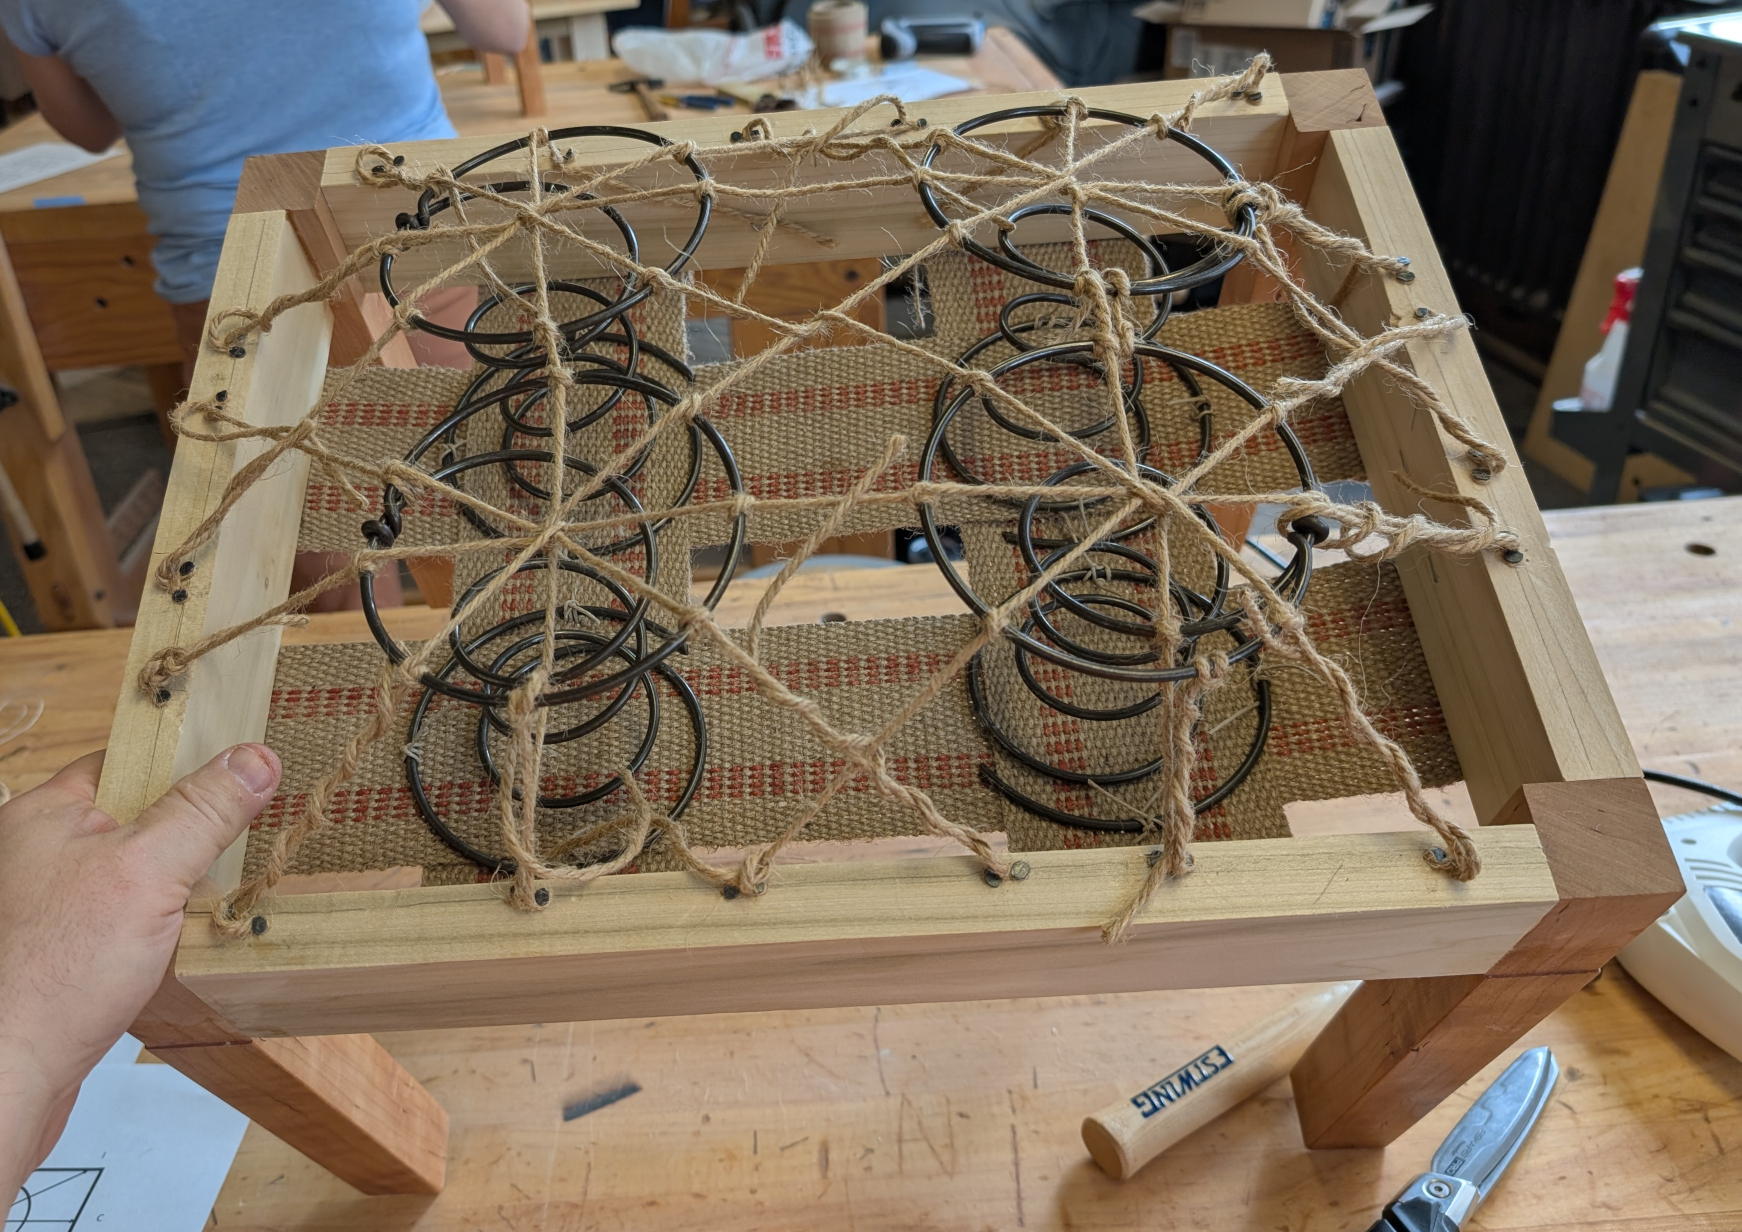
Those spring are sewed to the webbing and then tied at the top, but they’re not done yet. Next a later sheet of burlap goes over the springs and gets fastened down with staples, followed by a layer of dense poly foam and a layer of Dacron over that, which gives a more gradual form to the cushion.
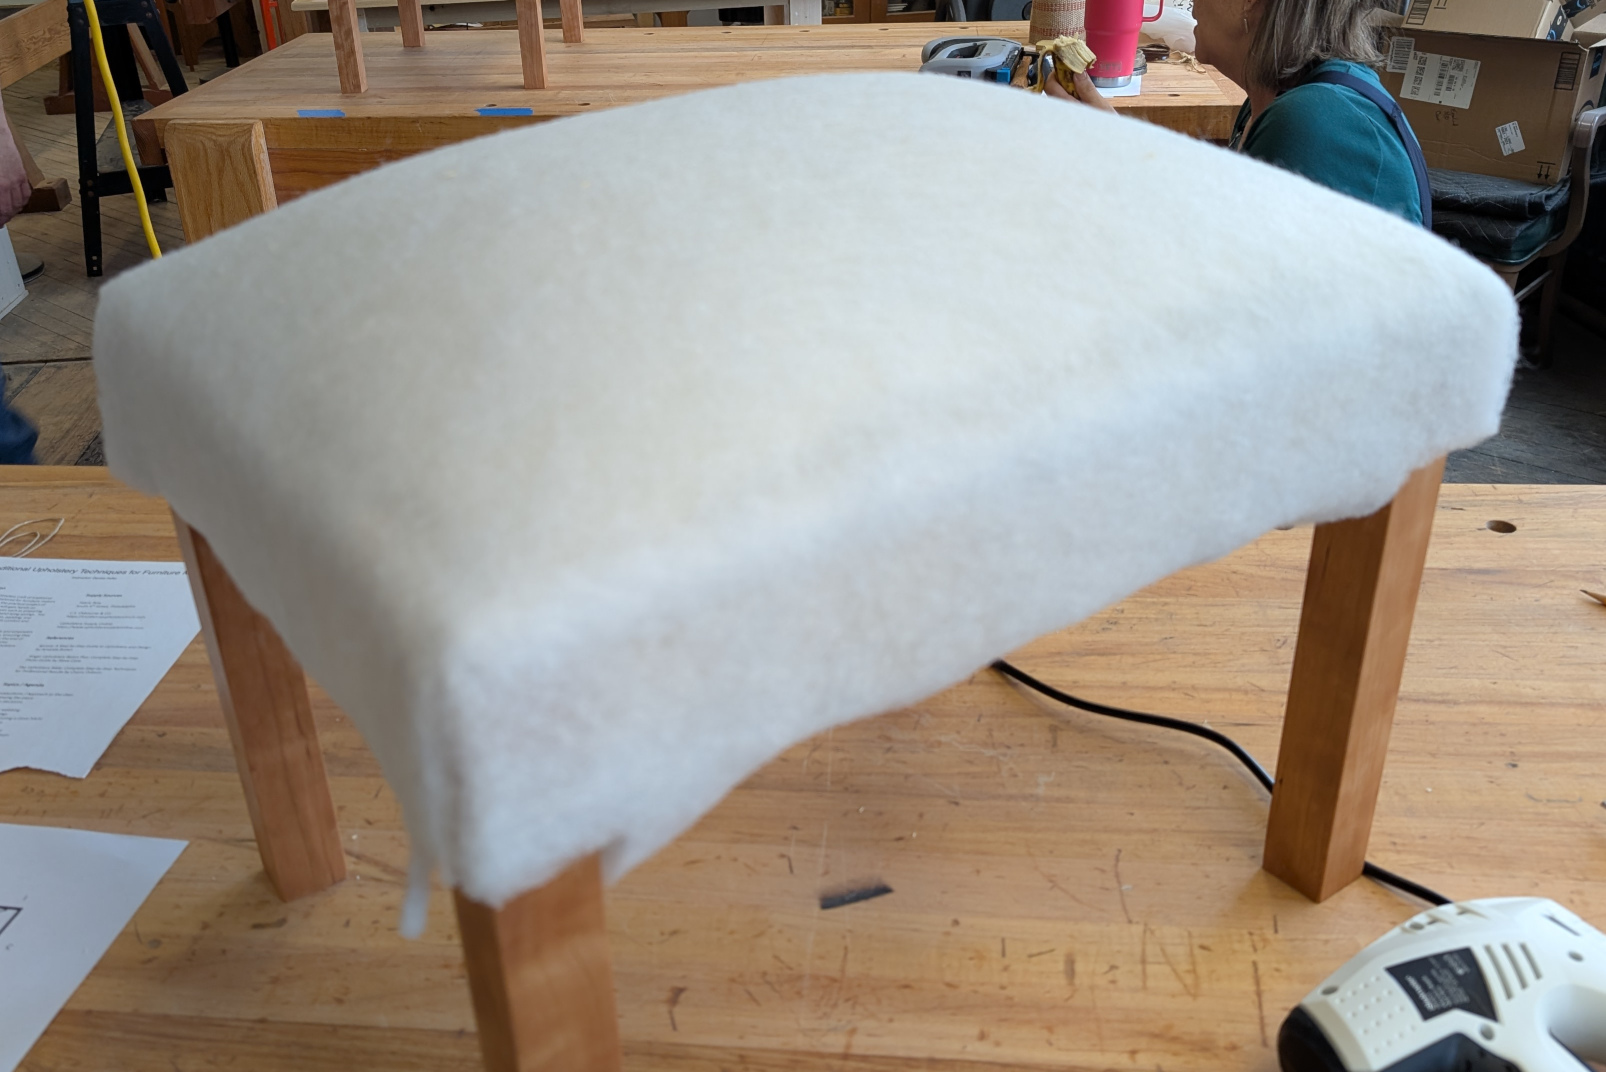
But there are still two more layers to add: a thin layer of muslin on top of the Dacron, which is kept as smooth as possible and, for this class, gave us a chance to practice making well-fitting corners. Then comes the show fabric, where everything counts because there’s nowhere left to hide.
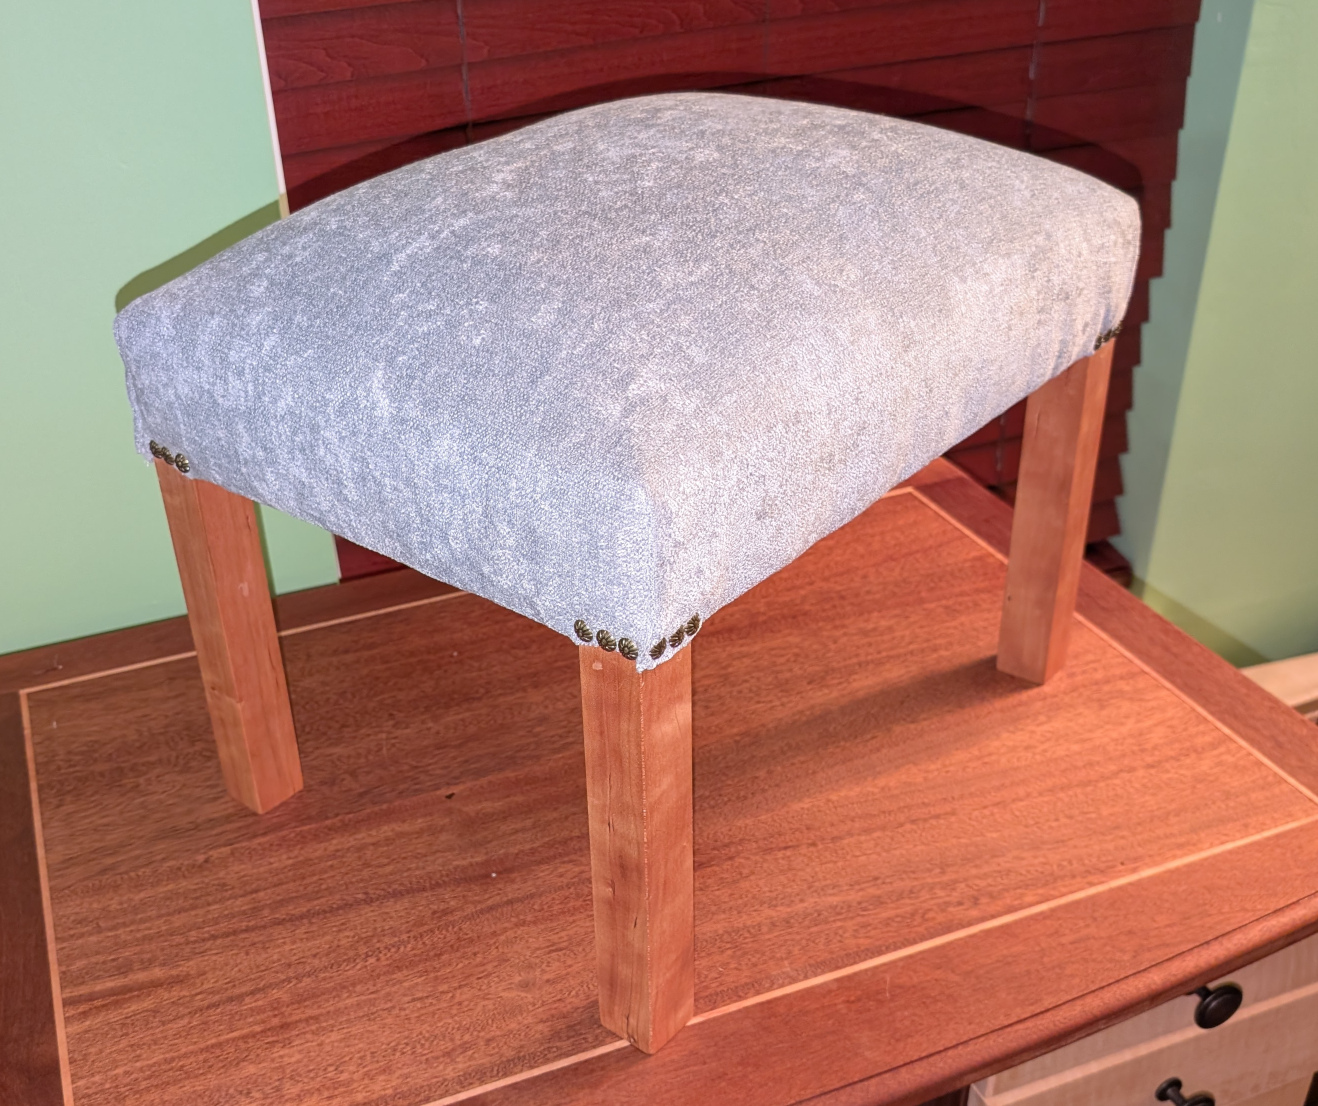
This show fabric was also decorated with large-head tacks, which turned out to be one of the more difficult parts. The tacks are very, very easy to bend and because they have rounded domes they are hard to hit straight on. But I eventually got them on, and the result was this:
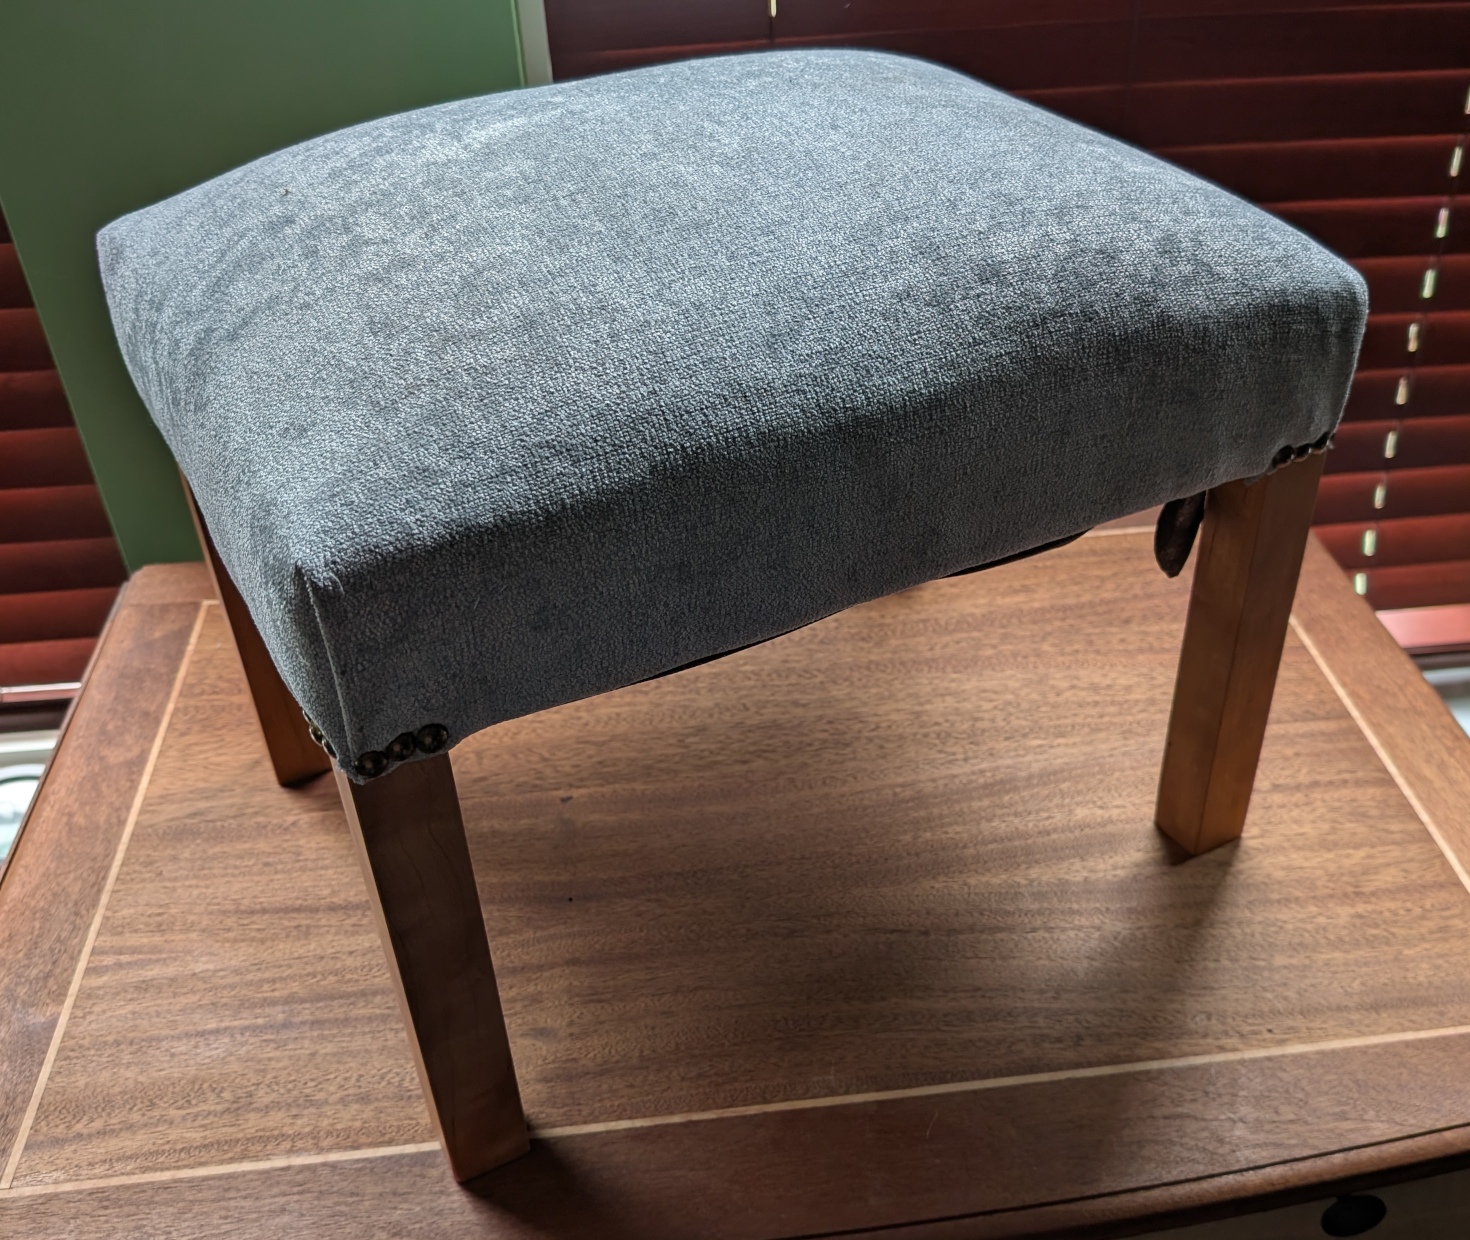
The next piece to do was the cambric underlayment, which just serves to hold things inside. I had to get a new piece of cambric for this, so it took a couple of days after I got the stool home, but it was simple to cut and install. The only tricky part was going around the legs.
Then for the final touch-up. I was very unhappy with the ornamental tacks on the bottom seam at each leg — they were very crooked and uneven. I carefully levered them all out and replaced them with slightly nicer, and much more evenly spaced and straight, tacks. Then I blind-stitched the corners together, and my stool was done.
This was purely an educational exercise — I really don’t anticipate making sprung upholstery for anything. But it was fun to do, and a lot of what I learned on this will come in handy for doing upholstered slip seats and possibly for more dungeon furniture, so it wasn’t just idle doing a thing to do a thing. And it is always fun to go to Goggleworks.
Leave a Reply